


Worm Composting – The Basics
What is vermicomposting? “Vermi-” means “relating to worms.” Therefore, vermicomposting means creating compost by using worms. It’s the art of feeding worms your food scraps. The worms turn your food waste into nutrient-rich organic fertilizer, also known as humus, worm castings, worm manure, or worm feces – perfect for gardens, lawns, and potted plants.
It may seem like a daunting task, but it’s actually quite simple. All you need are worm bins, some organic waste, bedding materials, worms, and the right attitude to take care of these little creatures.
This article addresses several basic materials you will need and where to get the worms, the pros and cons of vermicomposting as well as common mistakes beginners make and how to avoid them! Uncle Jim’s Worm Farm has all the knowledge you will need to succeed at vermicomposting.
Composting Bins
Your worms are going to need a place to call home that’s why the first thing you will need to start vermicomposting is a worm bin. Not all worm bins are created equal. Some materials, like plastic and wood, are better suited to house a worm population.
It’s important to note that they cannot have any antimicrobial properties; since bacteria and other beneficial microbes are needed for the composting process to happen. You can purchase commercial bins or build your own bin.
Whichever you decide to go for, these are the attributes a good worm bin should have:
- A lid to keep out the rain and discourage predators
- Drainage holes at the bottom
- Numerous holes on the sides
- Room to fit enough bedding so all the worms can move around
- Empty space above the bedding for air and let the bedding/fertilizer mix grow
Types of Bins
The Traditional One (Plastic Bins)
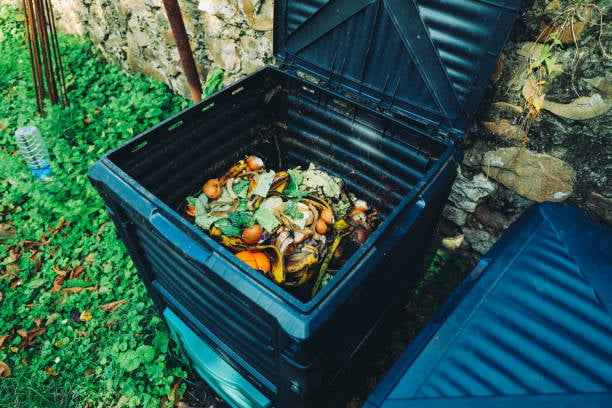
This type does not require a specific bin, but rather any plastic bin that can hold more than 3 gallons.
Buckets, tubs, trash cans, and other similar items are commonly used in households or by those who do not want to spend a lot of money when starting their vermicomposting journey. All you have to do is to poke holes through the plastic bins to aerate and allow the worms their oxygen.
Stacked Trays

One of the best options is trays, which are simple to maintain and harvest. They won’t get too heavy, so if they need to be moved, they’ll be simple to lift. If you want to have an indoor vermicomposting system, stacked bins are a popular choice. They were built to save space by literally stacking bins with holes in the bottoms to allow the worms to migrate up and leave castings and bedding behind, easier than traditional choices.
Moisture retention is excellent because the trays are nestled on top of one another and are sealed with a tight-fitting lid. The system’s base usually has a drain or spigot that allows for easy liquid drainage and collection of worm tea.
Check out Uncle Jim’s Worm Farm’s selections of tray-based composting bins. Each comes with instructions, and some include the worms.
Flow-Through Bin System
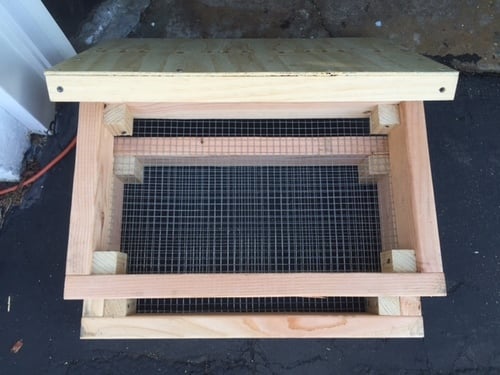
Because some worms prefer to live near the surface, the flow-through worm bin was developed to address some of the shortcomings and issues associated with traditional worm bins. This method adds organic materials and worms to the top of the bin while collecting worm casting (poop) from the bottom.
To keep everything from falling out, there are bars or wires in the middle. Because they are quite messy, flow-through bins are more commonly used for outdoor compost bins.
Bedding Materials
Worm bin bedding is what your worms live in. It must simulate the worms’ natural habitat so they can thrive. After setting up the worm bin, bedding is added before worms can be set free. You can use shredded brown cardboard, pure peat moss, or coconut coir; using just one type is fine, but worms prefer a variety of bedding types.
The key ingredients to good bedding are:
pH Neutrality
A properly maintained worm bin should have a pH of 6.0 to 7.0, which is ideal for many types of composting worms. A hydrometer, which can be purchased at any hardware store, can be used to measure the pH in your worm bin.
A poorly managed worm bin pH can be fatal to your worms. Minor pH issues can cause sour odors from your worm bin, similar to vinegar, and ruin any worm compost already made.
If you notice your worm population crawling up and out of your worm bin for no obvious reason, the conditions in your worm composting bin could be problematic.
Moisture Retention
Worm bedding needs to be moist enough to let the worms breathe. Dry bedding will only suffocate the worms and decrease their population.
Excess moisture can make the worm bin smell and have the consistency of mud. Ideally, the bedding should be 80% moist, wet enough to the touch; but when you squeeze it, no water should come out. We recommend looking for a consistency of a wrung out sponge!
Oxygen Aeration
Oxygen diffuses from the air through the skin. Worms do not have lungs. As long as they have access to enough air and moist skin, they will breathe easily.
When worms eat, they tunnel through organic materials and soil. These tunnels help create air holes which then lead to a healthier vermicompost bin.
Most Common Worm Bedding Materials
The key to keeping your worm bin healthy is to use a variety of bedding materials and add them to your worm bin on a regular basis. Vermicomposters should replenish their worm bins more frequently.
When the bedding is in good condition, the worms will thrive and production of valuable soil amendment will skyrocket. To achieve the best results, mix the following materials in your worm bins to achieve a good balance:
- Shredded brown corrugated cardboard
- Coconut coir

- Shredded paper (not bleached white office paper)
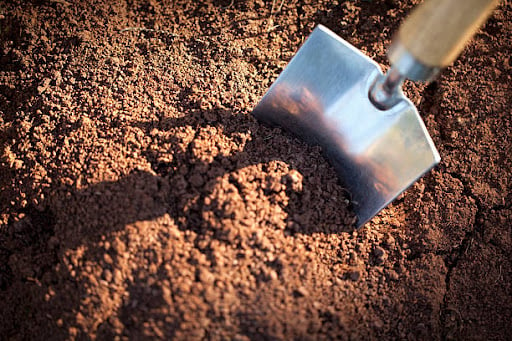
- Aged compost
- Peat moss

- Straw and hay
- Fall leaves and other yard waste
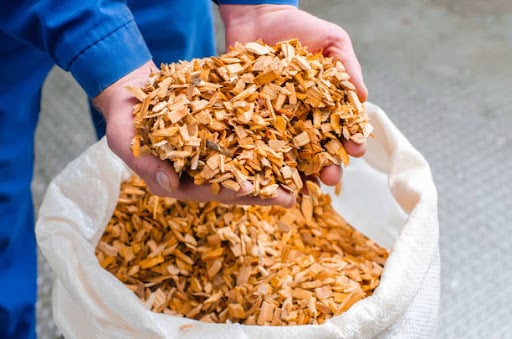
- Wood chips

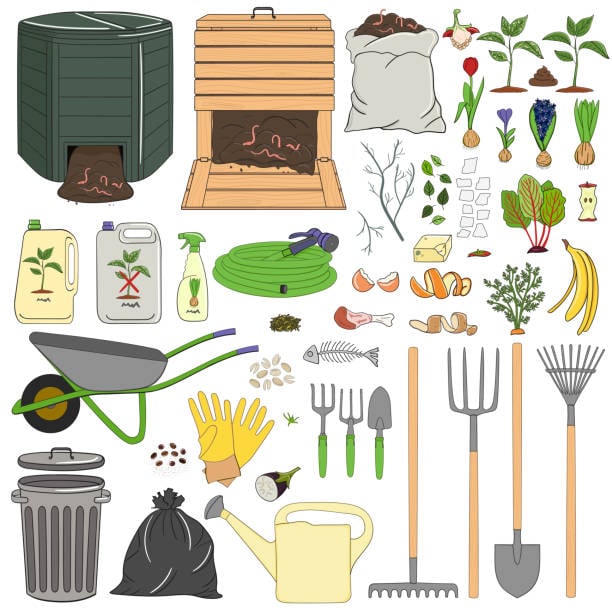
Worm Food – The Good and the Bad
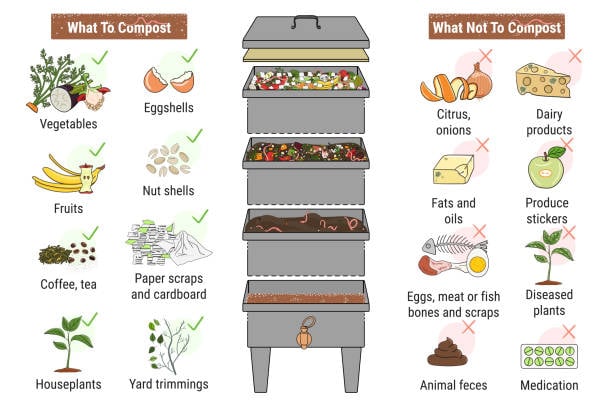
It’s a common misconception that you can throw all of your kitchen waste into the worm composting bin, but that’s not the case. Worms eat a specific diet in order to produce usable compost that aid in plant growth.
The first thing you need to understand as a beginner vermicomposter is that worms do not eat fruit and vegetable scraps in the same condition that you put them in. Instead, they wait for microbial communities to cover the food waste and then they dig in and eat away.
At Uncle Jim’s Worm Farm, feeding the worms is serious business and we only want the best for our beloved creatures. That’s why we have created the ultimate worm feeding guide. But if you don’t have time to read that, here’s a quick but informative summary:
The best food for worms comes from plants. This includes grains, fruits, vegetables, and beans. Plant matter is filled with nutrients and vitamins that worms need to produce the much-coveted worm castings.
Worms do not have teeth. Their little mouths take in the food. Therefore, they can digest food faster if it is:
- Soft
- Cut into small pieces, with a knife or food processor
- Somewhat moist
- Buried in the bin – just below the surface for red composting worms
The team at Uncle Jim’s recommends the following food for worms:
- Fruit scraps
- Fruit peels
- Vegetable waste
- Coffee grounds
- Tea bags
- Non-colored and shredded paper
- Small chunks of bread and grains
There is also food that contains harmful chemicals that are toxic to our beloved worms. Acidic foods destabilize the pH of the bin, and worm bins require a neutral pH to thrive. If the bin becomes too acidic, it will emit a rotten smell and attract pests like fruit flies, jeopardizing the worms inside the bin.
The following are food waste that should NOT be put in a worm composting bin:
- Meat
- Dairy
- Citrus fruits
- Spicy food
- Salty food products
- Sawdust
- Carbon and/or bleached paper
- Grass clippings from treated lawns
Lastly, The Worms!
Uncle Jim’s wouldn’t exist without these wonderful wrigglers. Usually thought of as disgusting animals by some, worms provide agriculturists with the necessary soil structure for plant growth. Not all types of worms are suited for the job though.
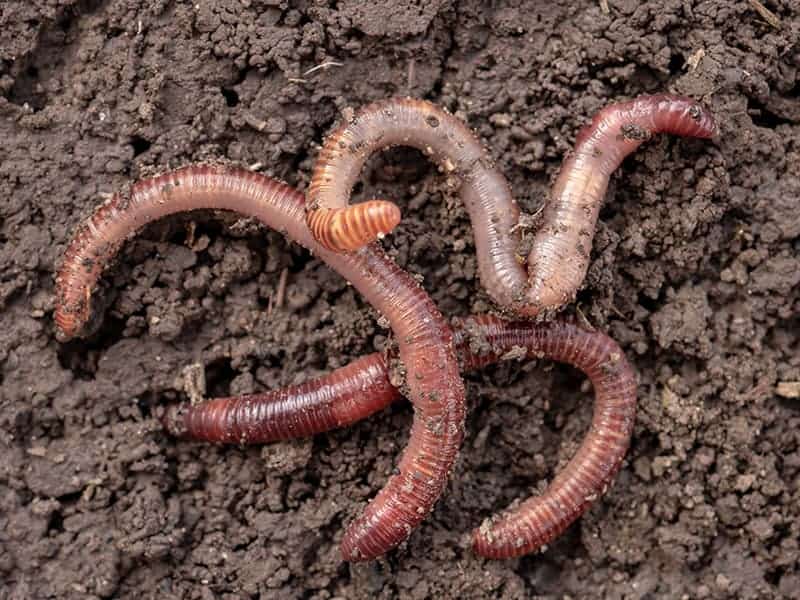
The King of Composting is the Red Wiggler (Eisenia fetida). They are known for their excellent composting skills and the ability to double their population in three months. Other compost worms work well in the composting scenario besides these earth miracle workers.
Worms Used for Vermicomposting
Let’s dig a little deeper into different types of worms and how they’re best suited for vermicomposting so you can choose which to use. Uncle Jim’s Worm Farm ships worms throughout the continental United States all year.
Epigeic Worms
Vermicomposting is commonly done with epigeic worms. They prefer top soil because it requires less burrowing and allows them to feed more easily on organic scraps. They also thrive when placed in a worm composting bin or worm bed.
The Blue Worm
Blue worms, also known as the traveling worm or the India blue worm, is a native specie of Asia. They can grow up to 2 ¾ inches in length and prefer temperatures between 70 to 80 degrees Fahrenheit. These worms also reach adulthood relatively fast, only taking them 3 to 5 weeks.
The African Nightcrawler
The African Nightcrawler, Eudrilus Eugeniae, is a tropical worm. It can withstand colder environments if given enough moisture, but these worms have a temperature limit of only 45 degrees Fahrenheit before they begin to struggle or die out. They, on the other hand, perform exceptionally well in more humid and warmer environments.
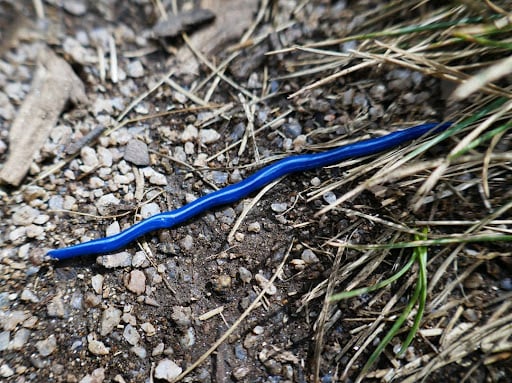
The Alabama or Georgia Jumper
The Alabama/Georgia Jumper (Amynthas Gracilis) are well suited to tropical and subtropical areas, especially in Asia. They can grow up to 6 inches long and can withstand temperatures ranging from 45 to 90 degrees Fahrenheit but the sweet spot for this specie is between 70 to 80 degrees Fahrenheit. * This worm is considered invasive and not recommend for use with vermicomposting*
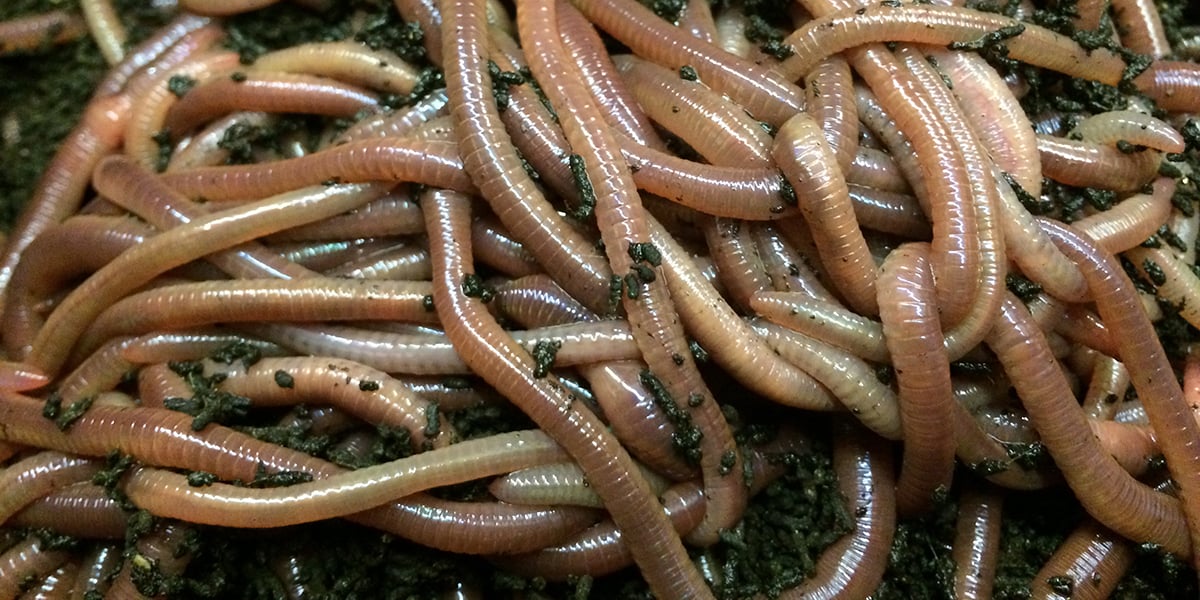
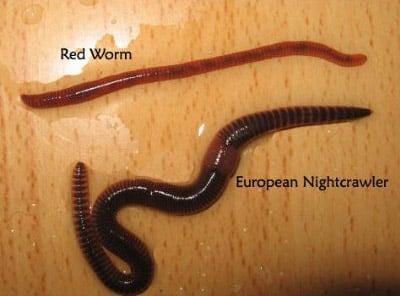
The European Nightcrawler
Best known as Super Reds, European Night Crawlers fall into the larger category in this list of worms ideal for vermicomposting. They are also used as bait when fishing and can aerate lawns and gardens. They are able to withstand a wider range of both temperatures and environmental conditions. Raising Super Reds is a relatively easy job since they are low maintenance and reproduce quickly, making them ideal for beginners.
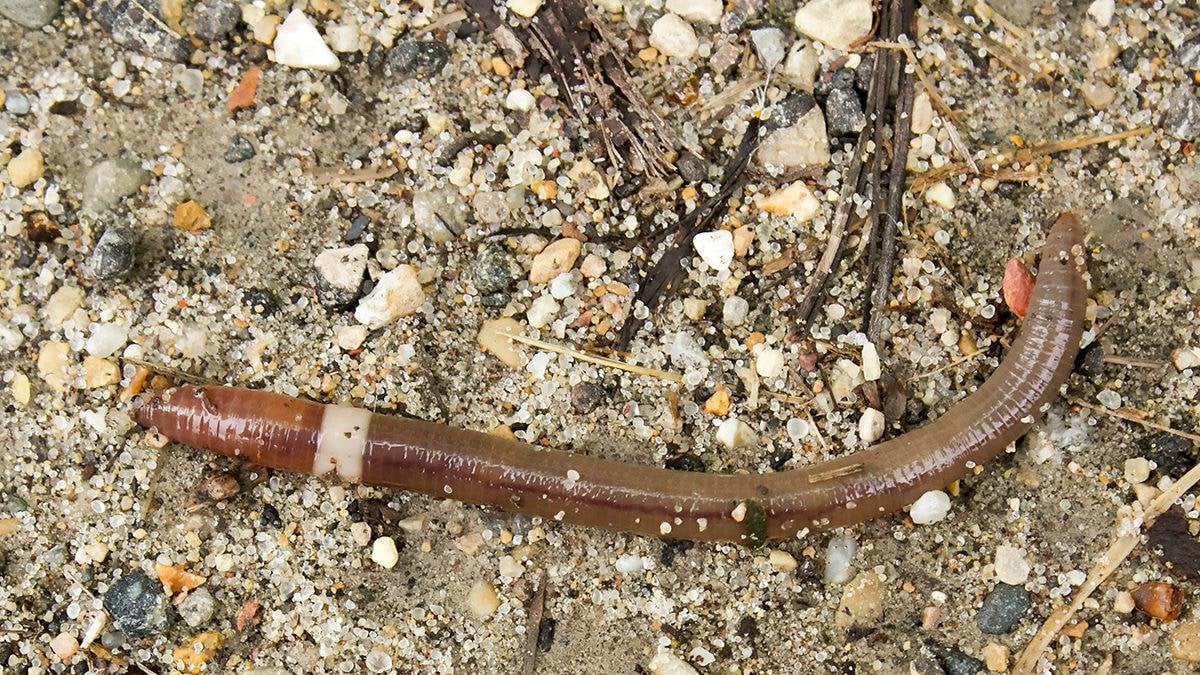
The Red Wiggler Worm
Arguably the best and most commonly used type of worm in vermicomposting, the Red Wriggler can eat half their body weight in a day. Not only are they are known to produce high-quality worm castings, but they also reproduce at a rapid rate. These worms love to mate during more humid and warm conditions and can grow to be 5 inches long and not quite the girth of a number 2 pencil.
Common Mistakes and How to Correct Them
Now that we have covered all the basics, you may have started the process and found yourself in an undesirable situation. Your worms might be dying or trying to flee, foul odors could be emerging, or you might have trouble harvesting worm castings. Uncle Jim wants to tell you about the most common mistakes a new vermicomposter can make and how to solve them!
Temperature Control
Composting worms, like humans, have a preferred temperature range. If they don’t, they will escape the bin for either higher or lower temperatures. The worm bin and bedding aid in temperature regulation. Extreme cold or heat will only cause suffering for your worms.
Worms slow down when the air temperature falls below 40 degrees Fahrenheit. They can die if the temperature falls below freezing. The worms can be cooked if the temperature rises above 84 degrees. Some of the temperature hazards can be mitigated by using ice, bin blankets, insulation, relocation, and moisture regulation.
Moisture Control
Another common concern is the amount of water in your worm composter. Some worm bin owners overdo it by pouring gallons of water on their worms. Others are careless and allow the bin to dry out. If the bin becomes too wet, it will stink and the worms will drown. When the environment is too dry, the worms become dehydrated, and are unable to breathe and tunnel effectively.
Picking up a handful of bedding is the simplest way to check the moisture levels in a worm bin. Upon squeezing the the handful of bedding, you should see a drop or two of water come out. If no water drips out, your bin is too dry. If more than a few drops of water drips out, your bin may be too wet. The consistency you are looking for in your worm bedding is similar to a wrung-out sponge.
Under and Overfeeding
When you first start out, you may be tempted to throw away all of your vegetable and fruit peels, but this can be harmful to your worms. Some may choose to be conservative and not put in enough effort. Worms thrive only when they are fed the appropriate amount of food.
Worms can theoretically consume their body weight in scraps per day. However, depending on the air temperature and other factors, that figure could be lower. Feeding them every 2 to 3 days is a foolproof method.
Frequently Asked Questions
Is worm composting better than traditional composting?
Vermicomposting and traditional (microbial) composting both use natural processes to keep organic material stable. Oxygen is needed for both of these processes to work.
Traditional composting relies on microorganisms to do most of the work, which takes more time to do. In vermicomposting, the worms do most of the work for you. They also turn the compost pile, which saves you time.
Can I start worm composting in any season?
Technically, you can start vermicomposting at any time of the year as long as you can control the temperature and moisture inside the bin. Uncle Jim can give you tips on keeping your bins cool during the hot months of summer and how to prepare for winter outdoor worm composting.
How many worms are needed to start vermicomposting?
The answer is that you must consider how much space you have available before deciding on the type and size of worm composting bin to use. We recommend starting with a worm stocking density of between 1/2 and 1 1/2 pounds per square foot.
To get the square footage of a square or rectangular bin, multiply the width by the length and divide by 144. As long as you have the space and ability to maintain the bins, you can use as many worms as you want.
How do you create and maintain an indoor worm bin?
Indoor worm bins are usually preferred by people who do not have enough space in the backyard or for those who simply don’t have a lot of waste. Indoor bins, like outdoor options, require bedding and food. But the main difference is that temperature and moisture control are easier to achieve in a controlled environment.
We recommend burying the food in the bedding to make it easier for the worms to eat and to prevent odors and fruit flies. It is preferable if the bin is near the kitchen; also consider placing it in a closet or under the sink. If you have more questions, read Uncle Jim’s guide on indoor worm composting for the full guide!
What are the benefits of vermicomposting to plants?
Plant benefits, plant growth, and a higher yield are some of the most well-documented effects of vermicompost. Worm castings on plants have been shown to have the following effects, to varying degrees:
- Seeds germinate more quickly
- The increased growth rate in the seedling stage and beyond
- Fruiting earlier and with a larger size
- Pathogen eradication
- Pest eradication
- Increased pollination efficiency
Interested in becoming a vermicomposter?
Let Uncle Jim help! We have dozens of blog posts that cover anything and everything about the world of worm composting. Send us a message and we’ll get back to you ASAP!


35 thoughts on “Vermicomposting for Beginners”
Various strategies that incorporate wet waste composting through the utilization of earthworms have conjointly been undertaken. The worms eat away the wet waste and turn out usable compost.
suitable atmosphere is provided for vermicomposting to require place.However such composting processes take large quantity of land and time consumption still.
Vermicompost is incredibly smart methodology to try to to compost, wet waste composting through the utilization of earthworms have conjointly been undertaken. The worms eat away the wet waste and turn out usable compost. AN appropriate atmosphere is provided for vermicomposting to require place. but such composting processes take large quantity of land and time consumption still however it results higher quality output ever. because of process you have got to require care of warms as per atmosphere
for more details about composting you can visit guidebest(.in)
I don’t understand how you get the worm castings from a bin that has no screen for them to fall through. My bin has scraps that have been accumulating for a year or so, clearly there are onions and citrus peels, too. Should I just start over?
Hello Andrea;
The castings do not usually fall out the bottom, they need to be harvesed in most cases. Here is a helpful video that you can watch. Please note, you can simply pick out the worms and do not need a sifting screen, but they are very helpful.
https://video.search.yahoo.com/search/video?fr=mcafee&ei=UTF-8&p=how+to+harvest+stackable+worm+bin+trays+video&type=E211US0G0#id=8&vid=5335859cf0a05fe151c6753dfe1635b1&action=view
Uncle Jim’s Worm Farm
The Alabama or Georgia Jumper you have pictured is becoming a problem for natural habitats in North America and is considered invasive to many. I would recommend not suggesting this species for vermicomposting. They go through topsoil so quickly they expose the roots of plants.
Thank you for all the information on vermicomposting.
Hello Sara;
Thank you for your comment. We do not have Alabama or Georgia Jumpers in any of our beds at the farm. Nor do we have photos of them on our site. We could not raise and sell them as they are invasive, correct, and would destroy our beds. Thank you for your concern though. Please let us know if you have any other concerns or questions.
Uncle Jim’s Worm Farm
You have a picture of them on this very page…
I noticed the same thing Gwen. It is reasonable to me that they would have a picture given their line of work, but a caption that properly contextualizes would be most helpful.
I was blown away that they did not seem to read the page they are commenting on.
“Uncle Jim,” please refer to your “The Jumping Worm” image on this page (Vermicomposing for Beginners)
https://unclejimswormfarm.com/wp-content/uploads/2019/06/The-jumping-worm-768×432.jpeg
The image is indeed still a jumping worm, a stock photo used numerous times online. While it does not appear that you currently sell this worm, your inclusion of it here without noting its invasive nature is a bit misleading. Please consider adding a warning to note it is an invasive species. For those interested, please review this “jumping worm” fact sheet issued by the WI DNR:
https://pddc.webhosting.cals.wisc.edu/wp-content/uploads/sites/39/2014/06/Crazy-worms-fact-sheet.pdf
/public service announcement
Hello Ms. Jenna;
Thank you for your comment. We do have quite a bit of information on the Jumping Worm on our website/blog. Here is that link below. We do appreciate your genuine concern for our ecosystem. Please refer to our blog at:
https://unclejimswormfarm.com/japanese-jumping-worms-friends-or-foes-of-your-garden/
Uncle Jim’s Worm Farm
UNCLE JIM’S: Please be VERY CLEAR whether or not the worms you are selling contain ANY SPECIES of Amyntha. Call them what you will – Alabama jumpers, Japanese jumpers – it seems the species overall is a huge problem. Your site’s information is extremely confusing as there is never any clear statement about where your company stands on including or excluding this species from your composting mixes. PLEASE DO NOT ENDANGER people’s gardens, homes, forests, ecosystems by having us unwittingly buy Amynthas – aka jumping worms – from you and introducing them into our systems. There is significant commentary being passed around the internet by seasoned vermiculturists regarding UJ’s, and there is discouragement from purchasing from UJ. For myself I only realized this too late, but… live and learn. I have a suspicion that Amynthas may be in your mixes; certainly there were in my bag of “500 Red Wigglers” a majority of Perionyx (Blues), which is a poor choice for my circumstances. I was counting on Eisenia Fetida (true “Red Wigglers”) for their temperament and hardiness, but now I’m stuck with a bin of primarily jittery, too-hungry blues and concerned there may be jumpers as well. I will not be putting any of UJ worms outdoors at this point, and hope I am not overrun by explosive and potentially migrating populations of blues in my indoor system.
PLEASE BE CLEAR AND HONEST ABOUT PRECISELY WHAT YOU ARE SELLING.
Hi there! Thank you for this cautionary message. Please know that we do not allow absolutely ANY Asian jumping worms here at our farm. We do not raise them and we are extremely careful in watching for any sign of them showing up here at our farm. Thankfully we have never found any here on our farm, which we are grateful for since they are extremely dangerous for a worm farm that raises red worms in bulk. We would never allow them here since 1. they prey on other worms and will wipe out an entire population of red wigglers/nightcrawlers and 2. they are quite literally not what we sell and we are very careful about what we send to our customers.
There certainly is a photo of Alabama or Georgia Jumpers in this article. They are pictured after African Nightcrawlers and before European Nightcrawlers.
How long after starting my worm bin should i expect to be able to harvest worm castings? I started a bin in May and another in June. Also, when will i know to split worms into an additional bin?
What is the problem with sawdust in the bin, if wood chips are good for worm bedding?
Hello Jack;
I do not believe that there is a problem with saw dust in a worm bin. Wood products, however, take a long time to decompose and the worms cannot process them until they are breaking down. Adding too many wood products will result in a thick and hard clump that the worms have a hard time penetrating. It is best to add that kind of compost in moderation. Also, some wood is acidic and can cause harm and/or irritation to the worms. Like Oak and Pine. When in doubt, leave it out.
Uncle Jim’s Worm Farm
I have pine shavings for my chicken coop – can I use that for bedding?
Hello Flo, You can use Pine Shavings in moderation or if they are old and already breaking down. Remember wood of any type takes a very long time to break down so the castings will need to be sifted before use unless you do not mind the wood in there.
I have a rotating compost bin with 2 sliding doors. There is drainage also. May I use this bin for vermicomposting?
I think I have the same kind of composter. I have not tried worms yet. I started composting about six months ago, and it seems that it takes a really long time for the scraps to break down. ( I haven’t gotten any soil out yet) I was thinking of adding worms, but I wondered if turning the composter would hurt them. Did you end up trying worms?
The tumbler type composters get too hot for worms, they exceed 100 degrees some days. They work on heat and rotation by design. If you keep the bin in the shade, and turn it only once a week or month, then you can add worms. You need to treat the tumbler more like a stationary bin and only turn the compost occasionally to allow oxygen in, keep it moist and the worms should be okay.
Uncle Jim’s Worm Farm
This is a great post! I’m on my second bin, with a few years between. First bin we had was in an apartment, so we used the compost in potted plants. We noticed that if we didn’t screen it well for both worms and eggs, they’d eat the roots. Anyone else have this problem? Ideas for screening?
I just placed an order and also read about jumping worms and that they are invasive and destructive. Could you please tell me the type of worms you do sell? I also saw the information and pictures of the jumping worms on your site. Please clarify. Thank you
They say above that they do not allow jumping worms on their farm anywhere, as they kill off other worms. It would be catastrophic to their worm farm. I’m glad they did include a photo so I know what to look for outside- I was able to compare to a nightcrawler so I don’t miss them up. Go look at their offerings to purchase worms.
I’m looking to incorporate red wigglers into some backcountry toilet systems called ‘moldering’ toilets. They are a toilet building over a cribbed foundation bin where the waste is deposited and ‘flushed’ with leaves to incorporate invertebrates and insects to help break down the waste. I’ve heard red wigglers help speed up the process. Would they survive over winter in NH in a 4x4x4 bin of waste?
I received my worms in perfect timing and condition thank you so much I’m starting a bait shop so I will probably be buying more worms in the future would it help to keep the price down if everyone ships your bags back so you can reuse them
Thank you from Bait-n-Eggs bait shop
Typo above, under Red Wiggler:
” can grow to be 5 inches long and 14 inches thick. ”
That would be a pretty scary worm, lol.
Yeah I’d love it if that were clarified lol
I am considering starting a worm farm. I have 2 cats and use corn cob litter. Would it be okay to wash the used litter and then feed it to the worms?
Hi Susan! We do not recommend mixing cat/dog fecal matter/litter into the compost bin. There are pathogens in the fecal matter, potential odors and fragrances in the litter that could harm the worms, and the end result would be a finished compost you cannot use in your garden on/around vegetable plants, etc.
Are the worms going to stay in the bin in house? I don’t want worms crawling everywhere.
Yes, I’m considered a new r! lol. Jan Dennis. hlcwestwind@aol.com
Hello Jan;
If the Moisture, food and temperature are well balanced and the worms are happy, they do not usually leave the bin, and contently stay and eat where they are comfortable. Often times they will gather at the lid or top of the bin in the condensation, they love that, it does not mean they are trying to escape, they just like the water droplets. However, if something is “off” in the bin, the worms will usually try to escape and usually all of them at once, not just a few. A few wandering here and there is perfectly normal, but not all of them. That is when you will need to check the bin for issues like the pH, and moisture, food and conditions of the bedding/compost.
Uncle Jim’s Worm Farm
What do we do about bugs or larvae in the worm bin?
How many worms should I start with using your 360.
Starting a Worm Factory 360 usually works best when you give the system enough worms to establish a strong, stable colony from the beginning. The sweet spot depends on how quickly you want the bin to become productive and how much food waste you plan to add.
Recommended starting amount
Most people start a Worm Factory 360 with 1 pound of Red Wigglers (about 1,000 worms).
This amount gives you:
A fast‑establishing colony
Quicker composting
Better stability in moisture, temperature, and pH
Fewer beginner issues like pests or slow processing
Other viable options
½ pound (about 500 worms) — works fine if you want a slower start or produce very little food waste. The colony will grow into the space over time.
More than 1 pound — helpful if you want fast processing right away, but not required.
Why 1 pound is the standard
The Worm Factory 360 has enough space and airflow to support a full pound immediately, and the worms will quickly populate the first tray. As you add trays, the colony expands naturally.