


 In a vermicomposting bin, bedding is the material that composting worms live in. When you set up a worm bin, you will need to add bedding before putting the worms on top. What is the purpose of bedding? Which types of bedding are best? How do you prepare the bedding, and when should you add more bedding? Read Uncle Jim’s Vermicomposting Bedding Guide and find out!
Why Composting Worms Need Bedding
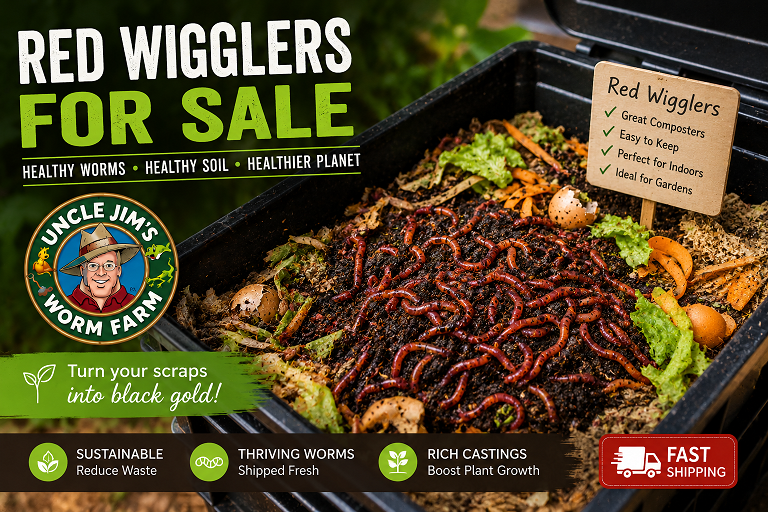
Bedding is meant to simulate the worm’s natural environment. The best type of composting worm is the Red Worm. These hearty, medium-sized worms have a ravenous appetite for kitchen scraps.
Red Worms love the dark. Light repels them. Sunlight can dehydrate a worm in just 3 minutes. Red worms burrow into their bedding to stay in the dark.
Bedding needs to be sufficiently moist. This moisture allows the worms to breathe. Red worms breathe through their skin. If they dry out, they suffocate. The bedding needs to be efficient at holding in the moisture. Therefore, Uncle Jim recommends certain types of bedding that do the best job.
Air is important for both the worms and the composting process. Having air flow discourages the growth of anaerobic bacteria. The vermicomposting bin should have air holes built in. Additionally, choosing the right bedding lets air move through. Shredding the right types of paper, for example, introduces air into the bedding.
Bedding should have a neutral pH (7). Worms get sick in an acidic environment.
The bedding you choose should be gentle on the skin. Avoid abrasive or sharp bedding.
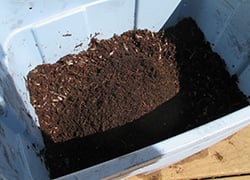
Food scraps can be placed on the bedding. Ideally, though, they should be placed in a little hole in the bedding and buried. Food buried in the bedding is easy for the worms to find. Red worms also eat the bedding. They convert these materials into “humus” – a dark, organic fertilizer that is prized by gardeners.
Types of Vermicomposting Bedding
We recommend certain types of bedding because they are non-toxic, they won’t irritate worm skin, the worms can easily eat it, they are airy, and they hold moisture well.
We have heard of all kinds of crazy stuff used as worm bedding. Junk mail, fresh bovine manure, and office paper, for example, cause problems. Junk mail has toxic colored ink; the plastic windows prevent worm movement. Bovine manure should be seasoned before putting it in a worm composter. White office paper is bleached and has toxic inks.
Red Worms do not have teeth. Anything you expect them to eat through should be soft, or should break down to softer material. Smaller pieces also help the worms eat faster.
Best Worm Bedding
The best bedding for vermicomposting are:
Shredded brown cardboard: Run corrugated cardboard through your power-shredder, or tear it into small pieces. If you do not have your own supply, any big box store or grocery store will have plain brown corrugated cardboard for the taking.
Coconut coir: Made from coconut husks, it expands 5 to 7 times in water. Purchase coconut coir from Uncle Jim’s Worm Farm or from a garden center.
Shredded paper: If you have unbleached paper around, run it through a shredder. Do not use bleached white office paper or computer printer paper.
Shredded newspaper: Find sections of the newspaper that are black ink only. Do not use newspaper with colored ink. Run through the shredder.
Peat Moss: Purchase pure peat moss at the garden center. Read the package carefully. Peat moss should be the only ingredient. If you see chemicals on the package or in the peat moss, don’t use it for worm bedding.
Aged compost: If you have an existing supply of aged compost, you can use this as bedding.
Yard waste, such as autumn leaves: Best to compost autumn leaves for the winter before using them as bedding. Pile them up and let them sit outside.
Aged bovine or equine manure: Allow the manure to “season” by leaving it out in the elements for several months to a year.
Hay and Straw: Easy to find. You can add some straw or hay to bedding.
Wood chips: Use untreated wood chips only. A small amount can be added to bedding if desired.
How to Set up Bedding
A worm bin that you purchase might come with starter bedding. Go ahead and use that material, following the package directions.
Coconut coir should be soaked in water for at least one hour before using. The water will make the coconut coir easy to break up. Coir holds plenty of water, which means it has excellent air space and drainage. It is also a renewable resource.
Your best bet is a mixture of several types of bedding. For example, coconut coir, peat moss and shredded newspaper. Or, mix composted autumn leaves and shredded brown corrugated cardboard.
Add water and stir until the mixture has the consistency of a wrung-out sponge.
In the future, you may need to add more bedding. For example, after harvesting compost, the bedding may be too depleted to support the number of worms. Extra bedding gives worms a place to retreat in cool or warm conditions. And sometimes, your worm bin has a meltdown and you just need to start over. Get more bedding, moisten, and add it to the bin. You may wish to dig a hole to add bedding. Dumping too much moist bedding on top cuts off some of the worm’s air tunnels.
Conclusion
Take care when setting up your worm’s bedding. They are living creatures. While hearty, composting worms can be harmed by the wrong environment.
Uncle Jim’s Worm Farm is the #1 supplier of composting worms and supplies in the United States. Check out our Red Worms for vermicomposting, Super Reds for composting or releasing into the garden and grass, and composters. We also offer mealworms for fishing, bird food and science experiments.


15 thoughts on “Vermicomposting Bedding Guide by Uncle Jim’s Worm Farm”
I’ve been using brown paper bags from Whole Foods as bedding. I rip them up before I add them, is this an ok bedding option?
Hello! I have two questions. My worms have been separated from casting and in new bin. I have dried and sifted my vermicompost and now have a large plastic bin of compost. Does it go bad! Second question, when I purchase more worms, can I immediately put them into prepared compost bin with old worms? Sorry, three questions, if dried compost goes bad, how to re-activate or what to do with it.
How do I dry my castings? Mine are very damp and hard to work with. Thank you. JH
I have a ten gallon tote that I originally filled about 1/3 full when I got my worms a month ago. It seems as though they have composted much of the bedding down. When do I add more bedding and how do I go about adding it? Do I just add a few more inches to the top or do I mix in? Do I keep adding bedding until the tote is nearly full and then harvest the casings? Newbie here, thank you!
Questions asked here span a period of two years, why have you not responded to anyone?
If your castings are wet, use air to dry them
I used shredded office paper. I see worms moving around but maybe not as many as expected. What do I do? Will I kill my worms? Will some survive the toxic paper? Is my compost doomed and/or will be toxic for plants that I was planning on planting/mixing in the compost?
For all those asking questions about drying your castings I will try and help as it seems the owners are not bothering to take the time to support this QnA section..
Now if they are soaked or really wet where squeezing in your hand has water dripping out then yes it needs to have some moisture removed.
But you never want your casting to become dry. Castings are home to billions of bacteria in just s spoon full. They need moisture to live. If you dry your castings you will end up killing much of that beneficial bacteria and fungi which is one of the main benefits of the castings.
Secondly dried castng are very hard and do not rehydrate well at all.
What you want is too store your castings in a container like a 5 gal bucket with a top. But I put holes in the top as I found it seems to help keep the castings fresher and bacteria alive better. Make sure you regularly check the moisture content of the stored castings. It should be moist like a rung out damp sponge. It should never be dripping wet or have water drip or pool in your hand if you squeeze it.
Honestly IMO you should NEVER wet the worm bin bedding so much that any water at all drips out the bottom holes. Just as their native soil it should be moist but never waterlogged. Much like how you dampen dry material in a layered composting stack.
So never dry your castings out completely. It kills the beneficial bacteria and can make it very difficult to rehydrate making its benefit to a garden severely reduced.
Keep worm casting moist but. never wet. To wet also kills beneficial aerobic bacteria (the main type is casting) and increases growth of anaerobic bacteria which you do not want and creates odor. If you can squeeze water or its like mud its way too wet.
If your casting are too wet spread it out and let it dry some but not dry out. You can turn it over/mix to keep moisture even.
To Amy,
As you obviously now know bleached paper which is basically all pure white paper is bleached is toxic to worms.
Remove any of the paper left. I would personally set up another bin and stack it above or sift thru your current one to transfer the worms that are still alive. Make the bedding a mixture of even parts coir noir, shedded cardboard, peat moss (make sure its pure no additives …check label). Add some used coffe grounds and a light springling of fine sand to act as grit to help worms grind down their food. Much like chickens intake sand and grit to aid in grain and seed break down in thier gizards.
Another good thing if you are adding composted or aged leaves yard clippings etc is to check the PH. Just get a ph tester. These red wigglers do best in neutral soil around 7.
Since your worms are not in ideal health be sure to not over wet the bedding. Just keep iit moist like you would want healthy compost to be.
With all that said it might be a good idea to add a fresh pound of worms to that new bin bedding along with the worms that were in the office paper fed bin. It will help boost the population and drastically increase breeding and thus building the population.
Also do not throw out that other office paper bin bedding. While it hurt the worms its still great for the garden. Just remove any of the surface paper left. Use it as you would compost or casyings
Hi Uncle Jim,
I keep having very tiny small white mites show up in my bins. I think it has to do with the moisture content but we don’t know where the water is coming from since we started leaving the food out to dry before placing it in the bins.
Any tips for how to control mites. We tried egg shells but they only work temporarily inside the bin but not on the rims of the bins or the lowest level where the tea collects. We just started vermi composting. We love the bins, our new pets, and the purpose, so any advise would be greatly appreciated! We hope to keep our worms happy
Awww man I used uncomposted leaves :(
שמור על פרטיותך ועדכן אימות דו שלבי
אנו ממליצים להפעיל אמצעי הגנה נוסף על חשבונך
Hi there.
As a beginnig grower of red wiglers, there are several question I’d like to get authoritative answers to, in order to avoid fatal mistakes during my process of growing those worms, hoping to be responded correctly.
1) Amongst other components of the bedding I prepared, I’m also in possession of a nice quantity of horse manure, I collected at some nearby stable, after learning that wiglers love to be fed on it very much. However, I’ve also been told that the horses in that stable, are regularely treated every 3 months, with some chemical preperation against intestine warms. As far as I know, that preperation that kills intesting worms, can also be harmful or even fatal for wiglers.And my question therefore: Is there any period of time, during which the toxidity of that stuf expires in a way that it is safe to add that manure to the bedding, and if the aswer is positive, than how long is it?t
2)What is the simplest and easiest way to monitoe the bedding acidity, and how can it be corrected in case of acidity increase?e
3)What is the way to find out when the bedding has all been completely consumed, and its time to add new bedding material, or start harvesting?g
I greatfully do hope to receive proper answers to those questions
With best regards
Yoram
Hello Yoram;
1) Most of the chemicals are digested through the animal and it is always good to use aged manure in a worm bin. Let the manure stand in the elements for a few months and then you can use it.
2) Depending on the size of the bin you have, and how many worms are working, a normal 10-15 gallon bin can take 2.5 – 4 months to fully process.
Please let us know if you need any further assistance.
Erma
What kind of Lime do I need to get to keep my ph right??
Hello Mike;
You can use Dolomite lime in your worm bin, it is safe and effective.
Uncle Jim’s Worm Farm