


Thinking about starting a worm farm? Great choice!
Whether you want to reduce kitchen waste, boost your garden, or try something new, worm composting is simple, fun, and good for the planet — not to mention your wallet.
No backyard? No problem.
You can start a worm bin right in your kitchen, garage, or even under the sink.
Let’s break it down step by step:
✅ What you need
✅ What to expect
✅ How to avoid beginner mistakes
What Is Worm Farming (And Why Everyone’s Talking About It)?
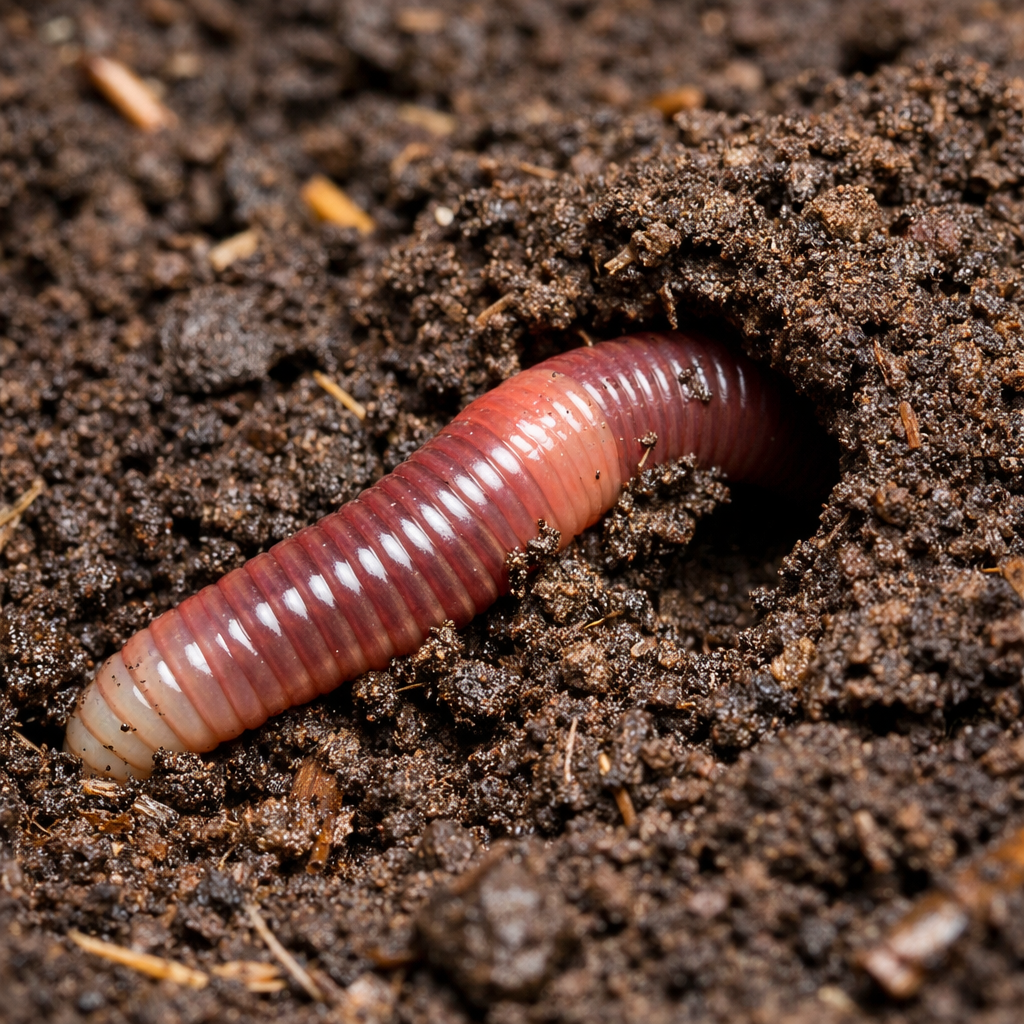
Worm farming is using composting worms (like red wigglers) to turn food scraps into rich, natural fertilizer.
These worms eat your kitchen waste and produce worm castings (aka worm poop) — black gold for your garden, lawn, or houseplants.
Why people love worm composting:
-
♻️ Less food waste in landfills
-
Saves money on store-bought fertilizer
-
Naturally boosts plant health
-
Fun for kids and families
What You Need to Start a Worm Farm
Starting is easier than you think. Here’s what you’ll need to build your first worm bin.
1. Worms (Red Wigglers)
Start with Red Wigglers (Eisenia fetida) — the best worms for composting.
They thrive in food scraps and eat about half their weight in waste every day.
2. A Worm Bin
You can buy a worm bin or DIY one. All it needs is:
-
Air holes for breathing
-
A lid to block light
-
Drainage holes
-
A cool, dark place to live
➡️ Check out our indoor worm bins
3. Bedding
Worms live in moist bedding — not just food. Start with:
-
Shredded newspaper or cardboard
-
A handful of soil
-
Water (damp like a wrung-out sponge)
4. Food Scraps
Worms love fruit peels, veggie scraps, coffee grounds, and eggshells. Avoid meat, dairy, citrus, and oily foods.
After:
Feed your worms:
-
Fruit peels
-
Veggie scraps
-
☕ Coffee grounds
-
Crushed eggshells
Avoid:
❌ Meat, dairy, citrus, and greasy or salty foods
How Long Does It Take?
Worms start producing castings in just a few weeks.
After 2–3 months, you’ll have enough compost to feed your garden.
❌ Beginner Mistakes to Avoid
- Overfeeding – Too much food can rot and smell. Start slow.
- Letting it dry out – Worms need moisture to breathe.
- Feeding the wrong stuff – No onions, meat, or processed foods.
- No airflow – Oxygen is key. Don’t seal the bin airtight.
✅ Beginner Wins That Make a Big Difference
-
Cut scraps small – Worms break down food faster when it’s chopped or shredded.
-
Keep it dark and cool – Worms thrive in temps between 55–77°F.
-
Add crushed eggshells – Helps balance pH and gives worms grit for digestion.
-
Check in weekly – A 5-minute check once a week helps spot moisture issues or food buildup early.
-
Start with a small feeding zone – Feed in one corner at a time so you can track activity and avoid overfeeding.
Why Worm Composting Is Exploding in Popularity
Worm composting is exploding in popularity — and for good reason.
People love that it’s:
-
Eco-friendly
-
Easy to do indoors or in small spaces
-
A great science project for classrooms and kids
Search engines are flooded with questions like:
-
“How do I start a worm bin?”
-
“Best worms for composting”
-
“What can I feed red wigglers?”
That’s why now is the perfect time to start.
Uncle Jim’s got your back — and we’re here to help every step of the way.
Do not hesitate to reach out with your questions. Find below some frequently asked questions to help you get started:
FAQ: What Beginners Ask the Most
Q: Does a worm bin smell bad?
Nope! If managed right, it smells earthy — not stinky.
Q: Can I keep worms inside?
Yes! A well-maintained bin can live under the sink, in a closet, or on a balcony.
Q: How many worms should I start with?
1 pound (roughly 1,000 worms) is ideal for most households.
Q: What do I do with the compost?
Use it in garden beds, potted plants, or mix into soil. It’s black gold for your plants!
Starter Kits for New Worm Farmers
- Red Wiggler Composting Worms
- Worm Bin Kit – DIY & Ready-Made Options
- Worm Castings for Boosting Plant Growth
✉️ Join the Worm Revolution
Over 50,000 families have started composting with Uncle Jim’s help — and we’re just getting started.
Sign up for our newsletter to get beginner tips, composting hacks, and exclusive discounts.
Ready to Start?
Starting a worm farm is one of the easiest, most rewarding eco-habits you can build.
Tip: Keep it simple. Don’t overthink it. Worms are low-maintenance roommates that pay rent in compost.
So what are you waiting for?
Order your worms today and join the movement.


17 thoughts on “Worm Farming for Beginners: The Easiest Way to Start Composting at Home (and Why Now’s the Perfect Time)”
Good afternoon,
I have a dumb question. I do tree work on my days off from the fire department. My wife and kids have horses. I combine the by-products from both (wood chips & horse manure) at the ratio of about 30 browns to 1 greens. Knowing that horse manure is ‘hot” I give the time sitting, composting, & resting about 2 years with necessary watering and mixing. Then we use the compost in our Church’s big garden and on our farm’s sandy soils in order to improve tilth and moisture holding capacity of the sandier soil. My question is this, would worms thrive in this mixture and would the worms make the composting process happen quicker? If so, how much?
Hello Tim; Once the compost has heated and cooled and has gone through that process, yes, the worms are very good at speeding up the composting process. They will help substantially.
Uncle Jim’s Worm Farm
I do have a bin . It’s been like 6 months and I see baby’s and adults but not a lot of compost (poop dirt)
Any body knows why?
Thanks..
And I give them the best, carrots, apple, potato,banana cucumber all the peelings, guava leaves greens and dry also mango leaves and guanábana leaves, egg shells, coffee grounds. Ect…
Hello Melissa; The worm casting are usually detectable as they are the bedding turned dark in color, almost black and condensed, wet and heavy looking. The worms will eat everything in the bin including the peat moss or dirt and turn that into castings. Look up Worm Castings on the internet and take a look at them to see if your bedding now looks similar. After that much time, they should be ready to harvest.
Uncle Jim’s Worm Farm
I have thought about a worm farm to start teaching my grandchildren how to plant gardening and new things besides technology. Especially playing on their phones when they could learn how to grow their own food instead of depending on the grocery store
I have the 4 bin worm farm. I have a bottom bin and the worms in the bin above that. When do I add the additional bins?
Hello Lori; When using the stackable tray systems, you normally add tray one (bottom) and after feeding on the tray for about a month or so, you can add tray two on top. Start feeding on that tray and keep adding to the top as time goes on. The bottom tray can be pulled and the castings harvested when that is completely processed and is all castings. Then you rotate the trays. You can find videos on YouTube if you type in the bin that you have. They can be very informative.
Uncle Jim’s Worm Farm
I’ve had my worms two weeks. How often do I feed and water them? I purchased corn meal and have only fed them twice. I keep the soil moist and have only watered once. I’m using them in my garden tower.
Hello Catrina; You can fed the worms every three to five days, or when the food you previously gave them is almost gone. Keeping them in a moist bed, with adequate food and temperatures will help them thrive.
Uncle Jim’s Worm Farm
What is the best biggest nightcrawler to grow in nebraska for resale as bait in controllable 75 degree temperature !!!
How do you remove the compost without removing the worms?
Hello Anni;
To harvest the worm castings, you will need to separate the worms from the castings and you can do this by picking the worms out, or dumping the bin on to a tarp and making a pile. The worms will burrow down quickly away from the light and you can scoop the top of the castings off of the pile and continue that until you have nothing but worms on the tarp. Or, you can purchase or make a compost sifter and use that to sift the worms out. Which ever is easiest for you. If you need further assistance, you can call our Customer Service Department, we are happy to help.
Uncle Jim’s Worm Farm
Hi Uncle Jim!
My worm bin smells bad. I think it has detritus worms. It has too much moisture, and I think we have been overfeeding them. We do not have airholes, and the worm bin is indoors. What do I do, step by step please.
If you can, please make a worm farm care guide for a indoor one, if you don’t already have one?
Thanks!
You can do one of two things, you can separate the worms from the bedding and food and start new bedding for them, refresh the entire bin, or you can remove all of the excess food, add dry peat moss and materials to absorb the excess moisture, and perhaps that will resolve the problem. Oftentimes if the bin is too anaerobic, it is best to start new bedding and begin again.
Uncle Jim’s Worm Farm
I have an above ground garden that I’ve used for years. I have now enclosed it like a small greenhouse. It’s only 8×8 and about 1 1/2 foot deep I was thinking about turning it into a worm farm. Can I do that or do I need to remove the dirt and put plastic or something under the soil. I want to raise night crawlers and sell them.
You can certainly add worms to that bed and they should do just fine. They can escape, but if they have all of the right conditions, like moisture, food and the temperatures are good, they will usually stay in that area and thrive. If you wish to ensure that they stay put, you can line the bed first. An enclosed bin would be much better for your intents and purposes.
Uncle Jim’s Worm Farm
Please make a indoor worm bin care guide!
Thanks
Jk