


Repurposed wooden pallets reduce waste and save money. All you need is a little elbow grease, a few tools, and some inexpensive supplies. When your composter is finished, you can begin a productive composting program. Composting worms speed up the composting process. Soon, you will have free compost to help your garden and lawn grow.
Start by finding a location for your worm bin. Place it a short distance from the house, not too close to any seating or play area. You will be walking out there frequently to deposit kitchen scraps. Placing it under trees or shelter is a good idea because too much moisture can drown composting worms.
Materials for DIY Wooden Pallet Compost Bins

- 4 or 5 wood pallets. Avoid pressure or heat treated wooden pallets as they can be toxic. Look for pallets with the smallest amount of space between the slats.
- Screw gun
- Scissors
- 8 L-brackets
- 26″ to 36″ thick zip ties
- A handful of 2″ long wood screws
- Optional: 2 sturdy hinges; hook and eye latch for door
- Optional: Large flexible plastic-backed mat or other cover for the bin
- Optional: garden netting or chicken wire
How to Build the DIY Compost Bin Pallets

- Place one pallet on the ground in the exact location of your bin. This will be the base. (Now is a good time to make sure your other pallets will fit as walls around the base. Experiment a bit to make sure everything will fit together before proceeding.)
- The “front” of the bin will face your yard so you can easily access it. This will be a swinging door you can open and close.
- Stand up the back panel and attach it to the base. Use the screw gun to fasten 2 L-brackets to the base.
Note: you can use zip ties, but the bin might not be sturdy if you cut corners on this step. - Attach a side panel to the base using 2 L-brackets. Then, strap it to the back panel with zip ties. Pull each zip tie tight, and trim the excess with scissors.
- Repeat for the other side. You now have a 3-sided structure.
- Optional: If you add a door, you will be able to expand the pile inside the composter. Place the fifth pallet over the front opening if you decide to make a door. Attach two hinges to the final pallet and screw them to one of its sides. Check to see if the door opens easily. Screw in the hook and eye so that the door can be easily locked and unlocked.
- Optional: Protect the bin with a covering. Moisture in the bin can cause odors and harm the worms; and a cover helps reduce moisture. The cover can be made out of wood or plastic, or use a large welcome mat or whatever is available. It is best to secure the cover to the bin’s sides so it does not blow off. Make sure you can lift the cover off when you access the bin.
- Optional: You can help prevent organic matter from sliding out between the slats by using garden netting as makeshift compost bin interior walls. Be sure to leave a gap in the netting so the door can still swing open.
Setting Up Your Wooden Compost Bin

- Shredded brown cardboard
- Paper (unbleached), or newspaper (black ink only)
- Aged compost; aged manure from cows or horses
- Coconut coir
- Pure peat moss (no added ingredients)
- Hay or straw
- Autumn leaves
- Wood Chips
- Grass clippings (untreated grass)
Using a watering can, light moisten the bedding as you add it and stir. It does not need to be wet; it should have the consistency of a wrung out sponge.
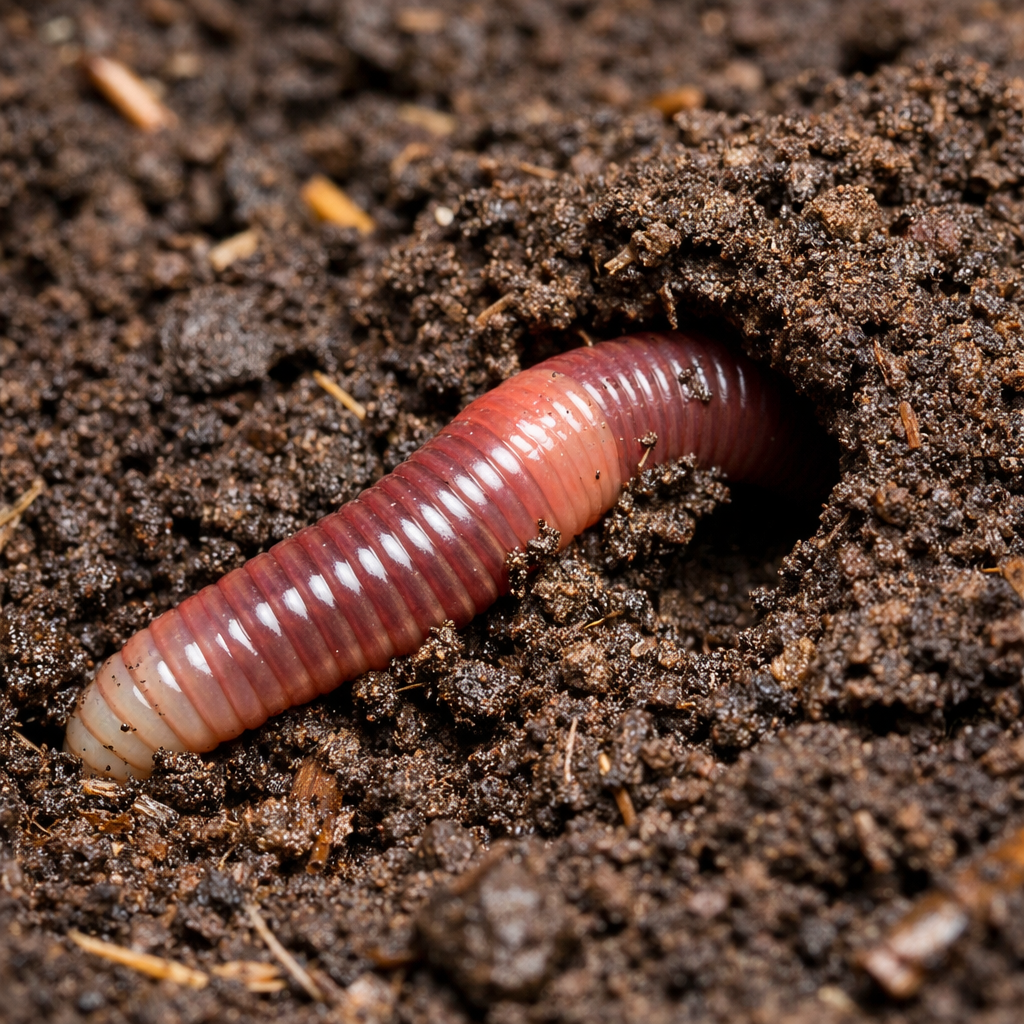
Now add composting worms. These come in bags from places like Uncle Jim’s Worm Farm. Worms from bait shops are not usually the right type for composting. Uncle Jim recommends red worms for composting.
The larger super reds (European Night Crawlers) can be used for composting, but they are better off released into the lawn or garden for aeration and fertilizing. Gently pour the bag on the top of the compost pile. No need to separate them – and don’t bury them. Let them dig down and find their own way into the bedding.
Your last step in setting up the pallet composter is to add organic matter. You can use kitchen scraps, coffee grounds, and garden waste. Bury the material to discourage pests, or just chuck it on top.
Either way, the worms will find it and start breaking it down. In a few months, you will have free compost you can harvest. This rich finished fertilizer is all-natural and perfect for making plants grow.
Note: Pallet composters can be extended to make 2 or 3 bins. Share walls to save space. Multiple bins are useful in larger spaces, such as apartment buildings or a large yard. When one bin becomes full, move on to the next. By the time you fill the last bin, the first one will be ready to harvest.
Maintaining Your Wooden Compost Bins
Compost bins are usually low maintenance. But since wooden compost bins rot, proper care and maintenance must be given to ensure that they last as long as possible. Here are a couple of tips from Uncle Jim to maintain your wood pallets:
Keep it off the ground.
Water is one of the most common causes of rotting wood. Moisture will seep into the wood and cause it to become brittle. To counteract this, raise your wood pallet compost bin with bricks or other pallet pieces. This allows air to flow beneath the bin, keeping it as dry as possible.
Choose a good location.
We understand that the essence of a wood pallet compost bin is that it is usually placed outside, exposed to the elements, but there is something you can do about it.
Find a shady spot in your backyard to protect your wood pallets from the rain and sun, as both can hasten the aging process. To provide some protection, put it underneath a tree or beside your tool shed (but not directly against it because wood diseases can spread through that).
Paint your wooden pallets.
Paint adds a line of defense because it acts as a moisture sealant and an additional layer of protection against heat and sunlight (especially if you choose untreated wood). You can even match the paint color to your house or shed, giving your backyard a more aesthetic appeal.
Frequently Asked Questions
Why build DIY compost bin pallets?
A pallet compost system is an ideal way to start your DIY worm bin project because it is both inexpensive (especially if you repurpose wood pallets) and simple to build.
It is strong enough to withstand the elements and keep unwanted creatures out of the bin. Pallets are also a good way to keep your backyard tidy, and they help to build and maintain heat inside the bin until it is finished composting.
Wooden pallets are also flexible when it comes to customizing them to fit a particular space. You can build a single bin or extensions to make three or more bins to produce more finished compost for your garden.
What kind of wood is best for making a compost bin from pallets?
Certain types of wood, particularly chemically treated wooden pallets, can leach poisonous materials into your compost. Uncle Jim suggests using cedar or redwood for your compost bins.
Cedar is extremely resistant to weather, moisture, and insect damage. It is made up of natural oils and compounds that act as a natural sealant. As cedar ages, its natural wood appearance fades into a silvery gray color that complements any backyard.
Pressure treated wood can be used, but only if it does not contain arsenic. Arsenic leeches poison into the compost, endangering the health of the soil structure and plants. It is ideal because it helps to seal the surface of the wood against moisture, preventing decay and preventing insects from nesting.
Does a pallet compost bin need a lid?
It is not necessary to build or install a lid on your compost bin. But it does keep more moisture out and heat in, especially during the cooler months. Lids also keep unwanted odors from wafting into your home and discourage creatures from wandering in.
What are the pros and cons to choosing wooden pallets as composting bins?
Wooden pallets are great for composting bins, but they have some drawbacks that we will go over so you can decide if it is the right choice for you:
Pros:
- It provides excellent airflow for compost.
- It is made of natural materials.
- It is simple to move around the backyard.
- If a pallet piece is damaged, it is relatively simple to replace.
Cons:
- Because wood deteriorates over time, you will have to replace it more frequently.
- Wood, unlike plastic, does not provide a lot of insulation.
- It is easier for creatures and vermin to enter through the gaps between the pallets.
Looking to speak to someone who knows all about worm farming? Uncle Jim and our team would be delighted to assist you in beginning your vermicomposting journey! Get in touch with us today!


8 thoughts on “Wooden Pallet Compost Bin – DIY Project”
I’m in an area that has temperatures that go below freezing in the winter. How harmful would that be to the worms?
I was considering doing this; however my property is somewhat rural. Any advice on how to discourage bears and raccoons?
Hi, Frank. You shouldn’t have a problem with any carnivorous guys if you don’t put meat or bones in your compost. Bones take way too long to breakdown for my purposes. And if you don’t want “guests” you should not do that anyway. I am in the city and we have racoon and possum here also, believe it or not. Poor guys are being driven from their natural habitat by land fill, etc.
But to your point, they don’t bother my compost bin. There isn’t anything in there that they’re interested in.
I do use fish heads, in the garden, but I make sure I bury deep them in the soil. I don’t do it often, though. So far, I don’t have a problem. Been doing it for a while now. I’m not sure, but I don’t think the racoon is big on digging.
I have an active worm bin in the garage that I cover with old towels in winter to keep the little critters warm. Could they survive in the center of an outdoor pile through Norther Virginia winter?
I also have temps that get really low in the winter. I was using a modified bee hive for my worms. I figured it was big enough that they would not freeze. It got down to 9 degrees one winter & they all froze to death. (I also get termites & black soldier flies in the summer because of the wood, so the bee hive is not ideal). I’d love an article or info on how to build a convenient, yet freeze proof container for year round worming. I currently bring my worms in the garage…one year my dear hubby left the garage door open over nite…they froze…so that doesn’t work well either. Plus they tend to crawl out & make a mess (plastic storage tub).
i’d like to put one or 2 inside my barn,( 2000 sf)… so a stall would be used for worms and compost, safe from hot or freezing weather. what is your opinion on this idea?
Hi Jennifer,
I think this would work out well in your barn! As long as you can keep the pile temp between 4-80F they will do great!
Don’t use heat treated pallets?? Surely that’s a mistake. The alternative are treated with chemicals.