You have been faithfully adding organic matter to your compost bin, and now it’s time to reap the harvest! In the spring and summer, your plants need lots of organic fertilizer to grow strong. Maintaining a composting bin or pile is the best way to make your own organic fertilizer at home. When you are getting ready to plant, or need to nourish an existing garden, turning your compost bin gives you access to the compost.
Most of our customers use worms to help break down the compost. Our Red Wigglers are champion composting worms that often lay eggs to continue the population; Super Reds (European Night Crawlers) are superior for releasing into the garden or for living and reproducing in a vermicomposting bin that gets exposed to temperature extremes. Certain composters for red wigglers are suitable for indoor composting, but most composting systems are outdoors — or indoors in the winter and outdoors in the summer.
Note: We carry a Compost Pile Turner that is great for aerating and maintaining a healthy composting system. However, it’s designed to be use a couple of times a month, not at harvest time.
How you harvest your compost depends mostly on the type of composting system you have. The more basic the composting bin, the more work it will be to harvest the compost without removing a lot of worms.
Tray Composting System
The tray-based composter is the easiest to harvest from. An example is the Worm Factory 360, which is a best-selling item at Uncle Jim’s. You should have been feeding only in the top tray. The lower trays should be full of rich, dark composted matter and very few worms. So, remove the lowest trays. Sort and screen out any undigested organic matter (see “Processing” below). If a couple of stray worms make it into your final product, don’t worry too much. You can either pick them out and put them in the top tray, or just leave them. These stragglers will be happy as free-range worms.
Drawer Composter
Some composters have a drawer at the bottom. Follow manufacturer directions to remove compost from this drawer. The undigested organic matter – and most of the worms – will be in the top of the composter, and the finished compost will be in the drawer. Sort, screen and apply the compost to your plants (see “Processing” below).
Tumbler Harvesting
Tumblers let you roll the bin or crank a handle to turn it. Depending on the type, many owners turn the compost a couple of times a week. This means the compost, worms and finished compost will be evenly distributed. You should stop adding scraps to the composter in the couple of weeks before you want to harvest the compost. This will give the organic matter a chance to break down. Scoop out your finished compost and sift through it before applying it to your plants.
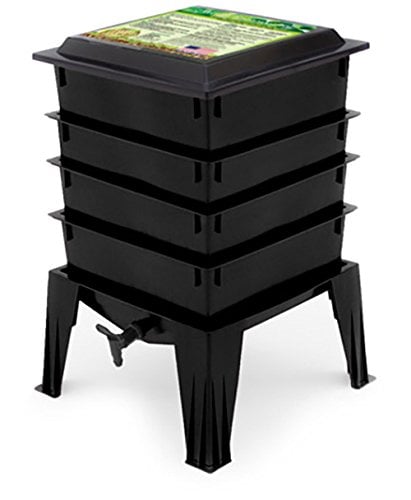
The Worm Factory 360 – FREE SHIPPING! –
From: $149.99
Select options
This product has multiple variants. The options may be chosen on the product page
Composting Bin Harvesting Shortcuts
 A large, deep plastic tote, plastic barrel or composting bin – fancy or plain – needs to be “turned” to find the decomposed compost on the bottom.
The exception is if there is less than half a foot of black gold, organic matter and worms in a tote composter (such as the Worm Friendly Habitat). You might get away with relocating your worms to one corner of the bin. Simply feed them in one place for a while and most of them should migrate to that spot. Then you can harvest from the other parts of the tote. However, if your worms won’t cooperate, you’ll have to turn it.
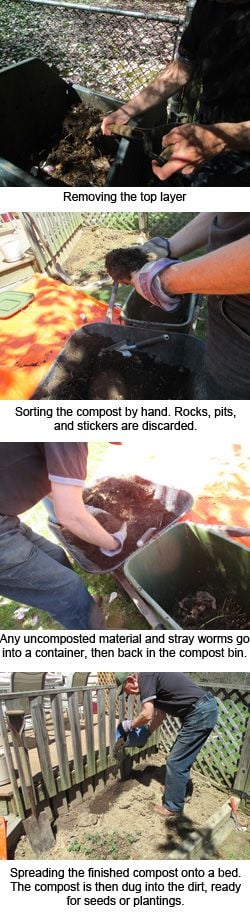
The deep bin or compost pile needs to be “turned”. Under the rotting material on top is fully composted humus, perfect for gardening. Get your pitchfork and follow along:
- Dig into the top of the bin and pull out the material that has not yet broken down. This may be several inches to several feet deep, depending on recent weather conditions, how many worms are munching away in there, bin health, and how much you’ve added to the bin. Put this stuff (Part A) on a plastic tarp, into a big pail or trash bin, or even on the ground (if it’s a rough patch that doesn’t need to look beautiful later). There might be a lot of worms in here. This stuff can be stinky, depending on the health of your bin.
- When you hit the dark, earthy-smelling layers, take inventory of your worm population. Are there a lot of worms on the top? If so, and you want to keep them, put another few inches or feet of worm-filled humus with the other undigested organic matter.
- Use a pitchfork or large spade to move the rich compost to another container, such as a wheelbarrow, sack, bucket or plastic tarp (Part B).
- Refill the compost bin with the partially-undigested matter and worms you set aside in steps 1 and 2 (Part A).
- If you are concerned that your finished compost has more worms than you want to release, you can expose the top of the finished compost to a bright light or the sun for a few hours (but don’t cook them in the sun too long). Worms don’t like light, so they will dig down. Scrape the top off and use it as your Part B. You can repeat this a few times to isolate the worms on the bottom. Then, put the worm-filled bottom material back into the composter.
Processing Your Compost
The finished compost (Part B) might have sticks, fruit pits, rocks, large seeds, produce stickers, partial avocado skins, tea bag tabs, etc. It’s a best practice to remove most of these items, if possible, before using the compost on your fruits and veggies. They can act as barriers to plants sprouting and can introduce problems if they take root.
Some gardeners choose to buy or build a screen to run the compost through. See our post about screening compost. This will also remove some of the stray worms, which you can reintroduce into the compost bin.
You can also sort out the compost by hand.
Dig the black gold into on your garden, mix with other ingredients for seedlings, or make compost tea.
If your vermicomposting system doesn’t have many worms in it, you could wait a bit and see if they bounce back. Sometimes there are enough eggs to rebuild the population. If you want to quickly boost your composting worm population, just order worms from Uncle Jim’s Worm Farm.
No matter how you manage your compost, know this: You are making a good decision to turn garbage into black gold. This free fertilizer makes your plants happy and strong, and it helps save the earth, too!