 As Spring approaches, your vermicomposting bin will start to need some attention. Take a look inside your compost bin. You should see dark, crumbly “dirt” – this is worm castings. It’s the perfect fertilizer for your plants. Here are the steps you should take to get your vermicomposting bin ready in the Spring.
Time It
Dig around. If you see a significant amount of undigested scraps in the bin, you may need to give your worms more time to break things down. This is especially true for outdoor bins, because composting slows down significantly in cold temperatures. Composting worms do best above 55 degrees.
If there are undigested food scraps, and you desperately need completed compost now, you can harvest whatever completed compost is in there.
Harvest Completed Compost
Most of the worms, undigested food scraps, sticks, bulky eggshells, fruit stickers, and random junk need to be separated from the completed compost. “Screened” compost is especially valuable because it is fine-grained and free from extra items – here is a video about making a screen for compost. This article explains how to separate worms from the compost using food or piles. We also have a start-to-finish article on several methods for harvesting your compost.
If you have a tray-based composting system such as the Worm Factory 360, harvesting should be simple. Feed in the top tray to attract the worms. The lower trays will automatically have fewer worms and be ready to harvest.
If you want to screen your compost, simply sift it through a screen. You can make one with holes big enough for the compost to get through, but the lumps, sticks and stickers will stay behind.
This nutrient-rich, all-natural fertilizer is perfect for starting seedlings and nourishing your seeds and plants in the garden. Compost can be raked into the soil, used as a side-dressing, put on top of the soil, or sprayed on as “compost tea.”
Add More Bedding
If the worms don’t have much wiggle-room after you harvest the compost, just add more bedding. You can use shredded newspaper, pure peat moss, and/or coconut coir. Moisten lightly and mix well before adding. The bedding in the bin should have the consistency of a wrung-out sponge.
Take a Census
If your worms have been in a warm location all winter, such as a partially heated garage, basement or indoors, you should see plenty of worms wiggling around. Your worm bin is good to go. If it is your habit to move the worms outdoors during the warmer months, do this after things warm up. You can move the whole bin, or relocate the worms to a different bin.
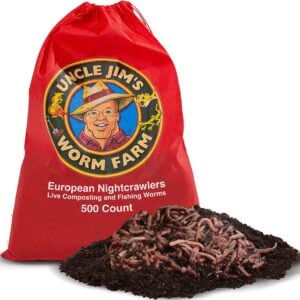
If they have been outside and you had a hard freeze, the worm population may be low or zero. In that case, wait a bit and see if baby worms hatch from eggs that might have been left behind. Worm eggs can last more than a year in harsh weather. They look like tiny, round brown specks, but they can also be hard to spot. Once you are past all danger of freezing, you can order new worms from Uncle Jim’s Worm Farm. We recommend the Red Composting Worm for composting bins; Super Reds, also called European Night Crawlers, will also work for compost bins, but they are better suited to be released into the garden for aeration and fertilizing.
Evaluate Your Worm Composting Bin
Evaluate how your worm bin is doing. If it’s broken, repair it.
Is it too big or too small? You might want to move the worms to a new bin, or start a second composter. Uncle Jim’s has a selection of indoor composters and outdoor composters. A tray-based composting system, such as the Worm Factory 360 or Can-O-Worms Composter, can expand and contract by adding or removing trays. You might be able to order additional trays from us if you have a larger composting program.
Composting worms are more than happy to turn your kitchen scraps into free fertilizer. Keep them happy and they will help your garden – and help save the environment.


19 thoughts on “How to Get Your Worm Composting Bin Ready in the Spring”
I ordered the 360 worm farm and 2000 red wigglers, they are doing really good. And just ordered 500 super reds.i am a 77 year old retired coal miner,and this is a hobby that I can do,and really enjoy…uncle Jim is someone that I trust.
My worms arrived while the grandsons were here for their Spring Break. Great teachable moment to have them open the box, untie the Uncle Jim green bag…and enjoy the start of a new project! Although the box was partially crushed, and had a stamp from USPS about it arriving damaged, the worms were in fact, protected by their packaging and we had ‘instant’ enjoyment of their activity getting adjusted to their bin. Numerous ‘check ups’ for the next two days, assured the grandsons, the worms had found a home in the lettuce, egg shells, shredded paper, etc., which had been prepared for them. Thank you for a great new, shared adventure, for my grandsons, and me!
Hello,
I have so many fruit flies. Do suggestion on how to handle this?
Take a small jelly jar or something similar, safely poke holes in the lid (usually with a nail) pour the jar about 1/4 to 1/2 full with APPLE cider vinegar ( not white…. it won’t work), put lid back on and set very near the worm bin and leave it alone for awhile…. the fruit flies or gnats will be attracted to this smell probably more than the worm bin, crawl inside the jar, become overwhelmed by the vinegar fumes, fall in and die.
I’ve never failed to see this work at controlling the flies. If the problem is very bad try several jars.
Change out the vinegar periodically, when you can’t smell it vinegar too well then it’s probably way past time to change it out for fresh.
This worked for me
Fruit Flies in the Worm Bin
https://www.gardensalive.com/product/ybyg-fruit-flies-in-the-worm-bin
I have a question. In my worm bin, which has a cover, at certain times of the year a yellow looking fungus forms sometimes over night. It looks like mushrooms, but when I try to remove it, it is almost like a liquid and falls off the hand shovel. Is it a reaction from something I am putting in the bin and is it something I should worry about? Please let me know.
Hello fellow worm farmers! I think i might be able to help out with an answer to your question about yellow mold in your worm/compost bin. I did some research on line and found an interesting article that explains all about mold in composting bins . Iv attached the link at the bottom,9Hopefully this helps you out! Have a good day , and happy worming!
~heather blackburne
http://www.redwormcomposting.com/general-questions/lots-of-mold-in-my-worm-bin/
There are no answers published to the questions above. I would like to know the answers.
Hi there, I purchased worms about 5 months ago and they are doing wonderful. I have them in a bin outside in a shaded area. I live in the Phoenix Arizona area and was wondering if my worms will able to survive the intense heat we have here in the summer. In the shade the temps can climb to 110 degrees. Will they survive this kind of heat in a well shaded and ventilated area on my patio?
I’ve been using worms for quite a while what I do to speed up the process of ocomposting I went down to the Goodwill picked up a used food processor for $10 and I put any large pieces of material like bananas skins ,celery ,spinach ,lettuce anything going do going bad and processes it. I also picked up Paper shredder used . . I take all my mail and newspaper (no magazines or coated,glossy material ) and shredded it. Then I mix it with my chopped materials and place it in my compost bin it works great . It really helps the worms and speeds up the process
I too have shredded food and bedding materials . I go dumpster diving for cardboard, then run through paper shredder. I definitely agree they love you for it. Production goes way up with no smell or flies etc
I have a BIG problem with my 360 worm bins! I have been doing vermacomposting for years off & on. The problem is…my worms have NEVER worked the bins going UP, they always work going DOWN! I have gone by the instructions in the booklets, online, and watched numerous YouTube videos. I finally tried reverse bin placements but they are HEAVY and too hard to maneuver so I sterilized the bins & retired them. Anybody else iut there with this problem? Suggestions will be appreciated!
I too had this problem .
Worms want to go down instead of up into other bins.
I upgraded my worms into another system.flow through. Made box of plywood with pvc bars on bottom .
Problem solved and easier to feed and process castings.
About the first of August I noticed that the worms seemed to be going through scraps rapidly. Thought they might be getting over crowded so started checking them. What I found was that all my worm were gone & I had some type of what appeared to be large, ringed grubs in sizes from 1/2” toothpick to 1” giant earthworms in both my red worm and earthworm containers. I’v had some type of black 1” flying insect in by containers when I opened them up which I’ve never seen around except for my worm beds. I picked out as many as I could find and have stopped feeding them. Have left the bins alone for the past two months and am now getting ready to screen the compost and then empty it out into my garden when I turn it over. What I need to know is you have any idea what they are before I order more worms, and what to do. I sent pictures on your Facebook page but received no response. Didn’t have this problem last year. If there’s any response please email them to me since I’m not likely to be able to find this page again. I’m not really computer savvy.
Hello Joan;
It sounds like you had Soldier Fly Larvae take over your bin. They are ferocious eaters and the worms will not compete with them for food, and eventually starve and die or leave the bin if they can. The Soldier Fly is a very beneficial fly for the environment but not the worm bin. Once they are gone, it is safe to add more worms. In the future, you can cover the food with damp paper, burlap or cardboard or a mosquito net; to keep them from entering and laying their offspring.
Uncle Jim’s
I’m starting a worm farm what do I need to know that is absolutely important to start my farm
how do i get started with composting? I’m new to all this and would like to know exactly what I need to get started ?
Hi Michael,
Welcome to the wonderful world of composting! You do not need much to get started. You will need a bin to house your worms, moist bedding, and of course worms! Once you have your bin set up, and introduce the worms, you can then start adding your worm food such as kitchen scrap or yard waste! If you have any questions along the way please feel to call out office.
Uncle Jim’s Worm Farm
I have raised self watering bins in my garden can I put my red wrigglers straight into my garden bins?