 Everyone loves a productive vermicomposting bin, but no one wants to smell it. At Uncle Jim’s Worm Farm, we want composting with worms to be a pleasant experience. Making free compost out of kitchen scraps and unwanted vegetation is great for gardeners. And it’s better for the environment. You can keep your environment comfortable by reducing worm bin odors.
If you have an outdoor vermicomposting bin, odor might not be too much of a concern. Unless it’s located upwind of your patio, fire pit or swimming pool, you don’t need to go crazy over a little whiff of rotting vegetation. However, a worm bin that could stun a buffalo at 20 paces is a sign that something is amiss. To keep your worms healthy, follow the trouble-shooting steps below.
For indoor worm bins, heading off odor is primary. If housemates, guests or family members start complaining about a “weird smell” when they walk in the door, your worm bin has problems. It is especially crucial to bury the scraps in indoor bins. Also keep the size of scraps small – cut them up or use a food processor, food chopper or blender. And don’t add foods that cause odors. Got odors? Follow the troubleshooting steps:
Worm Bin Smell Trouble-Shooting
1. Are you adding too much food?
If you see a large amount of undigested scraps in the bin, you might be adding too much food, too quickly. Remove some of the food. You can freeze it or throw it away, or cut it up smaller. The worms should be able to work their way through a specific lump of scraps within a week or two. You can guesstimate how much to feed by burying scraps in one corner. A few days later, check and make sure the worms are starting to work on the corner feeding. If you see a good number of worms munching away on those scraps, and the food is breaking down, add another set of scraps right next to it. Work your way gradually around the bin. By the time you get back to the original feeding spot, the scraps should have been converted into “black gold.” Keep feeding like this until you see indications that it’s time to harvest or add a fresh tray (for tray-based systems).
Note: Using a food processor or blender to make gourmet slurry for the composting worms can backfire if you add too much water. Excess water can unintentionally create moisture problems (see #3 below).
2. Are you trying to compost the wrong type of food?
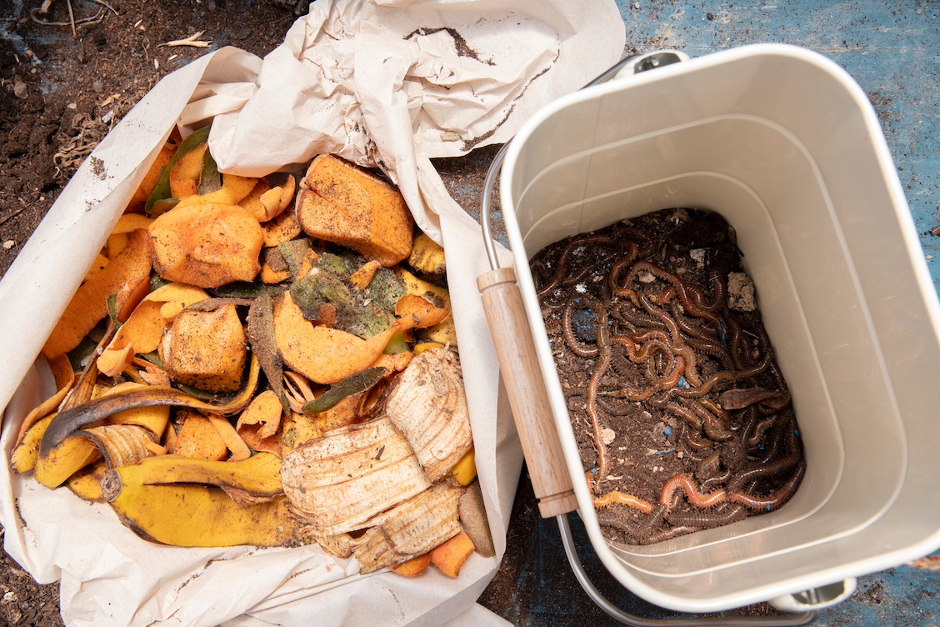
If you have added meat, dairy products, oils, or fats, they will go rancid and stink up the worm bin. Vegetation that is famous for odor are banana peels and cruciferous vegetables, such a broccoli and cabbage. If you must add them, cut into small pieces and add sparingly. Anything that specifically seems to make your bin smell bad should be avoided.
Acid foods can throw off the pH in a bin. Avoid excessive tomatoes, pineapples and citrus scraps.
3. Is it too wet?
A too-wet worm bin might start to smell. Too much moisture is also bad for worms, who breathe through their skins and can drown in wet soil. Aim for bedding that is about as wet as a wrung-out sponge. The texture should be crumbly.
Wet bins get clogged drain holes and then the problems really start! If drain holes aren’t open, clear them of any mud and debris.
If you have any standing water in the bin, soak it up with paper towels, then throw out the towels. (Removing the lid, shining a light to prevent escapees, and blowing a fan over the bedding had an effect on the top of a wet bin, but it didn’t cause any miracles).
Adding dry bedding, such as shredded newspaper or pure peat moss, will soak up the moisture and restore balance. Gently mix it in.
If you follow the troubleshooting steps and still have worm bin odor, post your question on Uncle Jim’s Worm Farm’s Facebook page. Happy composting!



6 thoughts on “Keeping Your Worm Bin Odor-Free”
I made a 3 bin system. Lower bin was for tea collection. The middle bin was sat down onto two 2-liter jugs and had holes in bottom as well as along top of sides. 2nd bin had original bedding. The 3rd and top bin I just started adding scraps to it. The worm were coming up to eat and all was going well for about 2 months. I began noticing a smell and that the 2nd bin was staying very wet. I failed to get it dry enough and all of my worms basically drowned.
I need to start over from scratch.
To keep odor down I use lacto-bacillus which I culture from milk (google bokashi gardening techniques). In concentration it smells like stinky cheese but in diluted form– 1oz per gallon of de-clorinated water– it can be sprayed lightly over the top of the bin for odor control & it won’t smell like cheese. I was amazed. I keep a supply in the refrigerator & when I drench my bin to make tea I add a few ounces of lacto bacillus culture to the water. This inoculates the bin with beneficial microbes which the worms actually like to live with in their tiny guts. It also makes for a happy garden when I use the tea. Odor is kept so low I have to put my nose in the bin to get a slight whiff of “earth”. I keep the lid loose for air exchange. I also drilled hundreds of 1/8″ holes in the sides & top of bin#3. One more thing: Every 2 weeks I hand-stir bin#3 & then sprinkle 1/2″ of dry, fluffy peat moss over the top of to cover odor.
One time I used inoculated newspaper shreds as bedding. The worms consumed it quickly & it worked as a preservative on the foodstuffs which I put under it; the same way it preserves dry salami.
I love this hobby. At the beginning of Spring I saw an explosion of new baby worms that delighted me & the young grandkids. I saw them because I was aerating the bedding with my hands; which I recommend for the health of any bin. It keeps oxygen available, pushes the lower-most castings through the 1/4in mesh to the collector bin & wakes up the population in my home-made 18″x24″ 3-bin system. The importance of oxygenation can be seen in how earthworms will thrive even in a well aerated pond like the one I have, in aquatic plantings & in filters where the water is moving & exchanging gases. Getting fresh oxygen into the bin is critical to its health & wonderful earthy smell. Thanks– Nick
How often should i rinse my worm bin to make worm tea?
We recently had a presenter at our local Extension office who said she has no problem putting in things like meat bones, fish parts and eggshells. High in protein and calcium and whatnot, those are important nutrients to worms as much as they are to everything else. The important thing to keep in mind is to make sure everything is in small pieces and buried properly according to her. She boils and crushes chicken bones before burying them, crushes eggshells a bit more thoroughly, and seems to have no trouble. As for fish parts, she said “it’s just unprocessed fish emulsion.”
i keep bones in my deep freeze for bone broth with i have enough. after the broth is made i pulverize the poultry bones if i am making beef broth then after the broth is made i will pressure cook the bones. my electric pressure cooker will go for 90 minutes. after the bones are prepared i grind them to a fine powder. be sure to allow the bones to dry before you grind them. they make a great powder that i add to my azomite bin (along with my ground egg shells) which is what i use for worm grit.
Be careful with animal meats and fats, those can lead to protein poisoning of your worms. Oily fish flesh may cause problems. The worms digest the animal meats and fats but can not deal with the gases generated, so, the worms end up with bodies like a string of balls. Eventually, the worms die. Ground egg shells and bones act as grit to the worms. They need very little if any. If you add wood chips, bark, leaves to your bin, your worms are getting grit from the attached dirt particles. I add a little ground eggshells and I sanitize them by cooking them first.