


Vermicomposting worms follow a similar life cycle pattern as humans: birth, growth, procreation, and death. In this article, we examine the life cycle of the popular earthworm: Red Wigglers, the Kings of Vermicomposting. These worms are distinctly different from humans when it comes to reproduction. For example, there are no “boy” red worms or “girl” red worms. We find worms fascinating and are grateful for the rich organic fertilizer that they produce from our table scraps.
Red Wigglers’ Reproductive Organs
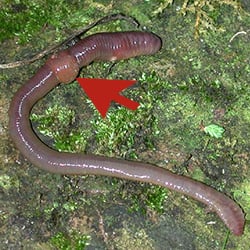
Worms possess both male and female reproductive sex organs. These organs are contained in a bulbous gland called a clitellum. The clitellum is located outside the worm’s body. Although difficult for us to see, it resembles a ring. When the worm is fertile, the clitellum advertises to potential mates. That’s because it becomes visible and turns orange, a signal that all’s clear for making babies. Even though Red Worms are hermaphrodites, they do require another partner to exchange genetic material. In other words, they can’t do it alone.
Reproduction the Red Wigglers Way
Red Worms typically prefer to reproduce in warmer temperatures. They line up side-by-side. The clitellum of each worm secretes mucus and albumin. The worms exchange sperm. When the exchange of genetic material is complete, they separate. The act of separating causes the sperm to mix with eggs, fertilizing them. Then, the worm wiggles out of its clitellum. This forms a cocoon to safely host the fertilized eggs. As the cocoon is deposited on the ground, it automatically seals itself.
The cocoon is as small as a grape seed and golden yellow. It can be found near the worm bin bedding’s surface. Cocoons are very hardy and can withstand freezing temperatures as well as high levels of moisture. A cocoon is so durable that it can last up to a year. The eggs are kept safe inside the cocoon until conditions are right to incubate. Incubation takes approximately three to four weeks. When the cocoon changes color to maroon, the eggs inside are ready to hatch. Each cocoon contains at least four to six baby worms. At birth, the baby worms will be ready to start eating food scraps.
The Life Cycle of a Red Wiggler
We had just discussed the Egg stage of a worm’s life cycle. The Juvenile stage begins after they’re hatched. Baby worms don’t have reproductive organs. They’re only a half-inch long and no thicker than a few strands of hair.
At two to three months’ old, baby worms grow up. They’re deemed officially mature when their reproductive organs fully develop. That kicks off the Mating stage–when they’re ready to reproduce. Once again, the cycle of life repeats itself when the clitellum turns orange.
Your Worm’s Life Span
Under ideal circumstances, two cocoons a week can be produced for each worm. Don’t worry that your worm population will get out of hand and multiply incessantly with no end in sight. Fortunately, your wrigglers are endowed by nature with a natural way of inhibiting births. They will only make babies to the extent of the space within the composting bins. You take good care of your worms, and they can lead a healthy life in the worm bin for up to five years. In return, they will continue to provide you with natural organic fertilizer.
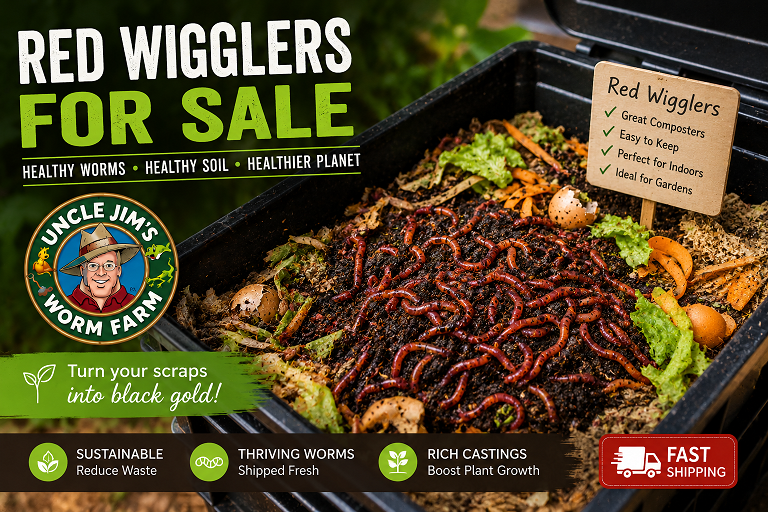
Uncle Jim’s Worm Farm is the #1 supplier of composting worms and supplies. All our worms are born and bred in the USA at our farm in rural Pennsylvania. Check out our Red Worms for composting, and European Night Crawlers for composting, fishing, and aeration.


15 thoughts on “The Life Cycle of Vermicomposting Red Worms”
Can vermicomposting worms use predominantly leaf mulch(oak and maple) as substrate. Do I have to augment?
I am having these bugs inside my worm composting bin. Not sure what they are. Please help me
I assume red wiggler mortality is highest at two stages, first eggs not hatching, secondly when colorless hatchlings are maturing and haven’t reached the more hearty point when they develop color. I’ve noticed hatchlings gathering around raw potato scraps and corn cobs. Is that good for them? Are there other foods or methods that help them survive that delicate time? Thanks!
Not sure if my worms are alive…I see none in my garden tower compost tube…the scraps I add several times a week are compacting and going down but I still don’t see any worms. The plants are doing well on one side but just ok on the other side. Any advice?
How big does the red wigglers get? Will they cross breed with nightcrawlers?
Hi Uncle Jim! I am very interested in purchasing your composting worms and I am excited to learn more about them. What is their scientific name?
I am having a fruit fly problem and was going to do DE in the bin. Will it be ok on the worms?
I have a bunch of big, earthworm size worms in my bin. I ordered red Wigglers. The last batch of worms I got from you doh’t seem to be red wrigglers. The worms do not seem to be eating the vegetable materials that I have put in. In the past, within a month of so the vegetable matter would be turned into dirt and disappear. Now I have a white material that isn’t dirt like at all. Did I get the wrong kind of worms in this shipment?
I’m ready to plant some tomatoes. How do I incorporate the worms I have (from my “hobby kit”) into the planting process? Thanks in advance, for any information.
Wut are Wormies?
whohrms
hi,
Is single cocoon produces one baby worm or more?
thanks.
4-6 baby worm per cocoon
Sugar ants tried to invade the can o worms and these weird little red/ copper mite looking things all around the edges of the can o worms
Will they hurt the worms
Any suggestions for getting rid of them
To get rid of mites already present, try one of these methods: reduce food and water input until mites start to leave; place potato slices, melon rinds, or damp newspaper on the surface of the bedding, then remove when mites have collected there; or water your bin thoroughly until mites come to the surface, then remove mites by torching, shop vacuuming, or sprinkling sulfur on them. If all else fails, replace your worm bedding entirely. Hope this helps!