


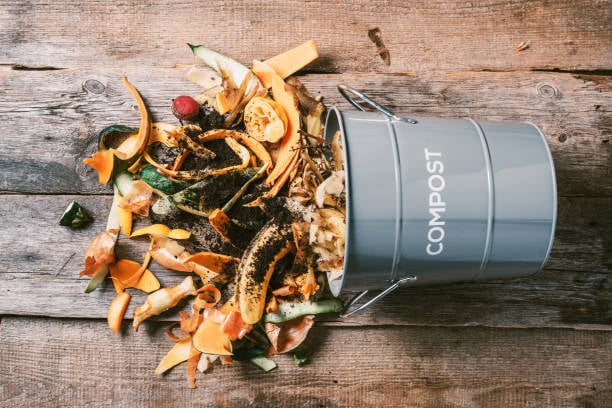
Starting Your Composting Journey
There is an option for every skill level in the composting world, from the different types of composting to the wide variety of materials you can use. From a simple compost pile on the ground to those bulky compost tumblers, there is a way for you to compost your kitchen scraps.
For this blog post, Uncle Jim will show you how and why you should be building a compost bin for your home.
How to Make A Compost Bin Using A Bucket

The start to your composting journey does not have to be complicated. All you really need to make your own compost are green materials (vegetable scraps, coffee grounds, and even grass clippings), carbon-rich brown material (dried leaves and cardboard boxes, and newspapers), and something to place your materials in.
Building a compost bin is not a complicated task, and for beginners, a bucket will do the job just fine. You might ask yourself “How do you make a composter out of a bucket?” Well, let Uncle Jim tell you how.
Materials you need to make your DIY compost bucket
- A bucket
- Lid for the bucket
- Hand drill
- Trash can (to collect food scraps)
- Green and brown materials
- Compost sifter
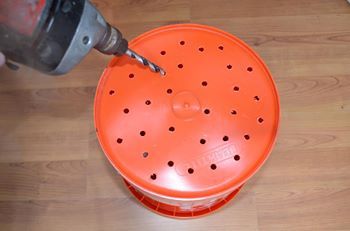
If you have a 5-gallon bucket lying around the house, that is the ideal size for at-home composting; otherwise, buckets of various sizes can be found at your local hardware store. The first step is to drill holes in the bucket’s sides and bottom to allow for airflow and moisture drainage. This is significant because excessive moisture can lead to mold growth.
Optional: To ensure proper drainage, place sticks in the bottom drainage holes to keep them from becoming clogged.
After you have determined the best location on your property, begin putting in your green and brown materials. But do not fill it all the way to the top so air can flow freely and you have room to tumble or stir the compost.
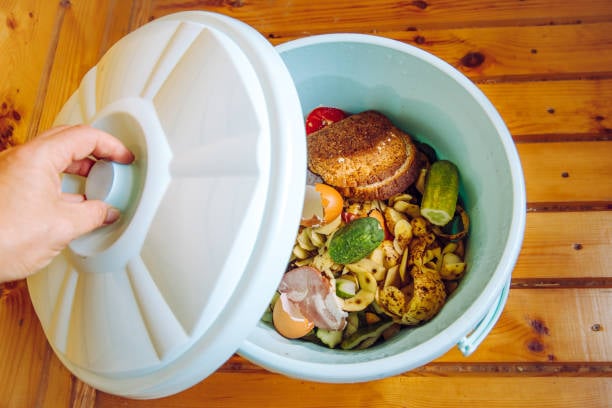
After assembling the bucket compost bin, cover it with a lid to prevent it from being completely exposed to the elements and to discourage any creatures from rummaging through the pile. After that, just keep tumbling and stirring to speed up the composting process.
The final task is to harvest. It is important to note that not everything composts at the same rate. So the first thing you should do is create three piles: one for finished compost, one for halfway done compost, and one for organic materials that still have a long way to go. To ensure the highest possible quality compost, use a sifter to remove any chunks.
That is all there is to it when it comes to composting in a bucket.
Composting in a Bucket Tips From Uncle Jim
The dos and don’ts of composting kitchen scraps and other organic materials
When collecting food scraps, not everything we throw out is suitable for your composting bucket. Organic material can also be divided into two categories green (i.e. veggie scraps) and brown (dried leaves). Below Uncle Jim lists out the most common ones that will serve as a guide for you:
| Do Compost | Don’t Compost | |
| Green Materials | Brown Materials |
|
|
|
|
How to solve common problems when in your diy compost bin
Problems or issues inside any compost pail or bucket are usually caused by a combination of factors that can be easily solved. Here are Uncle Jim’s expert tips for keeping your compost bins healthy:
Dried Out Compost
When the compost bucket starts to dry out, the decomposition process could slow down. This could have a big effect on the quality of the nutrient rich compost you make. Most of the time, this is because there isn’t the right mix of brown and green materials in the bin. This can be fixed by adding in more green materials with a little bit of water until the compost has the consistency of a wrung out sponge.
Foul Smelling Compost Bucket
It is normal for the compost in your bucket to have a slight odor due to the decomposition of organic matter, but it should be concerning if it emits a nasty or foul smell. The most common cause of this is a compost bucket that is too wet from too much green composting materials. This can be remedied by adding more brown compost materials and thoroughly mixing it.
Lack of Airflow
Proper airflow and drainage is needed for a healthy compost bucket. We discussed in the earlier part of this blog about how many holes are needed and where they should be placed but you also need to make sure that you are checking these air and drainage holes regularly to make sure that they are not clogged. A little stir every now and then will also help the air flow through your compost. You can either use a stick of some sort or a compost aerator.
Frequently Asked Questions
How do you maintain a compost bucket?
Fruit flies in compost are one of the most common problems composters have when maintaining the bucket. If there are existing fruit flies in the compost bucket, the best thing to do is dump it all out and do your best to sift through the material.
If your current compost bucket is overflowing and you have some wire, you can make a chicken wire compost bin using sticks or pieces of wood to form the structure. After that, it is just a matter of nailing the wire to the wood and piling in your organic materials.
How long does it take to compost in a 5 gallon bucket?
Composting in a 5-gallon bucket should take about six weeks if it is kept slightly moist, turned often, and has one-third green materials and two-thirds brown materials. The amount of compost in your bucket should be about half of what you started with.
Does Uncle Jim’s Worm Farm sell ready-to-use composters?
Uncle Jim offers all types of compost bins that suit the needs of various indoor and outdoor spaces. A stacked tray system is better for apartments and smaller homes because it keeps things tidy while allowing owners to compost more material than a single tray system.
We have large bins, a compost tumbler, and even a garden bed that can be used for vermicomposting for larger homes. We even have a dog poop composter so you can make something out of your animal waste.


4 thoughts on “Composting in A Bucket”
Hello, I am wondering how long it takes to get compost in a big outdoor composter, one that turns around. Thanks.
Hello Cindy;
Though we are not experts with the tumbler type composters, but from experience, they can take quite a while. Sometimes, longer than we would like. Keep it moist and in the heat and turn the composter regularly, i know that makes a difference. It it best to do some research as we do not have all the answers.
Uncle Jim’s Worm Farm
How many holes are recommended on the bottom and sides of the 5 gallon bucket?
Great guide, Uncle Jim! I love the idea of composting in a bucket—it’s such a practical solution for small spaces. I can’t wait to try out your tips for balancing greens and browns. Thanks for making composting seem so approachable!