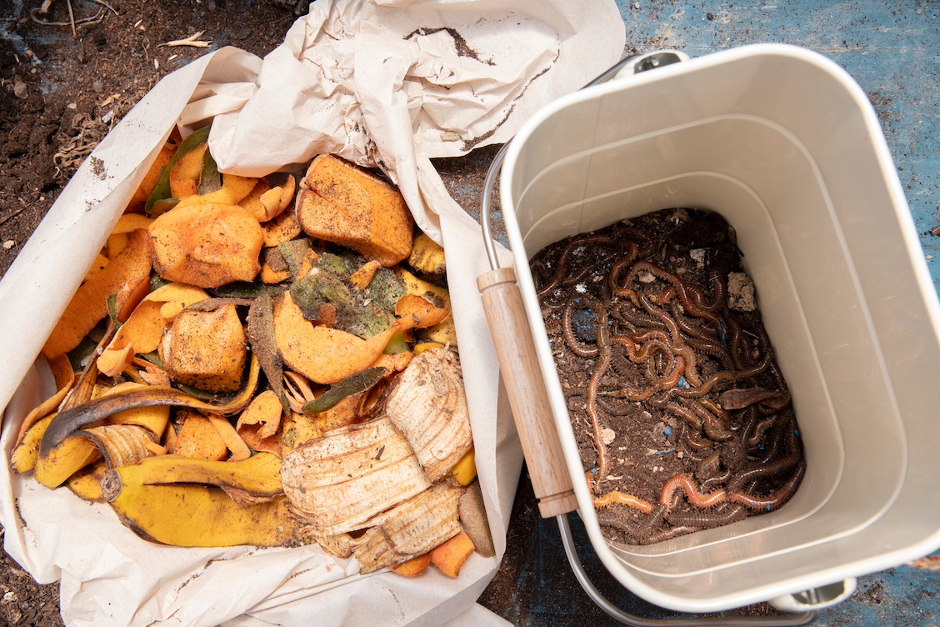
Hey there, fellow or soon-to-be vermicomposters! Today, we’re diving deep into the world of worm bins and exploring the two primary options for housing those wiggly wonders – the good old DIY approach and the convenient commercial bins.
Red Wigglers are the usual stars of the vermicomposting show, and choosing the right home for these little squirmy creatures is crucial. So, grab your gardening gloves!
Let’s roll up our sleeves and get our hands dirty with this comprehensive guide to get you started on your own worm farm and find the best place for your squirmy pals to call home.
Bin There, Done That: Thriving Red Wigglers Starts with Your Worm Bin Choice
Vermicomposting, the process of using earthworms to turn organic waste into nutrient-rich compost, has become increasingly popular among eco-conscious individuals and gardeners. Red Wigglers, scientifically known as Eisenia fetida, are the MVPs of vermicomposting due to their voracious appetite and efficient composting skills. However, for Red Wigglers to thrive, they need a cozy, functional home. That’s where worm bins come into play.
But here’s the catch: There are DIY worm bins and commercial worm bins, each with its own set of pros and cons. And let me tell you, folks, choosing the right worm bin for your Red Wigglers is like picking the perfect dance partner. You want someone who can groove to the same composting beat, not a wallflower who’s too shy to tango with your kitchen scraps. It’s the difference between a smooth, composting cha-cha and a messy, wormy waltz.
So, don’t leave your Red Wigglers twiddling their segments – give ’em a home they can boogie in, and watch that compost pile turn into a swinging garden party! Let’s explore both of these options in detail to help you make an informed decision.
DIY Worm Bins: What’s DIY Composting All About?
Do-It-Yourself, aka DIY worm bins, are like the craft projects of the vermicomposting world. You roll up your sleeves, gather some materials, and create a custom home for your Red Wigglers.
What are the benefits of DIY worm bins? Here’s why some vermicomposters love the DIY composting route:
Cost-Effectiveness
One of the standout advantages of DIY worm bins is their cost-effectiveness. You can repurpose materials like old plastic bins wooden crates, or even build one from scratch using reclaimed wood. This eco-friendly approach not only saves you money but also reduces waste.
Customization Galore
With a DIY worm bin, you have total creative control. You can tailor it to your specific needs, whether you want a compact indoor setup or an expansive outdoor system. Plus, you can choose the materials, colors, and design – it’s like worm bin couture!
Educational Experience
Another compelling benefit of DIY worm bins is the educational experience they offer. Building your own worm bin provides a hands-on learning opportunity that can be incredibly rewarding. Through the process of constructing and maintaining a DIY worm bin, you gain valuable insights into the natural behaviors of these remarkable creatures, which can deepen your appreciation for the delicate balance of a vermicomposting ecosystem.
So, not only do DIY worm bins save you money and let you flex your creative muscles, but they also offer an educational journey that can be both enlightening and fulfilling. You can follow our footsteps and make it a fun family project!
DIY Worm Bin 101
Alright, folks, if you’re gearing up to create your very own DIY worm bin, you’ll need the right tools for the job. So, what do you need to make a worm bin?
Here’s a checklist of the materials and tools you’ll need:
- A container (plastic, wood, or metal) of about a 2-gallon or more capacity.
- A drill or hammer for making ventilation holes
- Worm bedding material (shredded newspaper, cardboard, or coconut coir)
- Red Wigglers
- Worm food: food waste and kitchen scraps (for feeding)
- Two pounds of initial soil blend comprising organic material (distinct from conventional potting soil).
Get ready to rummage through your recycling bin because you’ll want a container, whether it’s an old plastic bin, wooden box (lumber or plywood), or your customized creation. Basic household items like a repurposed garbage bin, a malfunctioning refrigerator, a faulty toilet, or a weathered wooden drawer can all be repurposed into a DIY worm composter.
Next, you’ll need a drill or hammer to get things ventilated – after all, live worms like to breathe easy, too. And don’t forget the bedding material; think shredded newspaper or coconut coir for that snug feeling. Finally, the stars of the show, your Red Wigglers, and some kitchen scraps for their meals.
How to Set Up a DIY Worm Bin: A Step-by-Step Guide
Here are some quick worm composting tips to get you started with your DIY worm bin:
- First, drill the ventilation holes in the container’s lid and sides to ensure your Red Wigglers get enough air. Don’t go overboard; you want aeration, not an escape route!
- Add the bedding material to the container, moistening it until it’s as damp as a wrung-out sponge. This will be your worms’ cozy nest.
- Introduce your Red Wigglers to their new home. Start with a small number and let them settle in before gradually increasing their numbers.
- Feed them a balanced mix of kitchen scraps (avoid citrus, onions, and meat). Bury the scraps under the bedding to prevent fruit fly parties.
- Maintain your DIY bin by checking moisture levels, keeping the bin odor-free, and harvesting the nutrient-rich compost regularly.
Challenges of Going DIY
While DIY worm bins offer fantastic flexibility and cost savings, they come with their own set of drawbacks that you should consider.
- Maintenance: DIY bins require more hands-on maintenance. You’ll need to monitor conditions closely, adjust moisture levels, and ensure proper aeration.
- Aesthetics: Let’s face it, not all DIY worm bins are Instagram-worthy. Some might be functional but not the prettiest addition to your living space or garden.
- Time Investment: Building and maintaining a DIY worm bin can be time-consuming, especially if you’re new to vermicomposting.
Commercial Worm Bins
Now, let’s talk about commercial worm bins. Commercial worm composting bins are like the luxury cars of vermicomposting. They come ready-made with all the bells and whistles you could dream of. So, what are the benefits of commercial worm bins?
Here’s what makes them stand out:
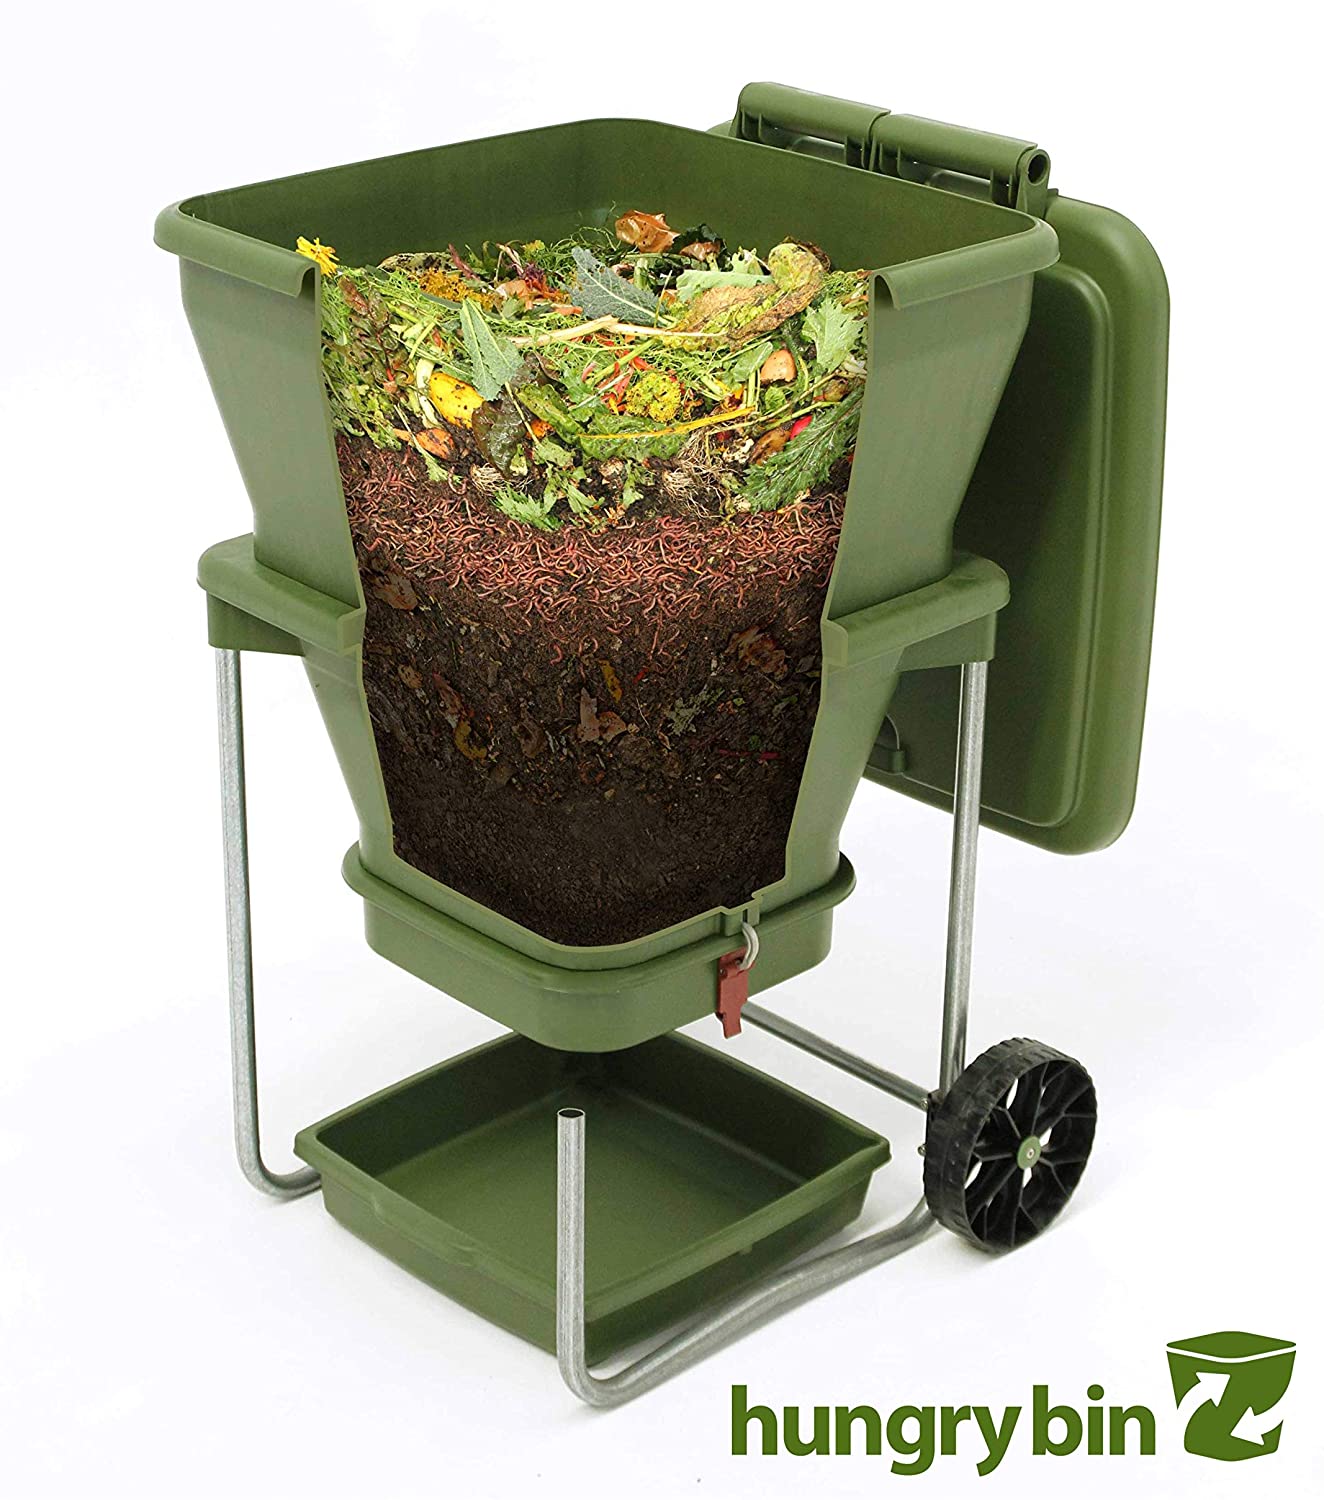
Plug-and-Play Convenience
Commercial worm bins are designed for ease of use. Most of them come with clear instructions, making setup a breeze, even for vermicomposting beginners. Just open the box, follow the steps, and voilà – your Red Wigglers have a new home! No DIY construction, no scavenging for materials, and definitely no measuring twice and cutting once – they roll out, you roll on.
Scalability
Many commercial bins are stackable or modular, allowing you to expand your vermicomposting operation as your waste production and worm population grow. These are like Lego for worm-loving grown-ups.
Reputable Brands
You can find numerous reputable brands offering commercial worm bins, ensuring you get a quality product. At Uncle Jim’s farm, you can find indoor and outdoor composting bins tailored to your specific needs.
Commercial Bin Varieties
When it comes to commercial worm bins, you’ve got options to choose from:
- Stackable Bins: These bins consist of multiple trays that can be stacked on top of each other, with covers to deter pests and maintain bin health. As your worms finish composting one tray, you add another on top, enticing them to move up to the next tray containing fresh food scraps and bedding materials. It’s like a worm condo with room service!
- Flow-Through Bins: These bins keep the party going 24/7and allow you to continuously add kitchen scraps to the top while finished compost is collected at the bottom. It’s a never-ending buffet for your Red Wigglers. As the worms transform organic waste into rich compost, their castings also gradually accumulate at the composter’s base, facilitating the separation of finished compost from the remaining contents of the bins.
- Tumbling Bins: If you want a less hands-on approach, tumbling bins are the way to go. They spin and twirl, aerating the compost and making sure your worms are always living the high life.
- Worm Factory Systems: These complex vermicomposting systems come equipped with multiple trays, a drainage system, and even a spigot for collecting worm tea – that liquid gold your plants will thank you for.
Disadvantages of Commercial Worm Bins to Consider
While commercial worm bins offer a plethora of benefits, there are a few potential downsides to consider:
Cost: Commercial worm bins are pricier than DIY setups. However, the convenience and features may justify the expense for many vermicomposters.
Space: Commercial bins may take up more room than a compact DIY bin, so ensure you have the space to accommodate them.
Complexity: Certain commercial worm bin systems can be more complex to assemble and maintain, requiring a steeper learning curve for beginners.
Comparison: DIY vs. Commercial Worm Bins
Now that you’re on the verge of making a decision, it’s time to weigh the pros and cons and pick the perfect match for you and your squirmy Red Wigglers. Let’s roll up our sleeves and dig into the nitty-gritty of the DIY vs. Commercial worm bin face-off.
Here’s the lowdown on the key factors that should guide your choice to help you decide which worm bin option suits you and your Red Wigglers best:
| Factor | DIY Worm Bin | Commercial Worm Bin |
|---|---|---|
| Cost | Budget-friendly, often using repurposed everyday materials you can find at home |
Relatively higher cost |
| Setup Time | More time-consuming, requires some basic construction skills |
Quicker setup with clear instructions |
| Maintenance | More hands-on, requires regular monitoring |
Easier maintenance with built-in features |
| Aestethics | Varied, may not always look visually appealing |
Designed for functionality, often more attractive |
| Scalability | Limited by the size of the container | Modular designs allow for scalability |
Reader Decision-Making: Choosing the Right Worm Bin Option for Your Vermicomposting Journey
Now that you’re armed with all this juicy information about DIY and commercial worm bins, how do you decide which one is right for you? It really depends on your preferences, budget, and how much time and effort you’re willing to invest in vermicomposting.
1. Assess Your Budget
Consider how much you’re willing to invest in your compost bin. DIY worm bins are budget-friendly and often make use of repurposed or readily available materials you probably have at home, helping you save those hard-earned bucks. Commercial bins, while loaded with features, can be pricier upfront. However, it’s an investment in convenience.
2. Evaluate Available Space
Check your available space indoors or outdoors. Commercial bins might require more room than a DIY setup.
3. Time Commitment
Think about how much time you can dedicate to vermicomposting. Are you eager to get your hands dirty right away, or do you prefer a quick and hassle-free setup? DIY bins require more time and effort, as you’ll be constructing them from scratch and maintaining them, but give you freedom of choice and customization. After four decades of worm-whispering, some of my most unforgettable moments were when I was elbow-deep in my own DIY bin concoctions, so if you’re handy it’s worth the adventure.
Commercial bins usually come with straightforward assembly instructions, saving you time and potential construction headaches if you’re not that nifty and demand less TLC in the long run. They often come with built-in features like proper ventilation, moisture control, and easy harvesting mechanisms designed to make maintenance a breeze, ensuring that your Red Wigglers have a stable and low-maintenance home. If you’re a set-it-and-forget-it type, this could be a game-changer.
4. Aesthetic Preferences
Consider to what extent the appearance of your worm bin matters to you. DIY worm bins can be as charmingly rustic or creatively quirky as your imagination allows. However, not all DIY bins are Instagram-ready; some might be more functional than fancy. On the other hand, commercial bins are often designed with aesthetics in mind and are more visually attractive.
5. Scale of Operations
Are you planning to expand your vermicomposting operation in the future? Commercial bins offer scalability with modular designs that allow you to add trays or components as needed. DIY bins may be limited in this regard due to their initial design. But hey, if you’re crafty enough – the sky’s your limit!
Considerations for Red Wigglers
Now, let’s shift our focus to the real stars of the show – your Red Wigglers. DIY bins allow you to tailor the environment to your preferences and provide your Red Wigglers with an optimal habitat. While flexibility can be great, it also means you’re responsible for creating and maintaining the ideal conditions for your Red Wigglers – they thrive in stable conditions, so your vigilance is key to their well-being.
Smaller DIY bins can work well for smaller Red Wiggler populations, but you’ll need to consider their growth potential. Red Wigglers reproduce prolifically, and you may find yourself needing a larger bin sooner than you expect as they thrive in spacious environments, so if you want to go big – commercial might be the way to go.
Ultimately, the well-being of your Red Wigglers depends on your ability to provide them with the right conditions, regardless of the worm bin type you choose. Whether you choose DIY or commercial composting bins, here are some crucial considerations to ensure the well-being and productivity of your wiggly wonders:
Ventilation
Red Wigglers need oxygen to breathe. Ensure your bin has proper ventilation, especially in DIY setups where you drill holes yourself. Good air circulation is vital for their health.
Bedding
Create a cozy bed for your worms with moist bedding material like shredded newspaper or coconut coir. It should be damp but not soggy. Think of it as a comfy mattress for your wiggly friends.
Space
Red Wigglers are social creatures but also appreciate their personal space. Don’t overcrowd your bin! If you notice them trying to escape, it might be a sign they need more room or less food.
Food
Striking the right balance for a nutrient-rich diet composed of greens and browns is paramount. Learn what you can and cannot feed your worms, and make sure not to overfeed them.
DIY vs. Commercial Worm Bins: The Final Verdict
When it comes to DIY worm bins, the power of creativity and cost-effectiveness reign supreme. DIY bins are perfect for those who enjoy a hands-on approach to vermicomposting and have a tight budget. Crafted from repurposed materials or built from scratch, DIY worm bins provide the freedom to customize according to your space and style preferences. Small-space dwellers can create compact solutions, while creative enthusiasts can let their imaginations run wild. However, be prepared for more maintenance and a learning curve.
Commercial worm bins are the go-to choice for busy individuals seeking convenience and value aesthetics in their composting setup. With easy setup and minimal maintenance, these bins are perfect for those with hectic schedules. Commercial options also offer scalability, allowing you to expand your vermicomposting operation as needed. Their polished designs are ideal for minimalist gardeners, and they’re perfect for those who prefer a straightforward, learning-curve-free experience. While they may come with a higher price tag, their features often justify the investment.
Your Vermicomposting Adventure, Your Worm Bin, Your Rules
In the quest for the perfect home for your Red Wigglers, you have two main contenders. Both have their merits, and when it comes down to it, the choice between DIY and commercial worm bins boils down to your preferences, budget, and how much time and effort you’re willing to invest in your vermicomposting journey. Make your ideal pick armed with these insights!
Whatever worm bin option you go for, your squirmers are in for a composting adventure as both paths lead to the same eco-friendly destination – turning kitchen scraps into rich, nourishing compost with the help of your trusty Red Wigglers. Remember, whether you’re a seasoned vermicomposting veteran or just dipping your toes into the wiggly world of Red Wigglers, providing a loving and sustainable home for our eco-friendly composting champions is most important.
You can find all the supplies you need to do so at Uncle Jim’s Farm. Happy composting, and may your Red Wigglers thrive in their new abode!
