


Quick Summary: Harvesting worm castings is easier than you think — and spring is the best time to use them. In this guide, we’ll show you exactly how to separate castings from worms, when to harvest, and how to apply them in your garden beds, containers, and seedlings for maximum growth.
Why Worm Castings Are Garden Gold
Worm castings (also known as vermicompost) are one of the most effective organic soil amendments available. Rich in plant-available nutrients, beneficial microbes, and humic acids, castings improve soil structure, water retention, and root development.
According to the Rodale Institute, castings contain 5x more nitrogen, 7x more phosphorus, and 11x more potassium than ordinary topsoil.
-
- Faster seedling growth
- Healthier root systems
- Increased resistance to pests and disease
When Are Worm Castings Ready to Harvest?
Castings are usually ready 2–4 months after starting a new worm bin. You’ll know it’s time when:
- The bottom tray or layer of your bin is dark brown or black
- It smells earthy and crumbly (like forest soil)
- Food scraps have mostly disappeared
If you’re using a multi-tray system like the Worm Farm Kit, simply rotate trays from bottom to top for easy harvesting.
3 Easy Methods to Harvest Worm Castings
1. Side-to-Side Migration
Push all compost to one side and add fresh bedding + food to the empty side. Over several days, worms will migrate to the food, allowing you to scoop out the finished castings.
2. Light Method (Manual Sorting)
Dump finished compost onto a tarp or bin lid under bright light. Worms will burrow down, and you can carefully scrape off the top layer of castings. Repeat until mostly worms remain.
3. Use a Sifter
For large harvests, use a compost sifter to separate fine castings from chunks and worms. Uncle Jim’s offers a Worm Casting Sifter designed for standard bin trays.
How to Store Worm Castings (If Not Using Immediately)
Worm castings are best used fresh, but they can be stored short-term if kept moist and aerobic.
- Use a breathable container like a cloth bag or open bin
- Keep out of direct sun
- Mist with water occasionally to maintain moisture
NEVER store castings in a sealed plastic bag — this can cause anaerobic conditions and kill beneficial microbes.
How to Use Worm Castings in Your Garden This Spring
1. Seed Starting Mix
Blend 10–20% worm castings into your seedling soil. This boosts early root development and reduces transplant shock.
2. Transplant Hole Boost
Add a handful of castings into each hole when transplanting spring vegetables. This places nutrients exactly where young roots need them.
3. Top Dressing Garden Beds
Sprinkle 1/4 inch of castings over soil and water in. Do this before or after planting to enhance fertility and microbe activity.
4. Worm Tea (Liquid Fertilizer)
Stretch the power of your worm castings by brewing an aerated compost tea — Carrie Hargrove from the Columbia Center for Urban Agriculture shows how to build a DIY system and brew worm tea using 1 gallon of unchlorinated water, ¼ lb of castings, and ½ tbsp of unsulfured molasses for a microbial-rich fertilizer.
Why Worm Tea Works Wonders
- 🦠 Loaded with Beneficial Microbes: Worm tea is rich in aerobic bacteria and fungi that improve soil health and boost nutrient uptake in plants.
- 🌱 Fuels Healthy Root Growth: Studies show that microbial activity from worm tea can stimulate root elongation and branching — especially in seedlings.
- 🛡️ Natural Disease Resistance: The microbes in worm tea can help suppress harmful pathogens like root rot fungi and powdery mildew.
- ♻️ Fast-Acting, Liquid Form: Unlike solid castings, worm tea delivers nutrients quickly through leaves and roots — perfect for weekly feeding.
- 🐛 Eco-Friendly & Homemade: No chemicals, no runoff, and 100% DIY with simple materials you likely already have at home.
Real-World Results: Why Gardeners Love Worm Castings
A 2021 study in Agronomy found that plants grown with vermicompost showed significantly better height, root mass, and chlorophyll content than those grown in compost alone.
What If You Don’t Have Enough Castings Yet?
If your worm bin is still building up castings or you want to boost your garden soil this spring, consider adding Uncle Jim’s Worm Castings – Organic Fertilizer, available in 4 lb, 10 lb, and 20 lb bags for a nutrient‑rich soil amendment straight from our own composting pits.
What About Mealworms vs. Redworms?
If you’re new to vermicomposting, you may have come across references to both mealworms and redworms. While both are technically worms, they serve very different purposes — and only one belongs in your compost bin.
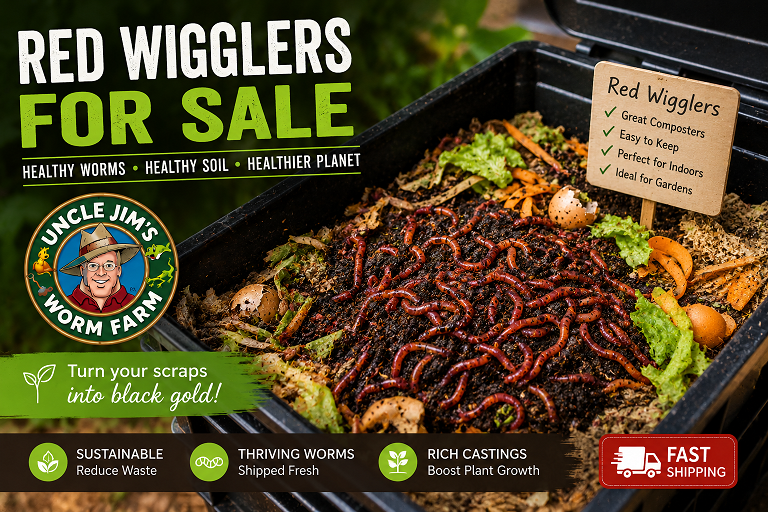
Redworms (Eisenia fetida): The Composting Champions
These are the worms you want for harvesting castings. Redworms thrive in moist, organic matter and are surface dwellers, meaning they live and feed in the top layers of your worm bin. They reproduce quickly and are highly efficient at converting food scraps into nutrient-rich vermicompost.
Uncle Jim’s live Red Composting Worms are specially raised for this purpose and arrive ready to go.
Mealworms: Not for Composting
Mealworms are the larval stage of the darkling beetle and are typically raised as feeder insects for reptiles, birds, and pets. They prefer dry environments and do not compost food waste or produce castings like redworms do. In fact, introducing mealworms into a worm bin can throw off the ecosystem balance.
Unless you’re raising feeder insects intentionally, mealworms should not be part of your composting setup.
TL;DR:
- Use redworms for composting food scraps and creating castings
- Use mealworms only for feeding animals — not composting
If you’re comparing worm types, note that vermicomposting experts recommend surface‑dwelling composting worms like Red Wigglers (Eisenia fetida) because they thrive on decomposing food waste in a bin — while other species or larvae (like mealworms) are not adapted for this process. You can read more about recommended vermicomposting worms and why they work well in a home bin on the Oklahoma State University Extension vermicomposting guide.
Common Mistakes to Avoid
-
- Waiting too long: Over-matured bins may become compacted or anaerobic.
- Removing too much bedding: Always leave some bedding behind for worms to rebound.
- Drying castings out: Keep them moist to preserve beneficial biology.
Quick Recap: Harvesting & Using Castings
- ✅ Check trays for dark, crumbly soil-like material
- ✅ Use manual or sifting methods to separate worms
- ✅ Apply castings to seedlings, garden beds, or brew into tea
- ✅ Store in breathable containers, not sealed bags
Get the Most Out of Your Worm Bin
Spring is the perfect time to put your castings to work. Whether you’re growing vegetables, herbs, or flowers, your soil will thank you.
Ready to take the next step?
👉 Want to grow more this season? Read our beginner guide: New Year, New Bin: A Beginner’s Guide to Worm Composting
What’s Next?
Coming Soon: A complete guide to indoor worm composting for small spaces — how to manage bins in apartments, closets, basements, or even under the kitchen sink. Perfect for year-round composting!
Make sure to subscribe to our newsletter or check back weekly — new articles drop twice a month throughout the growing season.
We Want to Hear from You!
Is there a specific composting topic you’d like us to cover next? Whether it’s troubleshooting pests, composting in extreme weather, or using castings for specific plants — we want your input!
Drop us a comment below, we read every suggestion and may feature your question in an upcoming post.
About the Author
Uncle Jim has been raising composting worms on his farm in rural Pennsylvania for over 40 years. As the founder of Uncle Jim’s Worm Farm, he’s helped thousands of gardeners and eco-conscious households turn their food waste into black gold. His advice has been featured in national gardening magazines, sustainability blogs, and soil health workshops across the U.S.
Learn more about our mission and team here: About Uncle Jim’s Worm Farm
Don’t forget to follow Uncle Jim’s Worm Farm on Instagram for tips, behind-the-scenes videos, composting inspiration, and worm farm updates straight from the soil!


2 thoughts on “How to Harvest Worm Castings & Use Them in Your Garden This Spring”
I remain unclear about how to put these mealworms
in some sort of container or feeder whereby the blue
birds can eat them but they can’t crawl away!??
I’m a physician so I would guess I have at least average intelligence?
A box the size of shoebox; holes for oxygen, a bran layer about a third of the depth of the box!
HOW DO THE BLUE BIRDS GET THEIR MEALWORMS?
I am totally uninterested in castings!!
Finding it hard to find shipping bags to sell
The castings …even the material to search.