


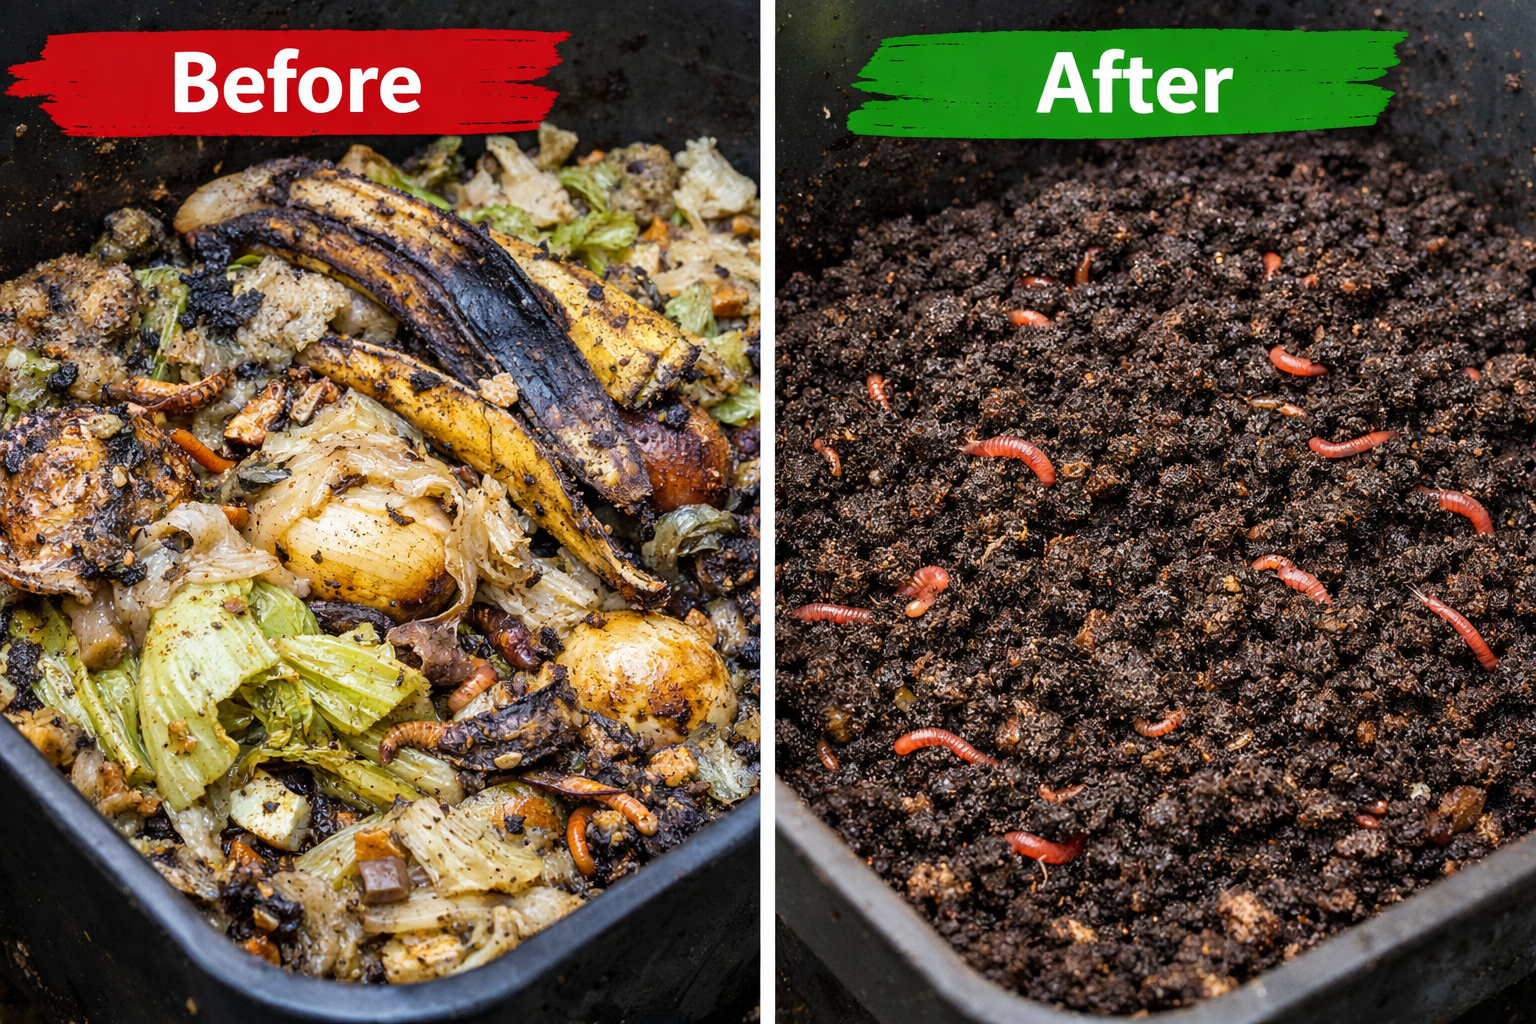
If you’ve opened your worm bin and noticed food just sitting there—untouched, soggy, or even starting to smell—you’re not alone. One of the most common frustrations in vermicomposting is when worms suddenly seem to stop eating.
At first, it’s confusing. You’re feeding them the same way you always have, the bin looks fine, and yet… nothing is happening. No breakdown, no visible activity, just a slow, stalled system.
Here’s the truth most beginners don’t realize:
👉 When worms stop eating, it’s usually not about the food—it’s about the environment.
Understanding why this happens is the key to fixing it quickly. And in most cases, the solution is simpler than you think.
Quick Summary: Why Your Worms Aren’t Eating
If your worms have slowed down or stopped eating, one of these common issues is usually the cause:
- Overfeeding: Too much food builds up faster than worms can process it
- Temperature stress: Worms become inactive if it’s too hot or too cold
- Poor bedding conditions: Compacted or overly wet bedding reduces oxygen
- Lack of airflow: Worms need oxygen to stay active and feed properly
- Food not broken down yet: Worms eat microbes, not fresh scraps
- Wrong worm species for your setup: Some worms struggle in changing conditions
👉 The good news: most of these problems can be fixed quickly once you identify the cause.
The #1 Mistake: Overfeeding Your Worms
If there’s one mistake almost every vermicomposter makes at some point, it’s this: feeding too much, too often.
It feels harmless. After all, worms eat food scraps—so giving them more should help them work faster, right? In reality, the opposite happens. When too much food is added at once, it begins to pile up before worms can process it, creating a backlog inside the bin.
Here’s the part most people don’t realize: worms don’t actually eat fresh food right away. They feed on the microorganisms that break down that food. So when you add large amounts of scraps, you’re not speeding things up—you’re overwhelming the system. The food sits, moisture builds, and oxygen levels drop.
As conditions worsen, worms naturally slow down or move away from the feeding area. In some cases, they may stop eating almost entirely. What looks like a feeding problem is actually an environmental imbalance caused by too much input at once.
🔍 Signs You’re Overfeeding
- Food scraps are still visible after several days
- The bin smells sour or rotten
- Wet, compacted layers form at the bottom
- Worms are clustered away from food zones
- You notice fruit flies or pests
💡 Quick Fix
- Stop adding food for a few days
- Gently mix or fluff the bedding to improve airflow
- Add dry bedding (cardboard, paper, leaves) to absorb excess moisture
Once the system stabilizes, you can resume feeding—but at a slower pace.
Food Isn’t the Problem, Your Bin Conditions Are
It’s easy to assume worms stop eating because of the food itself—but in most cases, that’s not the real issue. Worms are incredibly efficient when conditions are right. When they slow down, it’s usually because their environment isn’t supporting them.
A worm bin is a living ecosystem. It depends on the right balance of moisture, airflow, temperature, and microbial activity. When any one of these factors is off, the entire system becomes less efficient. Worms respond quickly to these changes by reducing activity or moving away from problem areas.
One of the biggest factors is oxygen. Composting worms need a well-aerated environment to thrive. When bedding becomes compacted or overly wet, oxygen levels drop. This creates conditions where beneficial microbes decline and anaerobic bacteria take over—slowing down decomposition and making the bin less hospitable.
Moisture plays a similar role. Worms need a damp environment, but too much water can suffocate the system. Instead of breaking down food efficiently, the bin becomes dense and sluggish. This is often when odors start to appear, and feeding activity drops off.
The key takeaway is simple:
Healthy worms don’t need better food—they need better conditions.
Once the environment is balanced, worms will naturally return to feeding and processing waste efficiently.
Temperature: The Silent Killer of Worm Activity
Temperature is one of the most overlooked reasons worms stop eating—and one of the most important.
Worms are living organisms, and like most biological systems, their activity is directly tied to temperature. When conditions are too cold, their metabolism slows down. When it’s too hot, they become stressed and may try to escape or shut down entirely. In both cases, feeding activity drops significantly.
This is especially common during seasonal transitions like early spring. Warm daytime temperatures can make a bin seem active, but sudden drops at night can quickly slow everything down. These constant fluctuations create instability, making it harder for worms to maintain consistent feeding behavior.
Unlike surface-dwelling worms, some species are better equipped to handle these changes. Worms that can move deeper into bedding or soil are able to find more stable temperatures below the surface. This natural behavior allows them to stay active even when conditions above are less predictable.
If your worms have stopped eating and everything else seems fine, temperature may be the hidden factor. Even small shifts can have a noticeable impact on how efficiently your system runs.
🔍 Signs Temperature Is the Problem
- Worms are sluggish or barely moving
- Food breakdown has slowed significantly
- Worms are clustered deep in the bin (too hot) or tightly grouped (too cold)
- Activity changes drastically between day and night
💡 Quick Fix
- Keep bins in a stable environment when possible
- Avoid direct sun or extreme cold exposure
- Add insulation (cardboard, bedding, mulch) to regulate temperature
- Monitor seasonal changes, especially in spring and fall
👉 The more stable the temperature, the more consistent your worms will be.
Bedding Problems That Stop Worms from Eating
If your worms aren’t eating, the issue might not be the food at all—it could be the bedding they’re living in.
Bedding is more than just filler in a worm bin. It acts as the worms’ habitat, regulating moisture, airflow, and temperature. When bedding is balanced, worms thrive. When it’s off, even slightly, the entire system can slow down.
One of the most common issues is compacted bedding. Over time, especially in bins that aren’t regularly fluffed or maintained, materials can become dense and compressed. This reduces airflow and creates low-oxygen conditions that worms naturally avoid. As a result, they stop feeding in those areas.
On the other end of the spectrum, bedding that’s too wet can create similar problems. Excess moisture fills air pockets, leading to a heavy, soggy environment where decomposition slows, and odors begin to form. Worms may retreat or become inactive rather than continue feeding.
🔍 Signs Your Bedding Is the Problem
- Bedding looks dense, muddy, or clumped together
- Water pools or drips from the bin
- Food is sitting in one area without breaking down
- Worms are avoiding certain sections of the bin
- A sour or musty smell develops
💡 Quick Fix
- Gently fluff or turn the bedding to restore airflow
- Add dry materials like shredded cardboard, paper, or leaves
- Remove excess food buildup if present
- Aim for a texture similar to a damp sponge—not wet or compacted
👉 Healthy bedding creates the conditions worms need to stay active and feed consistently.
Wrong Foods That Slow Everything Down
While food isn’t usually the main reason worms stop eating, certain types of scraps can definitely slow things down—especially when combined with other issues like poor airflow or excess moisture.
Some foods take much longer to break down, which delays the microbial activity worms rely on. Large chunks of vegetables, thick peels, or overly fibrous materials can sit in the bin for days without much change. During that time, worms may ignore them entirely.
Other foods can disrupt the balance of the bin. Highly acidic scraps like citrus or oily processed foods can create conditions that worms naturally avoid. This doesn’t mean a single piece will ruin your bin—but consistent use can lead to reduced feeding activity over time.
The key is not perfection, but balance. When food is added in appropriate amounts and prepared properly, worms will process it efficiently. When it isn’t, even a healthy bin can slow down.
💡 Quick Fix
- Chop or break down food into smaller pieces
- Avoid large amounts of citrus, oils, or processed foods
- Bury food lightly to encourage microbial activity
- Feed only when the previous food is mostly processed
Think of feeding as supporting the system—not just adding scraps.
How to Tell If Your Worms Are Healthy (Even If They’re Not Eating Much)
A slowdown in feeding doesn’t always mean your worms are in trouble. In many cases, worms adjust their activity based on conditions, and temporary changes are completely normal.
Healthy worms are typically active, responsive to light, and distributed throughout the bin rather than clustered in one area. You may also notice castings—dark, crumbly material—which indicate that processing is still happening, even if it’s slower than usual.
It’s also normal for worms to move deeper into bedding when conditions shift. This doesn’t mean they’ve stopped working—it often means they’ve found a more stable environment below the surface.
Instead of focusing only on how fast food disappears, look at the overall system. A healthy bin may not always be fast, but it should be stable, odor-free, and balanced.
🔍 Signs Your Worms Are Healthy
- Active movement when disturbed
- Even distribution throughout the bin
- Presence of worm castings
- No strong or unpleasant odors
- Gradual (not instant) food breakdown
Slow doesn’t always mean unhealthy—it often just means conditions need adjustment.
How to Restart a Slow Worm Bin (Step-by-Step)
If your bin has completely stalled, the good news is that it can usually be fixed quickly with a few simple steps.
Start by pausing feeding. Adding more food to a struggling system only makes the problem worse. Give your worms time to catch up and rebalance the environment.
Next, check the bedding. If it’s compacted or overly wet, gently fluff it and mix in dry materials like shredded cardboard or paper. This improves airflow and helps restore oxygen levels.
Then, assess moisture. If the bin feels soggy, add dry bedding. If it’s too dry, lightly mist with water. Aim for a damp, sponge-like consistency.
Finally, give it time. Worm systems are biological, not mechanical. Once conditions improve, worms will naturally return to feeding without the need for any drastic intervention.
💡 Quick Reset Checklist
- Stop feeding temporarily
- Fluff and aerate bedding
- Add dry material if too wet
- Adjust moisture levels
- Wait a few days before feeding again
Most bins recover quickly once the environment is corrected.
Why Worm Type Matters More Than You Think
Even with perfect feeding and ideal conditions, not all worms perform the same. Different species have different behaviors, tolerances, and strengths—and this can directly impact how well your system runs.
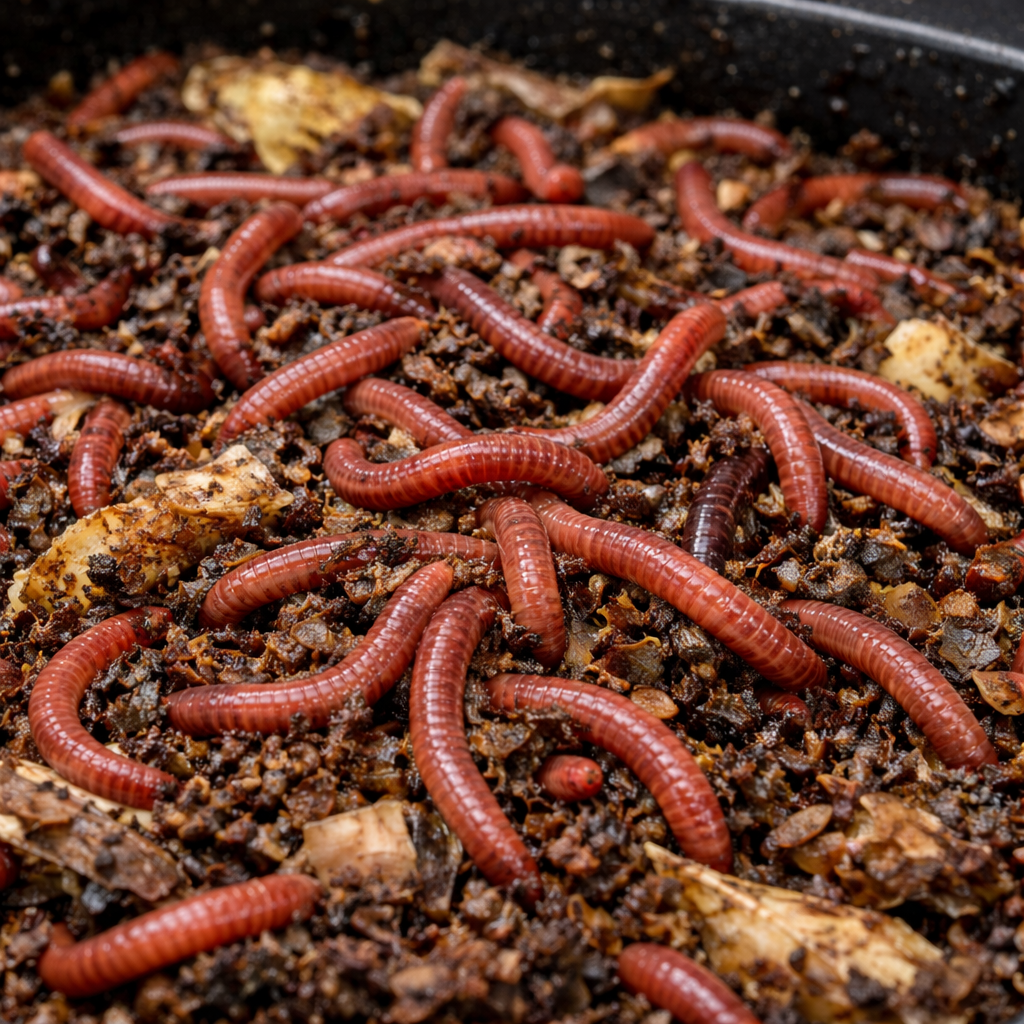
Some worms, like Red Wigglers, are excellent at quickly processing food near the surface. They thrive in controlled environments and are known for their speed and efficiency.
Others, like European Nightcrawlers, offer a different advantage. They are more adaptable to changing conditions and tend to burrow deeper, which helps regulate temperature and improve aeration. This makes them especially useful in outdoor bins or environments where conditions fluctuate.
If your worms consistently struggle despite proper care, it may not be your setup—it may be the species. Choosing a worm that matches your environment can make composting significantly easier and more consistent.
The right worm doesn’t just survive—it performs.
Pro Tip: Feed for Performance, Not Just Survival
Most beginners focus on what worms can survive on. More experienced composters focus on how to help worms perform at their best.
Feeding smaller amounts more consistently, maintaining balanced bedding, and keeping conditions stable all contribute to a more efficient system. When everything is aligned, worms process waste faster, produce more castings, and require less troubleshooting.
It’s not about doing more—it’s about doing things in the right order and maintaining balance.
What Now?
If your worms have stopped eating, don’t panic—this is one of the most common (and fixable) issues in vermicomposting.
In most cases, the solution isn’t changing what you feed, but improving the conditions inside your bin. Once the environment is balanced, worms naturally return to feeding and processing waste efficiently.
If you’re setting up a new system or looking to improve your results, choosing the right worms and materials can make the process much easier from the start.
A well-balanced system doesn’t just work—it works consistently.
FAQ
Why are my worms not eating food?
Worms usually stop eating due to environmental issues such as overfeeding, poor airflow, temperature changes, or improper moisture levels—not the food itself.
How long can worms go without eating?
Worms can survive for weeks without new food, as long as bedding contains organic material. However, their activity will slow down.
Should I remove uneaten food?
If food is building up or causing odors, it’s best to remove some of it and rebalance the bin before feeding again.
How do I know if my worm bin is healthy?
A healthy bin has active worms, balanced moisture, no strong odors, and gradual food breakdown.
About the Author
Uncle Jim’s Worm Farm Team
With over 50 years of experience in vermiculture, Uncle Jim’s Worm Farm has helped gardeners, educators, and growers build successful composting systems across the country.

2 thoughts on “Why Your Worms Aren’t Eating (And How to Fix It Fast)”
How much coffee grounds can you add to 50lbs dirt?
get this question a lot, especially from people who drink a lot of coffee and hate throwing the grounds away.
If I’ve got 50 lbs of soil, I personally stick to adding about 5 to maybe 10 lbs of used coffee grounds. That keeps me in that safe 10–20% range, where the grounds actually help the soil instead of causing problems.
I learned the hard way that more isn’t better. The first time I tried it, I dumped way too many grounds into a mix thinking I was “supercharging” it — and the soil got dense, held too much moisture, and just didn’t perform the way I expected.
Now I always mix them in evenly and don’t let them clump up or sit on top.
Honestly though, the best results I’ve ever had came when I stopped adding coffee grounds straight to soil altogether and started feeding them to my worms instead in a composting bin.. The worms break everything down and turn it into castings, which is on a completely different level. It takes the guesswork out of it.
So if you’re just mixing directly into soil:
I’d stay around 5–10 lbs per 50 lbs soil
Mix it in well
Don’t go overboard