


Worm farming, also known as vermiculture, is a fantastic way to recycle organic waste, enrich your soil, and reduce your environmental footprint. If you live in South Texas, you might be wondering if the warm climate poses a challenge to raising worms. The good news is that starting a worm farm in South Texas is not only possible but also rewarding with the right approach. Here’s a step-by-step guide to get you started.
Why Start Worm Farming?
Worm farming is perfect for eco-conscious gardeners and anyone looking to improve their garden’s soil quality. Worms produce nutrient-rich castings, commonly referred to as “black gold,” which can supercharge your plants’ growth. Plus, it’s a great way to reduce food waste and live more sustainably.
Step 1: Choose the Right Worms
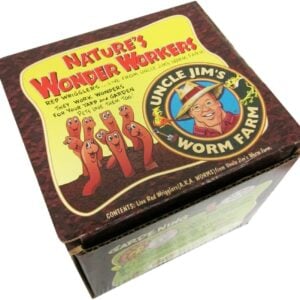
Not all worms are suited for composting, especially in warm climates. Red wigglers (Eisenia fetida) are the best choice because they thrive in a variety of conditions, including higher temperatures. They are easy to care for and highly efficient at breaking down organic matter.
Step 2: Select the Right Worm Bin
In South Texas, the heat can be intense, so your worm bin needs to provide protection:
- Material: Use a durable, well-ventilated plastic or wooden bin like our Worm Farm Starter Kit.
- Size: For beginners, a small to medium-sized bin is perfect. As your worm population grows, you can expand.
- Location: Place the bin in a shaded, cool area, such as a covered patio, garage, or under a tree. Avoid direct sunlight, as it can overheat and harm the worms.
Step 3: Prepare the Bedding
Worms need a comfortable environment to thrive. For bedding:
- Use shredded newspaper, coconut coir, or dried leaves.
- Moisten the bedding until it feels like a wrung-out sponge.
- Fill the bin about two-thirds full with bedding before adding the worms.
Check out our Worm Bedding Guide for more tips.
Step 4: Feed Your Worms the Right Way
Worms love organic scraps but are picky eaters. Start with small amounts of the following:
- Fruit and vegetable peels
- Coffee grounds and filters
- Eggshells (crushed)
- Small amounts of bread
Avoid feeding them:
- Meat, dairy, or greasy foods
- Citrus fruits in large amounts
- Spicy or salty scraps
Add food to one section of the bin at a time and cover it with bedding to avoid pests. Explore our detailed Worm Feeding Guide for more dos and don’ts.
Step 5: Manage the Heat
South Texas temperatures can soar, so keeping your worms cool is essential:
- Frozen Water Bottles: Place a frozen water bottle inside the bin (wrapped in cloth) to cool it down during hot days.
- Spray Water: Keep the bedding moist but not soggy to prevent overheating.
- Elevate the Bin: Raise the bin off the ground to improve air circulation.
Step 6: Harvest Worm Castings
After a few months, you’ll notice a build-up of rich, dark worm castings. These can be harvested by:
- Moving the worms and bedding to one side of the bin.
- Adding fresh bedding and food to the empty side.
- Waiting a few weeks for the worms to migrate before scooping out the castings.
Looking for tools to help? Check out our Compost Harvesting Tools.
Common Challenges and Tips
- Overheating: Monitor the bin’s temperature regularly. Aim for a range of 55–77°F.
- Pests: Keep the bin covered with a lid or breathable fabric to deter flies.
- Odor: A well-maintained worm bin should not smell. If there’s an odor, reduce feeding or check for soggy bedding.
Ready to Start Your Worm Farm?
Starting a worm farm in South Texas is not only feasible but also a great way to contribute to sustainability and improve your garden. By choosing the right worms, setting up a proper bin, and managing the heat, you’ll be on your way to successful vermiculture in no time.
Have more questions? Feel free to reach out to us or explore our worm farming supplies to get started today!


4 thoughts on “How to Start Worm Farming in Hot Climates: A Guide for South Texas Gardeners”
Can I add night crawlers and/or red diggers to my raised beds? I live in eastern NC growing zone 8A. Beds are 3 ft high by 42inches wide and 6 feet long.
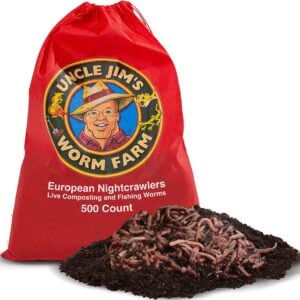
Hello Joan; We recommend that you add the European Night Crawler for in the ground or raised bed gardens. They are a hardy worm that can live off of the nutrients in the soil and burrow deeper which helps to protect them from the elements. We recommend 5-10 per square surface foot of soil. We also recommend that you add them in the early spring after the danger of frost or fall after the worst of the heat is over.
Uncle Jim’s Worm Farm
What kind of worms would I use for outdoor compost bin in south Texas
You can use the Red Composting Worm Mix or the European Nightcrawlers or both, They love all of the same foods and conditions. The nightcrawlers are hardy worms but eat slower than the composting worms, they burrow deeper and more independently, where the Composting worms are shallow dwelling worms that stay in colonies around a food source usually. Keep all of your worms in a shaded area and keep the bedding moist. You can give them frozen scraps on hot days or add frozen water bottles to cool an overheated bin down. Avoid overfeeding and adding too many leaves or grass clippings all at once.