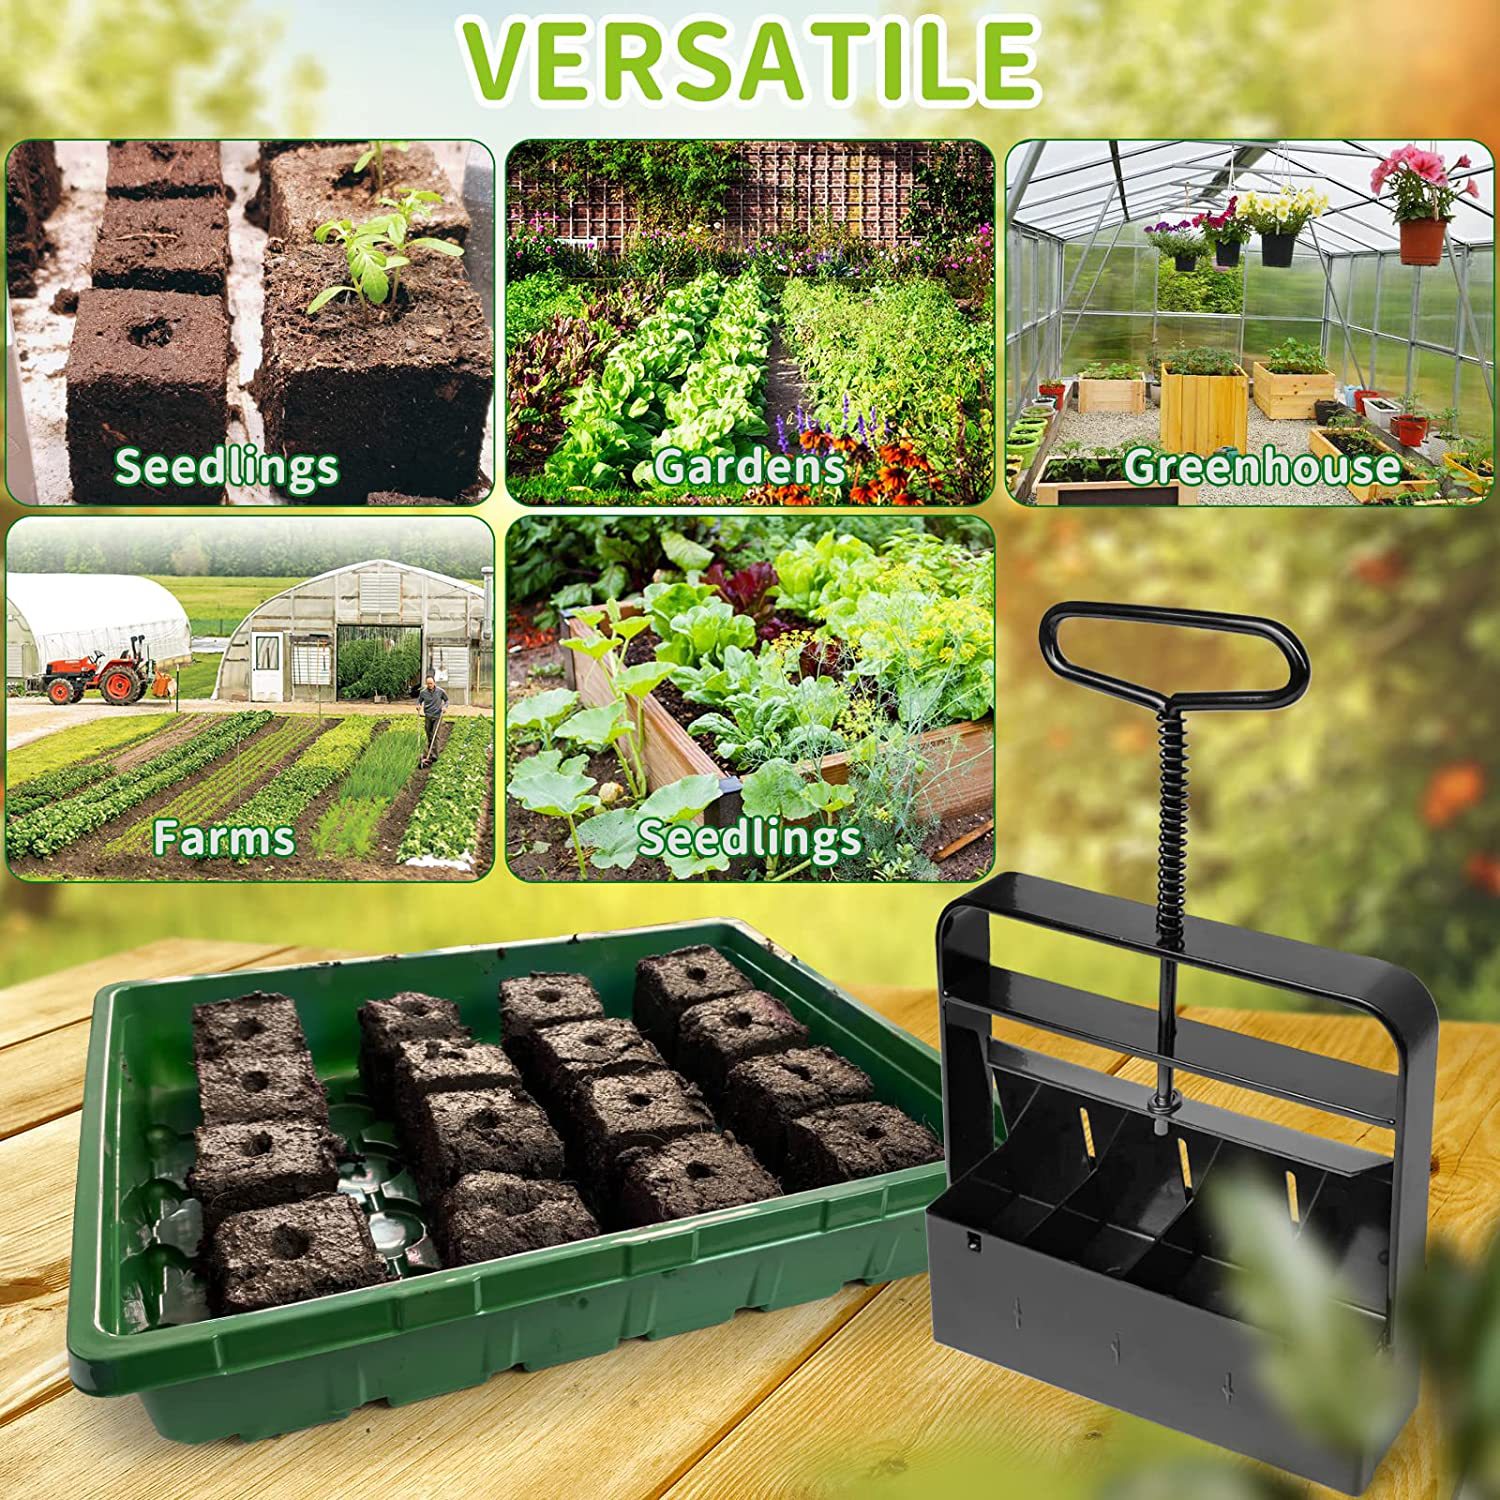
4 Cell Compost / Soil Cube Maker Tool

Original price was: $58.95.Current price is: $49.95.

Skip the plastic pots. The 4-Cell Soil Blocker presses your own growing mix into four perfect 2-inch cubes — each one with a built-in seed dimple ready to plant. Stronger roots, less waste, better germination. This is how serious gardeners start their seeds.


  • Makes 4 perfect 2-inch soil blocks in one press — no pots, no trays, no plastic waste
  • Built-in ball inserts create a seed dimple on every block automatically
  • Galvanized steel construction — rust resistant, corrosion resistant, built to last seasons
  • Ergonomic non-slip handle with spring-release mechanism makes blocking effortless
  • Works with any quality potting mix or homemade compost blend
  • Free Shipping

Category:

Description

4-Cell Soil Blocker Tool

Ditch the Plastic. Start Better Seeds.

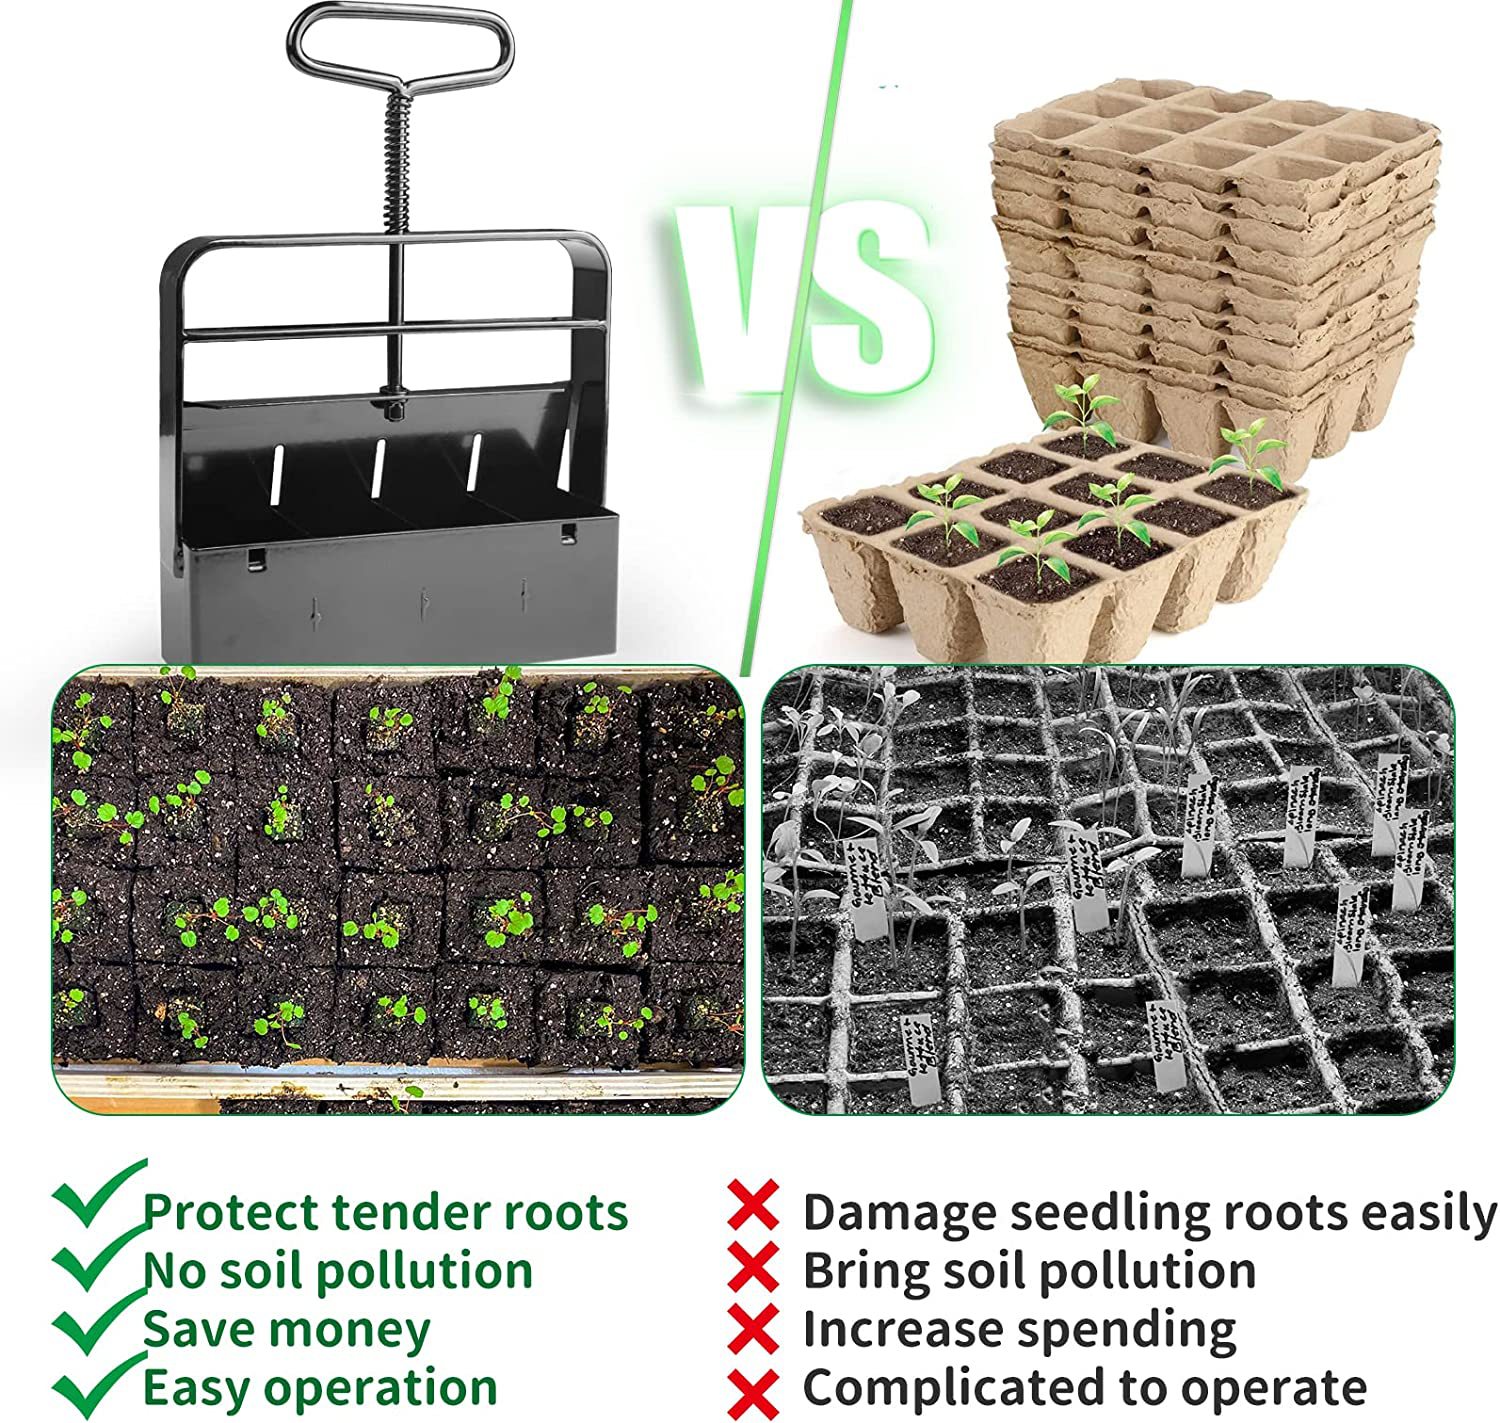
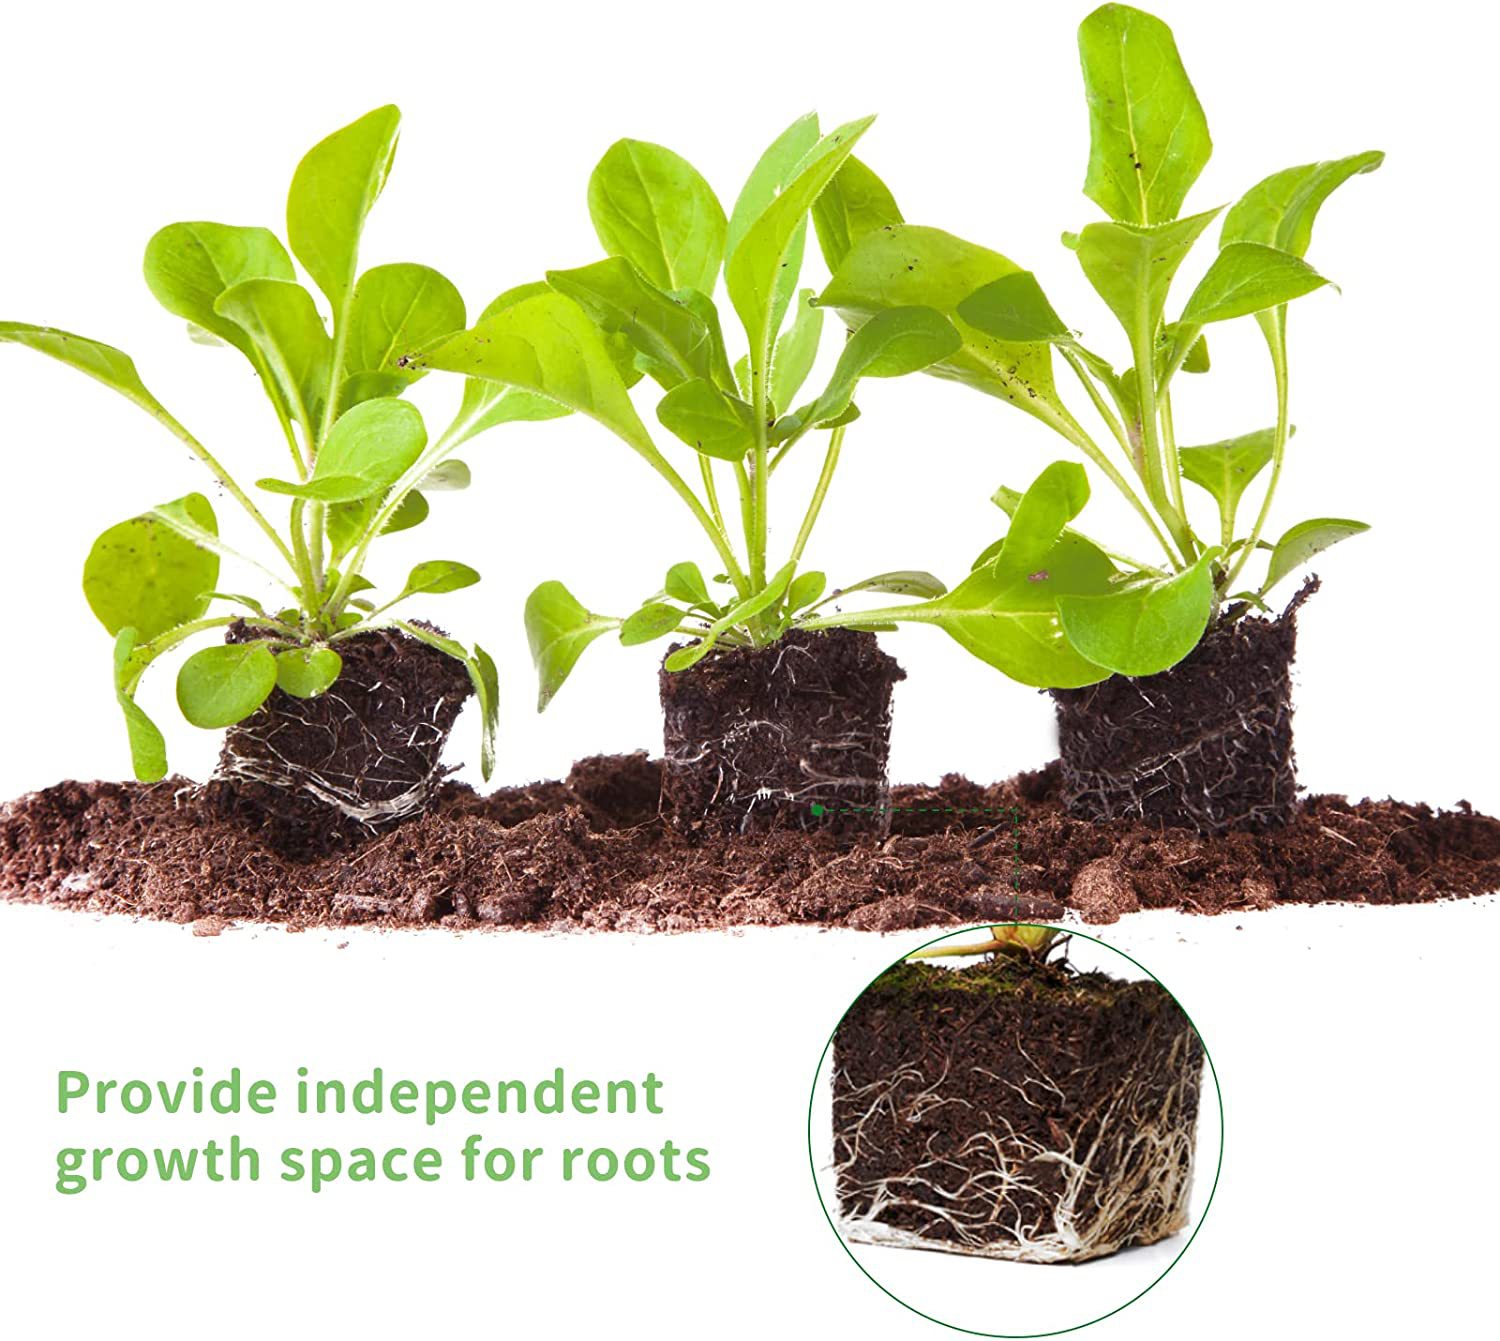
Every serious gardener eventually figures it out — the plastic cell trays aren’t the problem, they’re just not the best option. Soil blocks are. Press your own growing medium into firm, self-contained 2-inch cubes and your seedlings get something a plastic pot never gives them: air pruning. Roots hit open air at the edge of the block, stop growing, and branch back in. The result is a dense, explosive root system that transplants without shock and takes off the moment it hits the ground.

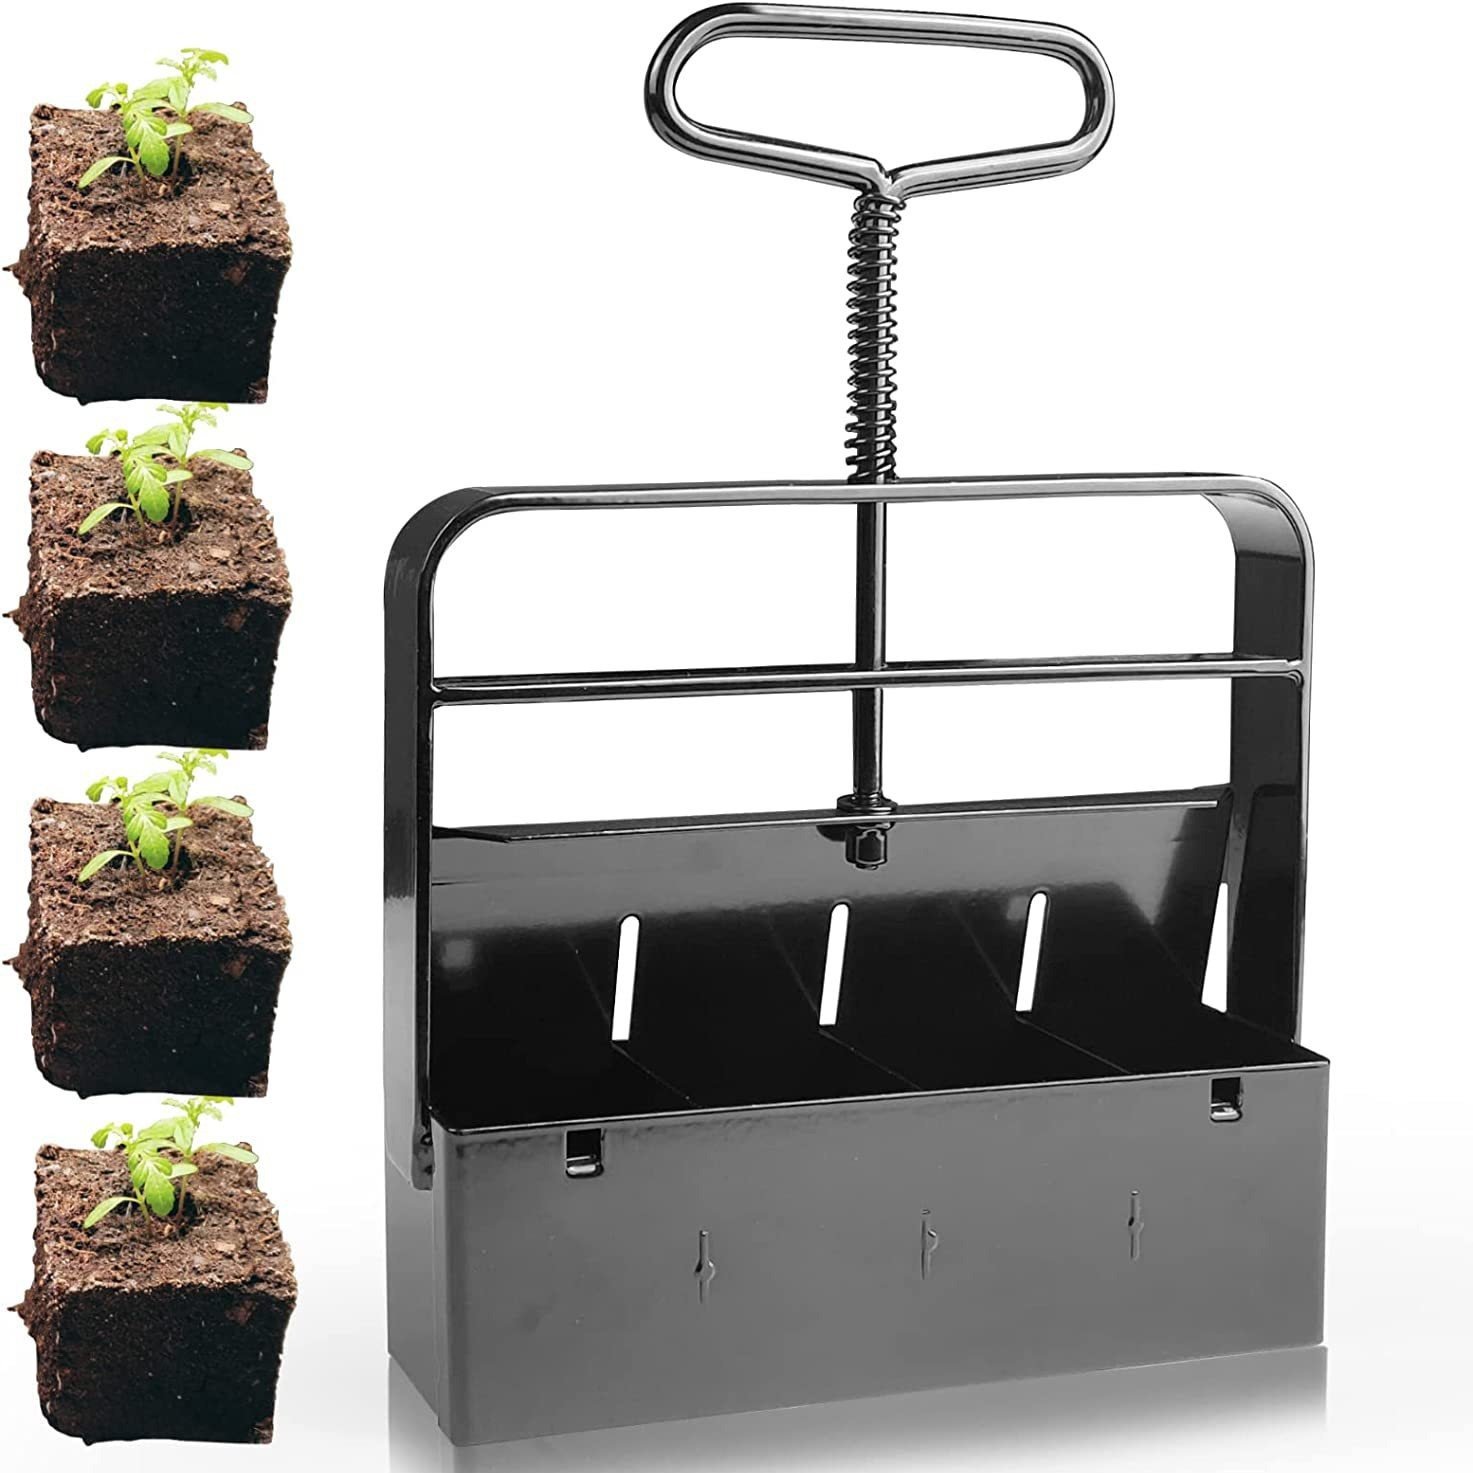
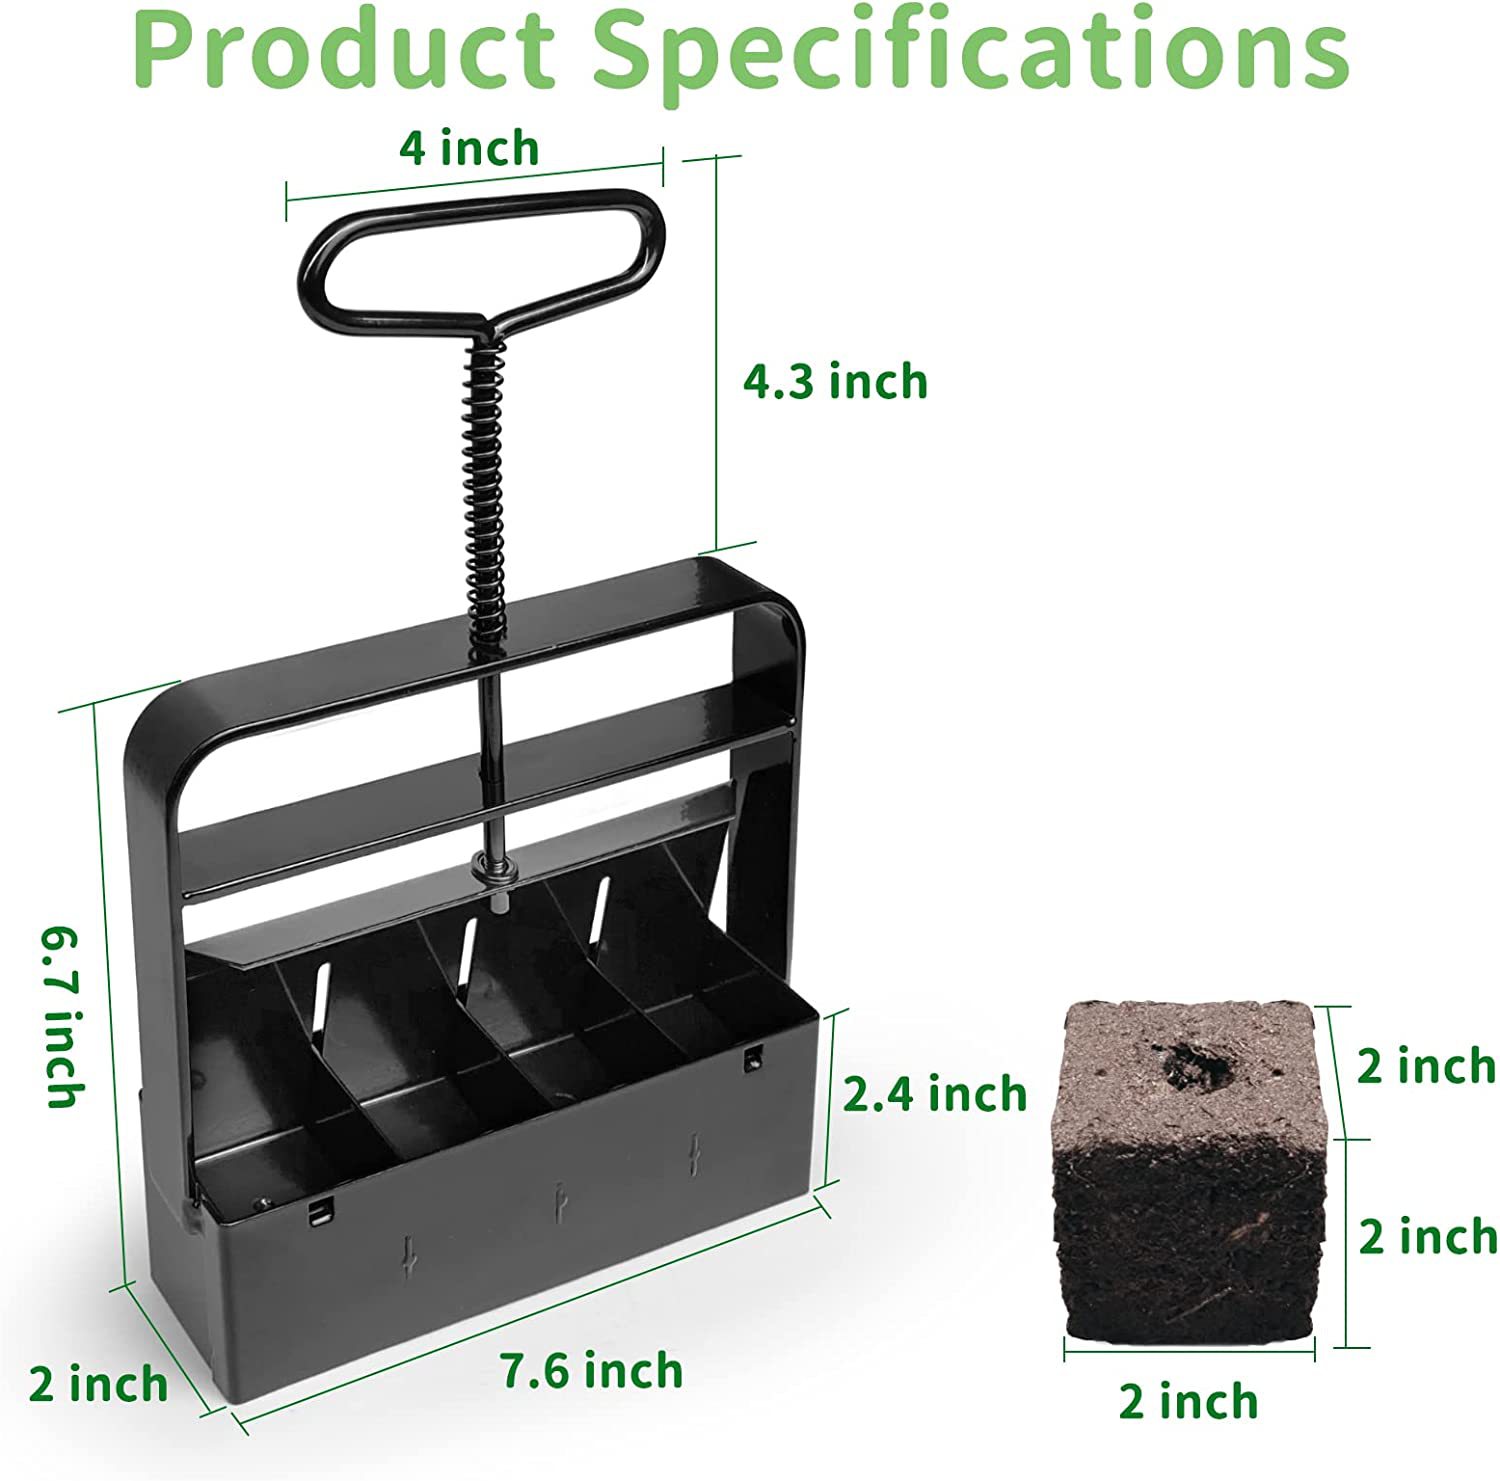
The 4-Cell Soil Blocker makes four perfect blocks in one press. No pots. No trays. No plastic to wash, store, or throw away. Just your mix, your seeds, and cubes that are ready to plant.

What It Makes

Each press produces four 2-inch soil blocks — the perfect size for starting tomatoes, peppers, herbs, flowers, and most garden vegetables. Each block comes out with a built-in seed dimple pressed right into the top, so your seed has a home the moment the block is made. No poking, no guessing, no tools needed.

Soil blocks with seedlings

Why Soil Blocks Beat Plastic Pots

When you start seeds in plastic cells, roots hit the wall and start circling. That circling becomes root binding — and root bound seedlings struggle after transplant. Soil blocks stop that from happening. Roots reach the edge, air prunes naturally, and the plant puts all its energy into branching roots instead of tangled ones.

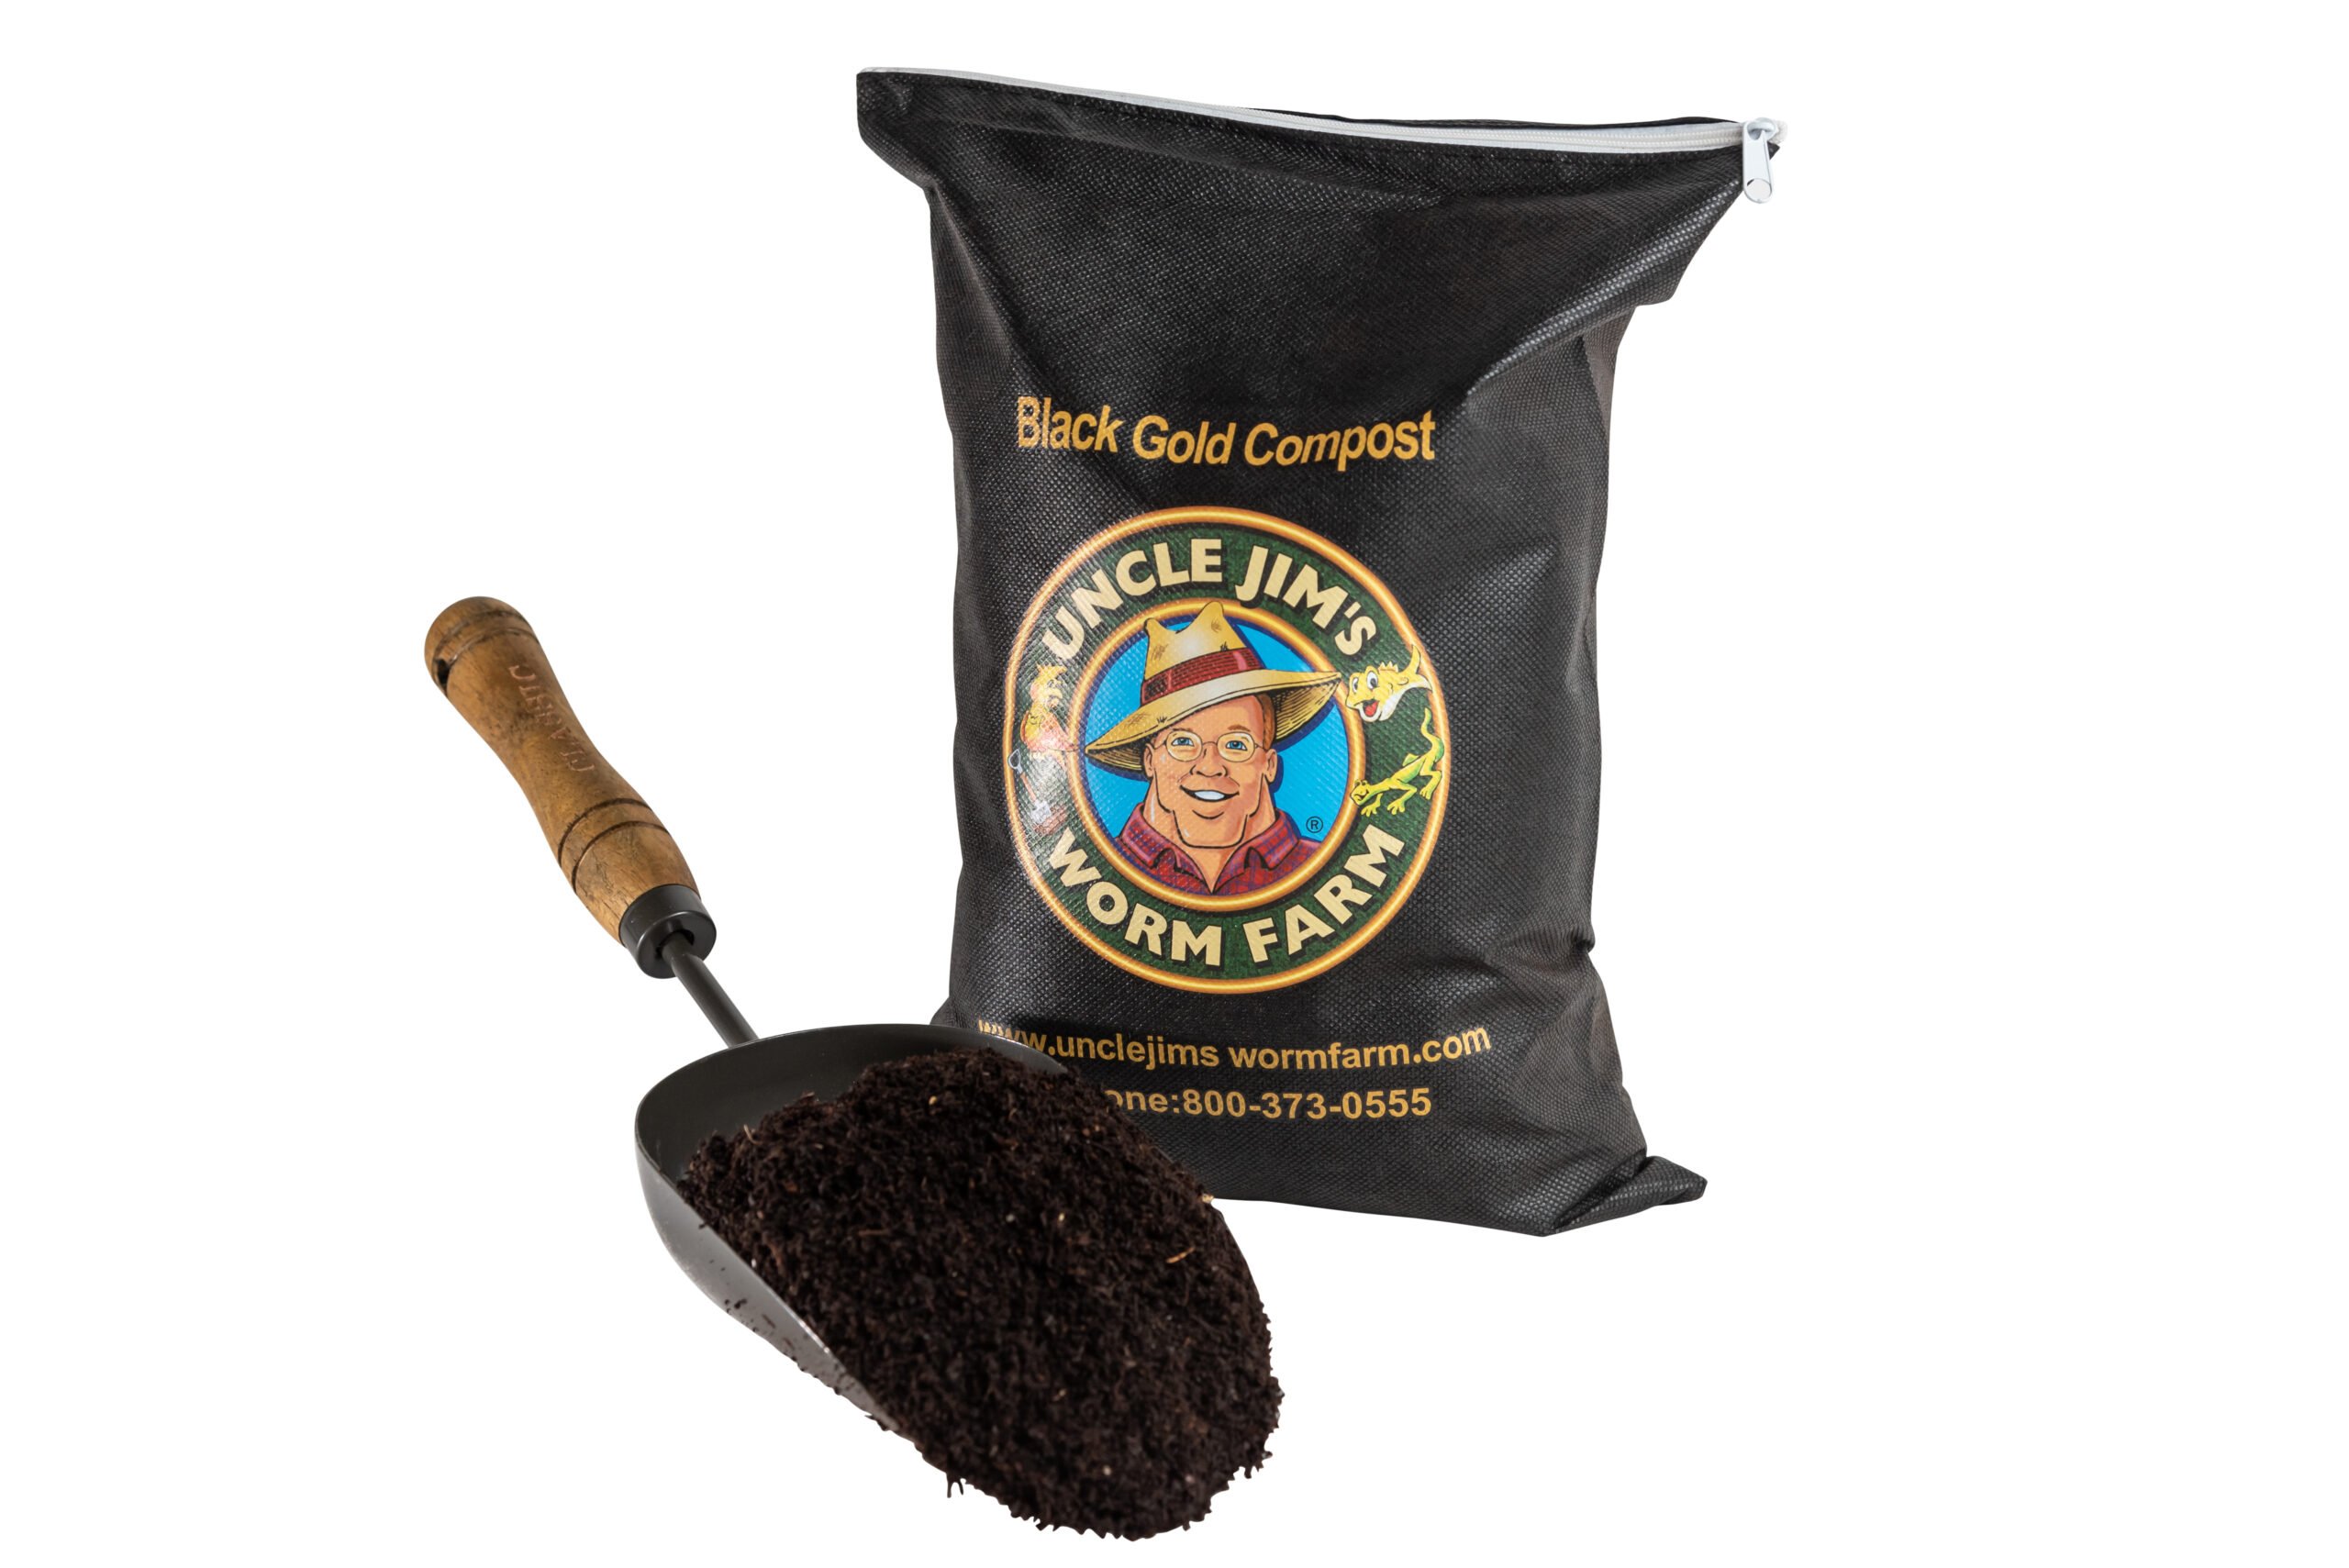
Fill your blocks with a rich mix of worm castings, compost, and quality potting medium and you’re giving your seedlings a head start that store-bought transplants can’t touch. The growing medium becomes the pot — loaded with nutrients, alive with microbial activity, and ready to feed your plants from the first day of germination all the way to transplant.

Built to Last

The blocker is made from galvanized steel — oxidation resistant, corrosion resistant, and tough enough to press hundreds of blocks season after season without bending or breaking down. The handle features non-slip cushioning and an ergonomic grip that keeps your hand comfortable through a full flat of blocks.

How to use soil blocker

How To Use It

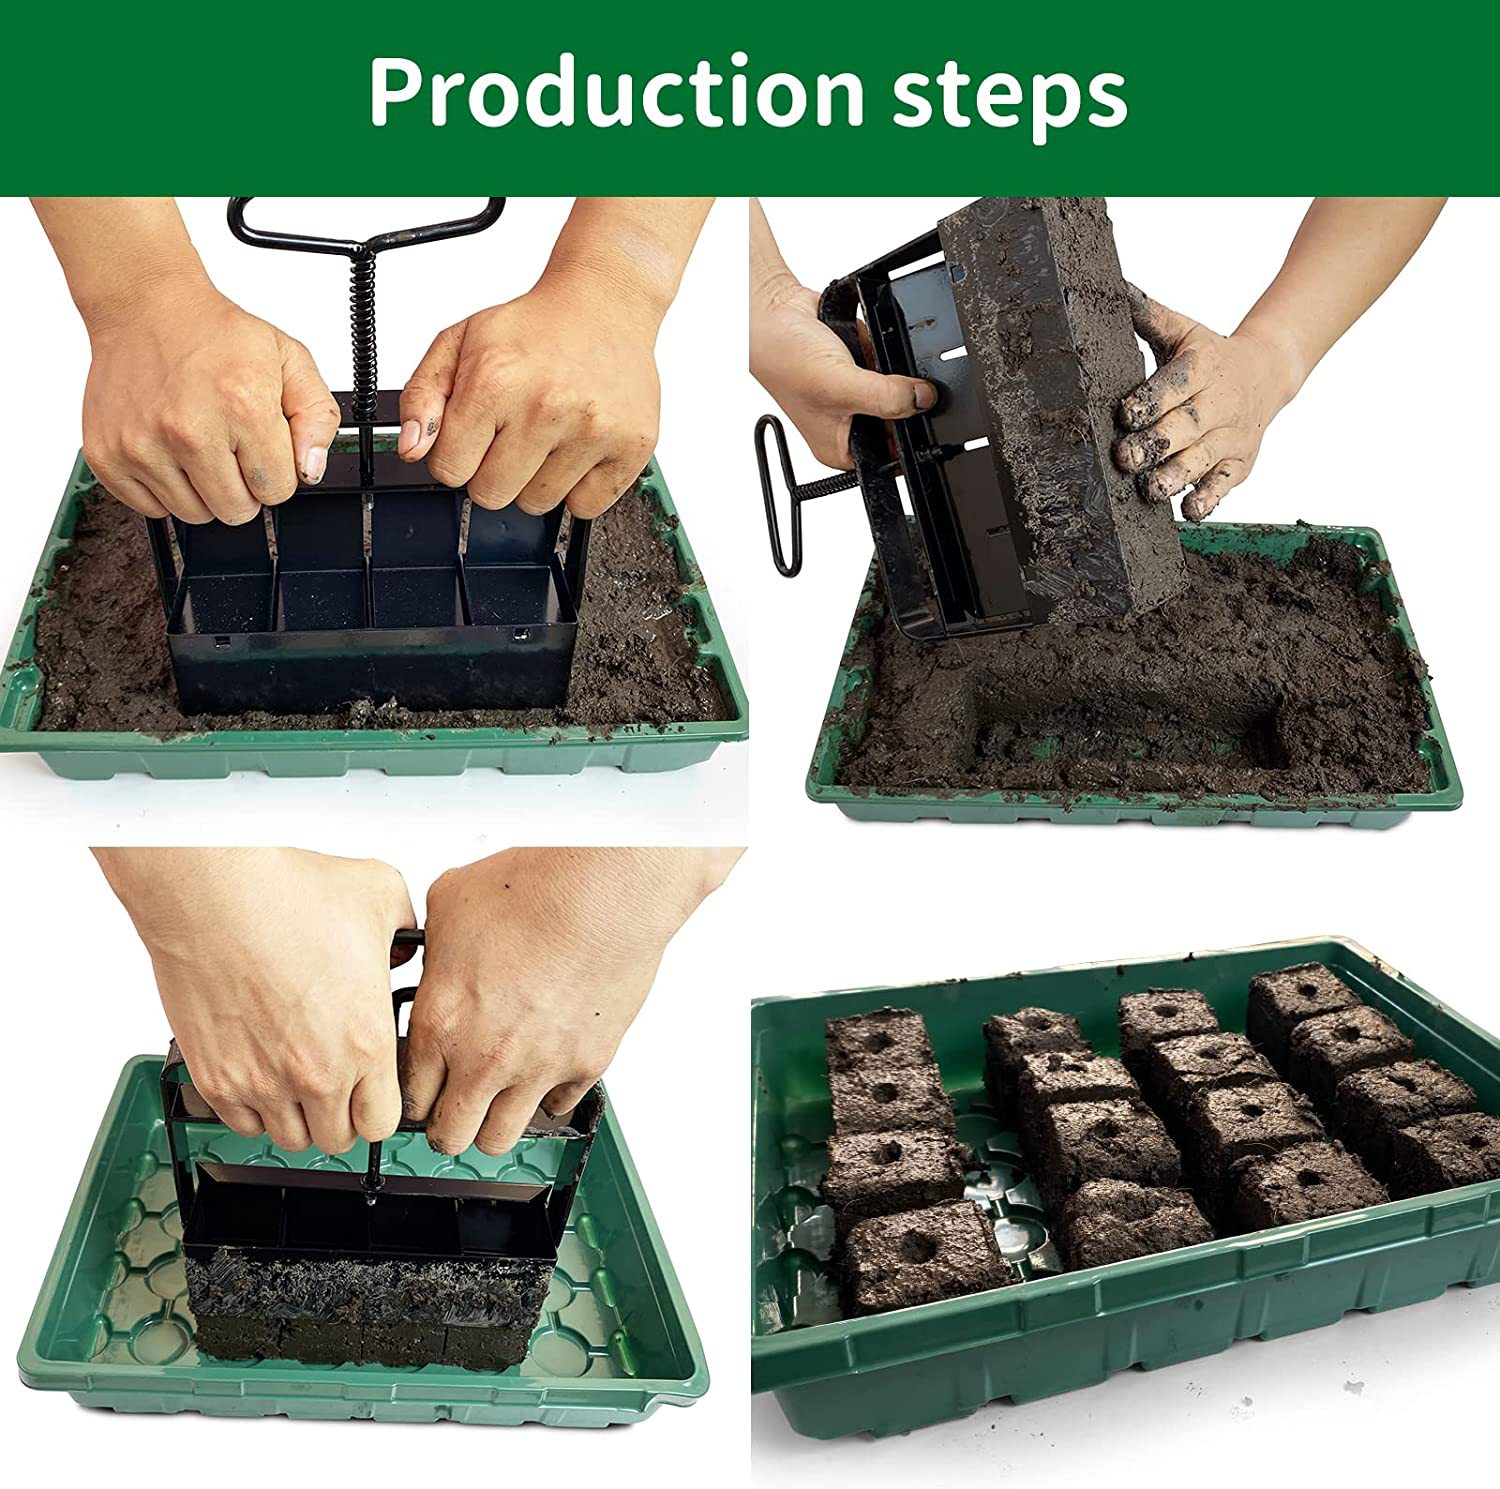
Step 1 — Mix your growing medium until it holds together when squeezed. A good soil block mix is slightly wetter than you’d expect — think wrung-out sponge.

Step 2 — Press the blocker firmly into your mix, packing the chambers full.

Step 3 — Place the blocker on your tray or flat surface. Grip the handle with your palm and squeeze the spring mechanism with your fingertips while pressing down.

Step 4 — The spring releases the blocks cleanly onto your surface — four perfect cubes, each with a seed dimple ready to go.

Step 5 — Drop your seed in the dimple, mist with water, and watch them grow.

Pro Tip From Uncle Jim

Mix worm castings into your blocking medium. Even a 20% ratio of castings to potting mix gives your seedlings a living, nutrient-dense start that synthetic fertilizers just can’t replicate. Your germination rates go up. Your transplant survival goes up. And your garden thanks you for it all season long.


Add to Cart — Free Shipping

Questions?
800-373-0555 — Monday through Friday, 10am to 6pm Eastern
sales@unclejimswormfarm.com

Frequently Asked Questions

1. What size soil blocks does this make? Each press makes four 2-inch soil blocks — the most versatile size for starting seeds. Two inches is perfect for tomatoes, peppers, herbs, lettuce, flowers, and most vegetables. Big enough to give roots room to develop, small enough to fit a lot of blocks on a single tray.


2. What kind of mix do I use? Soil blocks need a mix that holds together when compressed. A standard potting mix on its own is usually too loose — you want something with good body. A great starting blend is quality potting mix, peat or coco coir, and worm castings. The castings add nutrients and help the block hold its shape. Aim for a consistency like a wrung-out sponge — wetter than you think, but not soggy.


3. Will the blocks fall apart? Not if your mix is right. A properly made soil block is firm enough to pick up, move, and transplant without crumbling. The key is moisture — too dry and they won’t hold, too wet and they won’t release cleanly. Once you dial in your mix you’ll be pressing perfect blocks every time.


4. Do I still need trays? You don’t need cell trays or plastic pots — that’s the whole point. You will want a flat surface or shallow tray to set your blocks on while they germinate. A simple 1020 seedling tray without inserts works perfectly. The blocks sit right on the surface and roots stay contained within the block itself.


5. How is this better than just using seed trays? Plastic cell trays cause roots to circle when they hit the walls — that circling leads to root binding, which stresses plants at transplant. Soil blocks air prune naturally. When roots reach the edge of the block they stop, branch back inward, and build a dense healthy root system. Plants transplanted from soil blocks establish faster, suffer less shock, and outperform tray-started seedlings almost every time.


6. Is this hard to use? Not at all. The spring-release mechanism does the work — press down with your palm, squeeze the spring with your fingertips, and the blocks pop out clean. After a few presses you’ll have a rhythm going and can knock out a full flat in minutes. It’s genuinely satisfying once you get the hang of it.


7. How do I water my soil blocks without washing them away? Bottom watering is your best friend here. Set your blocks on a tray, pour water into the tray, and let the blocks soak it up from the bottom. Top misting works too for germination — just keep it gentle. Avoid heavy watering from above until the blocks are well established.


8. Can I use worm castings in my blocking mix? Absolutely — and we strongly recommend it. Mix in about 20% worm castings and you’re giving your seedlings a living, nutrient-rich start from day one. Better germination rates, stronger root development, and healthier transplants. It’s the single best upgrade you can make to your blocking mix.