


 There are several reasons why you might want to separate your composting worms from their bedding. Perhaps it is time to harvest the finished compost. Or maybe something has gone REALLY wrong in the bin, and you need to start your bin over again. Uncle Jim’s Worm Farm offers several techniques for separating your worms from most of their bedding.
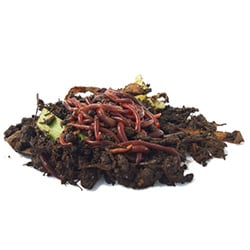
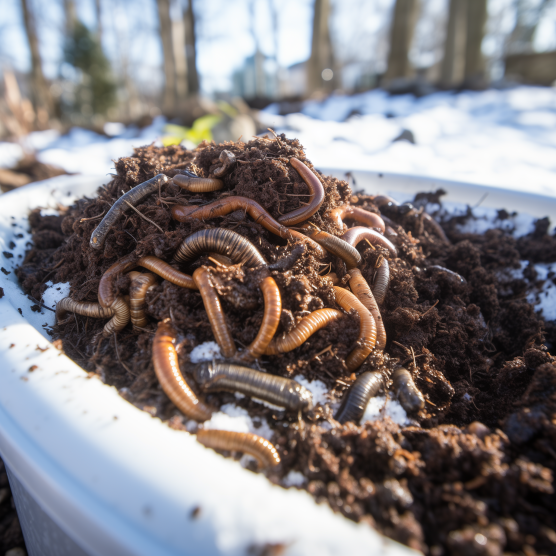
If your worms have been munching on scraps for more than a few months, there should be plenty of “black gold” (worm castings) in the bin. Worm castings are an all-natural, nutrient-rich fertilizer for the garden and houseplants. They are also filled with friendly microbes that are good for the soil.
Once in a while, a worm bin has an intractable problem. If it is sopping wet, you can try blotting up puddles, opening the drainage holes, and adding dry bedding (such as peat moss, shredded newspaper or coconut coir). If your worm bin smells bad, you can remove offending scraps, mitigate the pH, take out mold and mildew, and avoid over-feeding. Sometimes an ant colony turns an outdoor bin into a nursery and if removing the lid doesn’t discourage them, it might be time to cut your losses. Worms might be trying to escape en masse. If you try to fix it, and it can’t be fixed, it’s time to start over.
Attract Worms with Food
If time is on your side, the most natural way to make worms assemble together is with food. This technique is easiest if you use a tray-based composter, such as the Worm Factory 360 or Can-O-Worms composter. Feed only in the top tray. Most of the worms in the lower trays will climb up to get the food. If there are still too many worms in the lower trays, dig around and see if there is undigested food scraps in the lower trays. If so, remove them or move them to the top tray. When the worms have mostly vacated the lower trays, dump the trays out and use the completed compost in your garden. If your bin is spoilt and you need to start over, you will need to also sort the worms (see below).
If you have a simple composting bin, such as the Worm Ranch or a bin made from a tote, focus on feeding the composting worms in just one corner of the bin for a couple of weeks or more. The worms will figure out that to get food, they have to go to that spot. To get the worms in a convenient bag, just put bedding and food in a mesh onion bag or burlap sack and bury it; after a few weeks, dig it out and you have a bag of worms. The rest of the bin should have fewer worms. You can take away the worm castings from the other parts of the bin, leaving the highest concentration of worms in the bin. You may elect to add more bedding at this point.
If you have an over-population of worms, the food technique might not work well. There still might be worms mixed in with the majority of the worm castings. You’ll have to decide whether to try a different separation method, or just keep some worms in the fertilizer. Releasing them into the garden, mixed in with the fertilizer, gives these worms a chance at a new life. They are not ideal for the garden, but they won’t do your garden any harm. (Super Reds/European Night Crawlers are bigger and better for the garden.)
Sort the Worms from Compost Using Piles
You can separate composting red worms from the compost or bedding by using their natural aversion to light. Here is a shortcut for sorting the worms using mounds:
- Start by picking a spot indoors or out that has good lighting, but not too much direct sun.
- Dump the contents of your composting bin onto a tarp.
- Shape the bedding/compost/worm mixture into a bunch of mounds. You can form a peak on top to form cones.
- Let the mounds sit for a few minutes. The worms will dig down deeper into the mounds.
- Brush off the material on the top of the mounds. This is your completed compost (if you are harvesting worm castings) or the old bedding that needs to be discarded or used as compost (if you are starting over again). Set aside.
- Repeat steps 4 and 5 until piles of worms remains. It’s OK if there is still some material mixed in with them.
- Put fresh, slightly moist bedding in the worm bin, and place the worms on top. Shining a light of them will encourage them to dig down.
Whether you want to use dark, rich organic fertilizer in your garden or start over with a fresh worm bin, separating composting worms isn’t too difficult. The resulting compost can be screened to remove debris, then dug into the garden, used to make starts, or turned into compost tea.

81 thoughts on “How to Separate Worms from Compost and Bedding”
Thank you this article was very helpful
I am going to try the mounds on the tarp. No method I have tried has worked except to take out the worms one at a time by hand. I have millions. If any are dying of old age, I can’t see it. I am up to three bins and they are all loaded with worms. I will say, I was lazy and used all the worm tea on one set of perennial beds last year that was close to garage where the bins are. It was amazing how those plants grew. I love the entire process, except for separating the compost from the worms.
LOL, Kathy, about them not suffering from old age. I too have wondered what happens to the worms when they die — do they just sort of get absorbed by the bedding/fertilizer mixture? Dust to dust? Congratulations on having such a healthy and productive worm farm. Mine is pretty slow these days, probably because it’s so hot where I live. I’ve brought them indoors (!) for the summer, and the population seems to be increasing again.
It is spring here in Tucker, GA. I have started planting new plants and shrubs in my yard. I have a 360 system. I am getting the worm castings out of the lower bins and putting around the roots of the plants/shrubs. I find some worms in the mix. I leave the worms to do their job of making tunnels and leaving worm castings for fertilizer and making more worms. This is my first year doing this. I anticipate that every thing will grow better than plants without the “black gold”.
I have always left my worms in the compost as I spread it on the theory the worms were good for the soil. Am I wasting my money? Also, I mix my leaves, grass clippings and softer plant trimmings (like aspadista) in my bins (tumblers) with My kitchen scraps. Wise or not? Whatever, the results are a magic elixir on anything I spread it on!
You are just fine. I do the same as you for the last 18 years with zero problems.
For separating worms what about using a screen to do that?
Worm farms are great. I have ordered worms twice and have been more than please with the process.
I am in the process of harvesting six bins. They have done their job well.
My question is this? I have lots of worms but most are half the size of the one’s I received from you. Is this normal. I have thought maybe I am not feeding them enough? I am using regular cardboard box’s which I cut up into 2 or 3 inch squares. Heard somewhere this is good a babies can hide in them. I also use newspaper but as stated am not getting the size of worms you sent. Any idea’s?
Thank you so much. I really enjoy this hobby. Makes my tomatoes grow huge.
I was taught in a Master Composter class that you use newspaper as bedding material and feed the worms your kitchen scraps( vegetable peels, fruit peels, and other vegetable scraps). So maybe your worms are undernourished with just the cardboard. Need greens and browns just like a regular compost pile.
I was told that grass clippings and leaves don’t do well in worm composting and that grit needs to be added whenever new food is added. Being new to this (only got a Worm Cafe about a month ago) I’d love to know what others think of this advice. Thanks.
Janet, I have three outdoor composting bins (I live in Colorado), in which I use dried leaves, kitchen scraps, very few grass clippings, and the garden debris from the fall all chopped up. I have red wiggler composting worms in two of the three bins, and they multiply like crazy in warm weather. I wrap the bins with insulation for the winter and take the lids off on warm, sunny days. To the best of my knowledge, I don’t add any grit when I put new food in, which I do daily since there are lots of scraps from winter soups. In the fall, I collect paper garden bags filled with dried leaves to add during the winter, and by planting time (May in Colorado), I have lots of black gold.
Boom shalkaaka boom boom, problem solved.
add coffee gronds to the food and crush up egg shels it is good grit for the worms
Mine really love the coconut bedding along with shredded paper and veggies.
Since worms don’t have teeth, you are right they need grit. Purchase oyster shells or, I save egg shells, sanitize them on baking sheet in oven by putting in oven at 250° for a couple of hours then when cool, I pulverize them in magic bullet. This gets sprinkled on the food they get each week.
I have a tray composter, and when my compost is ready on the bottom tray, I take the lid, turn it upside down, put some moist bedding and food in it in the sun. I take the tray of finished compost and put it on top of the lid. The worms from the finished compost travel away from the sun to the nice, cool bedding and have a treat of fresh food waiting. Then, I use the compost, put that now empty tray on top, empty the lid that now contains worms, bedding and food into the tray, and replace the top. Viola.
Great idea! Thanks!
I use a similar technique as I have both Rubbermaid style bins and Worm Ranch style tray set up. I take the completed tray and put it on top while underneath I create a nice new food and bedding rich home in an empty tray. I then pop the top off the completed tray and the worms head down out of the light. I do this indoors so as to avoid frying the little wigglers. As they move down I scrape off the top layers of compost into bags for later sifting and screening. This is similar to the mounding technique and takes longer, but it gets most of the worms out of the compost naturally. Once I am down to the bottom inch or so, I make a mound and scrape off the compost until there is a very small mound left and all the worms have either congregated in the last bit of compost or have migrated down to the fresh tray. I then just flip that last bit of compost, worms and all into the fresh tray. the extra bit of compost helps jump start the breakdown process I the fresh tray and I have migrated most of he worms. Any worms lingering in the corners of the tray get squirted with a squirt bottle until they move down. Time to start another tray!
I have a egg carin with 2 worms in it i take great care of it what can i do to tell if it ia a boy or girl and is soil good for them?
Worms don’t have sexes. They lie together and that’s how the babies are made.
I have had worms for a long time. I feed them watermelon rinds, coffee grinds, chopped egg shells and worm chow. they really love watermelon rinds. If you cut your rinds in large pieces and place them in the bin skin side up, the worms will collect in mass bunches under the rind. You then can grab large bunches of worms and clean out your bins. This works real well for me.
I have had worm farms for years and have never gone to much trouble to remove worms. When the worms have finished with one tray of scraps, I put that tray on top of the other ones, with the lid off. The worms move down, away from the light, and as they do that I gently and slowly remove the top layer of earth/fertilizer. That exposes a few worms, who then dig down further (and often go into the tray below) to get away from the light. While they are doing that I go do something else for a few minutes. Then I come back and once again carefully remove the top layer of earth/fertilizer. It’s very easy and not stressful to the worms (or me!).
I saw many good Ideas here. This is my third year at worm farming and I have been doing a combination of these ideas. Usually I take the bottom bin and put it on top in the sun. I like the idea of the lid in a tray under with fresh bedding and I think I will ry that. My population has not been growing as fast as I thought it would. I bought 2000 worms the first year, and again the second. It seems that just more worms stay in the bottom tray or even in the water tray,
is it ok to feed your worms used coffee grounds
Too many coffee grounds can make the compost bed to acidic. Add fine ground sterilized egg shells.
Doesn’t seem to affect my worms, feed them grounds about once a week. Nothing like a worm on caffeine!
I have heard people say the way to attract worms outdoors (such as night crawlers) is to leave a pile of coffee grounds under a burlap sack (or such) .
I also found the following on a website related to coffee grounds:
Adding a large volume of coffee grounds negatively affects the vermicomposting bin by making it too acidic. Too much acid in the bedding, or a low pH level, can burn the worms’ skin. Use a pH test strip in the bedding to make sure it’s not too acidic. Worms survive best in an environment with a pH of 6.0 to 8.0. If the pH is lower than 6.0, add crushed eggshells to the bin to help neutralize the acid.
Absolutely! Give them some grounds! There are some myths about spent (used) coffee grounds. (I am a master gardener, a master composter, and I raise worms, o.k.?) Let’s look at a few myths:
*”Nitrogen in coffee will ignite the bin, or at least burn the worm”. Not true. Coffee grounds are about 2% nitrogen by volume. The nitrogen content will not harm them.
*”Coffee grounds are too acidic and will burn/harm the worms…better to use them on blueberry plants”.. Not true. Grounds are not acidic; the acid in coffee is water-soluble so the acid is mostly in the coffee, not spent grounds
.
*”PH of coffee grounds is very strong acid”. Wrong. Coffee (spent) grounds are not acidic, they are close to pH neutral (between 6.5 – 6.8 pH).
* More truths: Plus, Worms, like chickens, need grit, and coffee grounds are great for that.
* Another reason to give them grounds: Plus, spent grounds are organic…worms like organic matter to eat.
I wouldn’t dump my grounds in every day, but once every couple of weeks or once a month will be fine. The rest can go into your outdoor compost pile, be spread around your flower or vegetable beds, or put in “food waste” bins for commercial composting.
Hi – I pretty much do the same thing to separate the worms, put them at the top, food on the lower tray and they crawl down. However, what about all those eggs? My worms have a very good egg season when the weather is cool here in Florida. I have hundreds of eggs in my finished tray. They are so small and my eyes are not so great either! Anyone else have this “good” problem? How to separate the eggs so I can have new worms?
I am new to this process and haven’t harvested the castings yet but read about using screens of 1/8th and 1/4″ . seperate the worms first using the 1/4″ screen then use the 1/8″ screen to seperate the eggs from the casting. I think i saw it demonstrated on u-tube
They should hatch in a day or two.
I just got my red wriglers from you about 4 weeks ago and already have black gold in the bottom of my tray. I have been feeding lettuce. some coffee grounds, peelings and a little corn meal. The worms seem to like it and are doing well. How will I know if there are eggs in there??
About what happens to geriatric worms, I remember being told in a Master Gardener vermicomposting class that the live worms ingest the dead ones. Talk about recycling!
I put my 2000 worms in compost piles and after a month I can not find a single worm. where did they go? did they all die? I put food scraps and corn meal on top and its all still there.
I have a simple worm bin in order to feed my turtle. After a few mistakes, I think I’ve gotten the hang of it. I change the bedding every couple of weeks or so. I put food in the corner of the bin, but they don’t seem to be eating much. I think (and hope) it’s because they’re munching on the newspaper, cardboard, corn husks, leaves etc. I mean really, when’s the last time these worms ran into a banana peel in my backyard, right? But I’ve gone astray, as my question is this: Is it necessary (and if so, why) to separate the cocoons or eggs (whatever) from the adult earthworms? Can’t they all live together? They don’t eat their young, do they? I can set up a “nursery bin” if necessary, but just wondering why… Thanks!
I have soooo many baby worms, the lower you get, the more there are. I hesitate to disturb them. Am I being too careful? Is there a way to get the dirt without hurting the incubator?
i have been using fruit peals, skins or scrapes along with my kitchen scrapes. I have a lot of fruit flies breeding and living around my bins . Is this a problem for my worms or the tea production that shows signs of fly larva growth.If anyone can answer, i would appreciate it.
Living in Florida, I, too, have a problem with gnats and flies getting in the bins and creating their very large grubs which overtake the worms; hand picking the grubs out is laborious and really not effective. I have glued vinyl screening over the air holes but the gnat still get in. Any suggestions ?
How do you figure out what the castings are if you have coir bedding? Are the castings much darker than the coir?
Shred your junk mail for bedding
I bought a tray system composer and quite frankly I’m not sure I understand how this works. The instructions were less than helpful. I’veven added my 2nd tray…..now what? How long does it take the worms to move to the 2nd tray? Then what do I do?
I have gone to grinding my scraps with water in the blender and then putting the mixture out in my worm bins. It has eliminated the flies and my worms are multiplying like crazy. They love the mixture.
we’re at the same point in this new adventure :) I was thinking of combining the two trays and adding a ‘fresh’ one on top with food/scrap ‘slop’.
They aren’t eating the newspaper real fast so I’ve held off on the fresh stuff for a few days…. But I hate to quit feeding them.
I make slop: I put all my scraps in a food processor, chop, and freeze once I have the amount I know will fill a gallon freezer bag. this way the scarps don’t sit around and get icky. works so far, but just wondering the same thing you posted so we’re following you’re post…
I keep a container in the frig for food scraps that I use to feed the worms once a week only. If I have extra scraps they go into a gallon freezer bag for those weeks I may not have enough food.
I was a Master Gardener for years, and have composted for many more years. Although I do also compost without worms, I do not like to manually turn my traditional compost piles (for aeration), so I prefer the worms. They do most of the work.
Vermicomposting does not require much work. I have had worms for about 15-20 years, most of that time in Rubbermaid boxes with air holes, but I have also used the Worm Farm. Honestly, you do not need anything complicated. Keep it easy, so that it does not become a chore.
When using the Rubbermaid boxes, I add the food on one side of the box and the worms migrate there. If you are getting a lot of uneaten foods, smells, or flies, decrease the amount of food. I had a lot of worms to keep up with the amount of food waste we produced. I must confess, I started out trying to separate worms from compost, so that I could have dry compost. That was a lot of effort for little reward. Now I just let my worms be a little bit hungry, then add some food to the top (or side–wherever you want them to go). Most of them go to the food. I pick up the top layer (with the majority of worms), place them in another container, then dump the bottom part out (which has quite a few worms left in it) to be used throughout my garden. I deliver it to various places throughout my garden (yard) and gently turn over a bit of soil. I then just add that layer with the majority of worms in it to a bunch or moistened leaves or coconut coir, and start over.
My soil is fantastic. Anywhere I turn soil, I find tons of worms and nice airy soil. That is just fantastic. What more can I ask?
I have found over ripe mangos are a favorite. I put a whole half peeled mango and I have the fattest huge worms….I have had to move my bins outside when I discovered I have developed gnats or tiny fruit flies…is there any way to avoid these pests or are they good for them.
I have several different styles of bins. I seem to always be in need of new housing as these wigglers reproduce like mad. I, like Jack, find that in my multi tray bins my wigglers tend toward the bottom trays and the catch basin (water tray). I scoop them out, add them to the top tray and the next time I feed them I have to go fetch them all over again.
I have found that sterilite dresser drawer cabinets, the ones with three drawers make good bins. The drawers are deep enough that you can keep a good many worms happy in each drawer and with the usual holes drilled through the bottoms of the drawers the whole thing is airy enough and dark enough to keep them quite happy. I put screening on the bottom drawer too. I live in the mid-atlantic so fear that summers are to hot and winters to cold for outside worming though. Imwould love to hear from others who have thoughts about that.
I also have two of my multiple tray bins placed so that there spouts are open into a bucket so I can catch all that super dark stuff that comes from the catch basin spouts. I don’t know what to do with it exactly as I have read that it is too rich to use.???
You can add a little water to it and use it on shrubs or flowers. Just don’t use it on edible plants unless you are going to aerate and make into worm tea. That you can use on edibles.
I run my worm food through the food processor. I then put about 2 cups in each of the 3 bins that I have. they seem to go to the bottom one with the liquid. any idea why?
I will try the tarp to get the compost out. and let the worms go into the soil.
My worms are at about 75F is that too hot or too cold. in the winter they are at 50F.
I’ve had a large tote inside another larger with drainage holes in smaller for several years in my basement. I live in the northeast and this has worked great. I’ve separated using a screen, but this takes time so will try piles next time for garden fertilizer. I’m also going to start another tote so I can handle more compost. Does anyone get any liquid waste draining thru holes that could be used on indoor plants?
The directions stated to feed your worms 1/2 pound of food per a day, if you have a pound of worms. I have about 1000 red worms, how much would the weight, I tried putting them on the bathroom scale but they are like me don’t like getting on a scale.
I feed my worms once a week and barely 1/2 lb. They also have the shredded paper bedding, cardboard from egg cartons and dried leaves to munch on.
I have many pounds of red wigglers, all doing well. I am ready to transfer much of the soil, partially to reduce the volume of my compost bin, and because I want the soil in my vegetable garden. I am thinking of building a box screen which will trap the worms on top and allow the soil to fall through. Has anyone tried this? I figure that I have so many worms it couldn’t hurt to try!
I weigh each one individually, then add up the weights.
JK. 1000 worms is around 1lb.
I am using a bin inside and i believe its time to seperate castings and start over. What is the best way to store and keep castings until spring when i start new vegerable gardens? Thank you
All of these suggestions about separating worms from compost are great. One caveat that might apply if there are moles in you area – Don’t put the compost down without separating the worms. I used compost worms and all, and moles had a feast. on their way to dine, they tunneled my lawn, ruining it in spots. So, if you do not want to be fighting with moles, do separate the worms out before using the compost.
How do tell when the bedding needs to be removed? Mine is peat moss. It’s dark brown. I can’t tell it from castings.
Use shredded packing paper or junk mail as bedding.
I recently received the hobby kit and the instructions were great to set up but now I’m clueless as to continue the worm farm! How and when (how often ) do I change their bin? It’s clear so will the “black gold” be visible at the bottom of the bin?
Too much like hard work when a normal compost bin with its base open to the earth will be teeming with composting worms without any help or expensive new colonies bought in by me.
Over thinking, overspending.
I tend to agree with you Carl, however in Wisconsin winter, the compost pile is pretty dead, and not really fun to walk out to, so I started vermicomposting in winter. But I try to keep it simple. Hardest part is making the bedding. I use a guillotine style paper cutter to cut cardboard boxes into strips; it’s not really hard, but takes some time. I use only plain brown cardboard figuring it has the least amount of possibly toxic stuff in it. I moisten it and put it into a large plastic tote divided into two chambers with 1/4” hardware cloth between and a shower drain in the bottom. I had hoped I could feed one side of the bin and let the other rest and the worms would go where the fresh food was. Unfortunately, it has not quite worked out that way – still a lot of worms hanging out in the “finished” compost. I’m going to try a 1/4” sifting screen placed over the bin open to the light, and hopefully they will drop through. Regarding fruit flies, I haven’t solved that one yet. I can put the bin in a colder area and knock them down some, but it doesn’t end them completely, and it slows down the worms. Regarding feeding, I don’t save scraps, freeze them, make worm smoothies, or any of that. When the kitchen compost bucket is full, I take it out and bury the waste in the bedding, trying to rotate the dump sites. Seems to work fine. Excess water drips into a bucket below. I dilute it a little and put it in a few herb plants I have growing indoors (not in the house proper though…still, no noticeable bad smell or anything). I was putting eggshells in like with my regular compost, but the worms don’t do much with them and I wind up with A LOT of big pieces of eggshell in the castings. In a good hot compost pile, they break down better. So I have started washing, air-drying, and grinding them; never sterilized them and never had a problem. I have yet to add ground eggshell to the worm bin. Last summer I ignored the worm bin completely and was surprised to find them alive and well at the start of winter, but they were, and so we carry on. I’m hoping to start an aquaponic system soon and then will try to capture the fruit flies for fish food, as well as giving the fish some wormy treats. I’ve read that the worms can work in the grow medium as well, so looking forward to that experiment.
innovative ideas. wonderful
I am from a small village from India with a kitchen garden. The entire organic waste goes into vermi compost pit from kitchen waste to fallen huge palm leaves. The red wrigglers eat away everything. We need to promote these little saviors of Earth.
I ordered 500 European night crawlers. I had a spot where a tree service dumped wood chips. It had turned to dirt. I used it, leaves and newspaper as bedding. Covered them with leaves. They seem to be doing going, their fat and been seeing little ones. But, the tote is heavy and the bedding is tight. How can I get them out without killing them. Thought about dumping them and try separating and not go so heavy with my bedding.
Why am I not seeing any answers to these questions? What is the point of this site if not to answer so other readers can know and wont keep asking the same thing?
Most sensible question on the whole site. To all those people with so many simply answered questions – just type “worm farm” into Google and you will not have time to read all the information that will be available.
I use the brown liquid from the farm I water it down ten to one and water plants as i plant them or need to vitalize a plant Use castings in a pot when planting seeds or potting up lplants
Yes, dont do this ever… This is leactate, and is full of anaerobic bacteria that arent good for plants or growing. If you want real worm tea, you have to take finished castings and aerate it with a bubbler.
Hi ,i have worm farm and big compost bins x2 ,we built out off pallets . working well braking things down,i put everything that is grown or comes from the earth back inti it ., but have good amount of worms that i want to keep working, but i spend hours hand picking them out ,i bought a small wholed wire sheet of metal and put over top of heap and shoved compost on top in full sun, but it takes so long for the worms to drop through .so i will try the tray next ,as my time is so full picking them out takes to long.i find it amazing I can find them so tinny .
I use a rather large tote as a bin, added coconut coir as bedding, food scraps and worms. It’ been nearly 3-months, adding food in different areas of the bins. The worms are definitely moving to where the food source is. How do I identify the difference between the actual worm castings and the coconut coir bedding. The volume of bedding (with the added castings) doesn’t seem to have increased. I would like to separate only the castings and reuse the coconut coir bedding if that’s possible. I hate to put the used coconut coir into normal compost pile if it can be reused. thanks
Hello Jim;
It can take anywhere from 2-4 months or more, depending on your bin size, for the bedding/Coir, to turn to all castings. usually, when the bin is ready to harvest, the soil/bedding will become rich & black in color and wet looking. It condenses and is heavy. That is when the bin is ready to harvest the castings. it is not very practical to try to separate the Coir from the Castings, that is too difficult.
Please feel free to contact us if you need further assistance.
Uncle Jim’s Worm Farm
ciao manta veto kiva Buena notte fourchette $_$
Thanks! This article is really helpful!
This is my 1.5 year anniversary composting and I am so excited to be using this worm gift in my gardens come spring!! I bought my worms from Jim and got a big horizontal barrel, 2 bin composter and now trying to figuring out how to separate the worms from the castings. Older compost on one side and new scraps on the other. Like another here, I’m lazy, in that I don’t want to mess with it and make cones of compost and brush it off on a tarp…. etc. Any chance I can bury a tray of food on the one ‘mature’ side of my bin and they will come and let me lift them out in one swoop? Best case scenario is I cut a hole in the dividing wall between the bins and build out a removable cover to let them migrate from side to side but, then again… the lazy thing. Just trying to not reinvent the worm trap. Anyone have a similar setup they want to share with a new guy?
Hello Mookie;
That is a great idea and worth a try! I will tell you that the Red Composting worms are attracted to a good food source and will normally migrate to it if there is not other food source. you can place some of their favorites like Banana peels, Avocado shells (face down) on the top in one area and they should be easy to catch under them after a few days. There are many tricks but you will not get them all to go to one area, you will always need to separate the worms from the castings in the end. Please let us know how it goes if you try that method! Have a great day.
Uncle Jim’s Worm Farm
I just addressed this in a previous comment, but as Uncle Jim says, the worms will not all migrate to one side, and you will still have to separate them if you want to have worm-free castings. I have high hopes for a 1/4” hardware cloth sifting tray with 2” of wormy castings set over the bin and exposed to light. Will post again after I try.
Hello, It is time for me to harvest my first tray of worm castings but I am wondering how to get out all the tiny baby worms? I do not mind a worm or two in my potted plants but I do not want them to end up eating all the roots. I am finding the castings quite wet and I cannot really “brush off” the top layer of dirt. Any suggestions?
Hello Jen;
When harvesting babies from the bin, just grab the entire clump of baby worms, compost and all, and drop it in the new bed. It is actually beneficial for the babies to have some of the castings in with them. This is the easiest way.
Uncle Jim’s Worm Farm
I am going to try the 3 bin method (or maybe just 2 bins) for my vermicomposting. The worms have been in the first bin for about 6 weeks now. How do I know when the compost is ready and that it is time to harvest it and put the second bin on top for them to migrate into?
Hello Janelle;
Thank you for your question. When the bedding/compost is all worm castings and ready to harvest, it will become a dark, rich and moist looking soil. It will also condense and look heavy and wet. That is when it is time to add another tray. You may need to add a bit of peat moss so that the holes in the top tray touch the soil so that the worms can burrow through, they do not jump! :) Allow about 2 weeks for the worms to migrate up and then pick out the remaining worms when ready to use the castings.
Uncle Jim’s Worm Farm
I put a large piece, 6 x 8 inches, of fruit fly paper in mine to keep the gnats under control and they are almost gone after 1 week. It has 2 sides I peel 1 side and place that sticky side up and then turn it over and peel off the other side when it gets kind of full.